Laravel Bootstrap Tabs Example Tutorial
Oct 18, 2022 . Admin
Hello Friends,
Are you looking for an example of a laravel bootstrap tabs example tutorial. In this article, we will implement how to create dynamic tabs with bootstrap in laravel. I would like to share with you to create dynamic tabs by using bootstrap in laravel. I’m going to show you dynamic bootstrap tabs in laravel. you will do the following things for bootstrap tabs in the laravel code example.
You can use this example with the versions of laravel 6, laravel 7, laravel 8, and laravel 9.
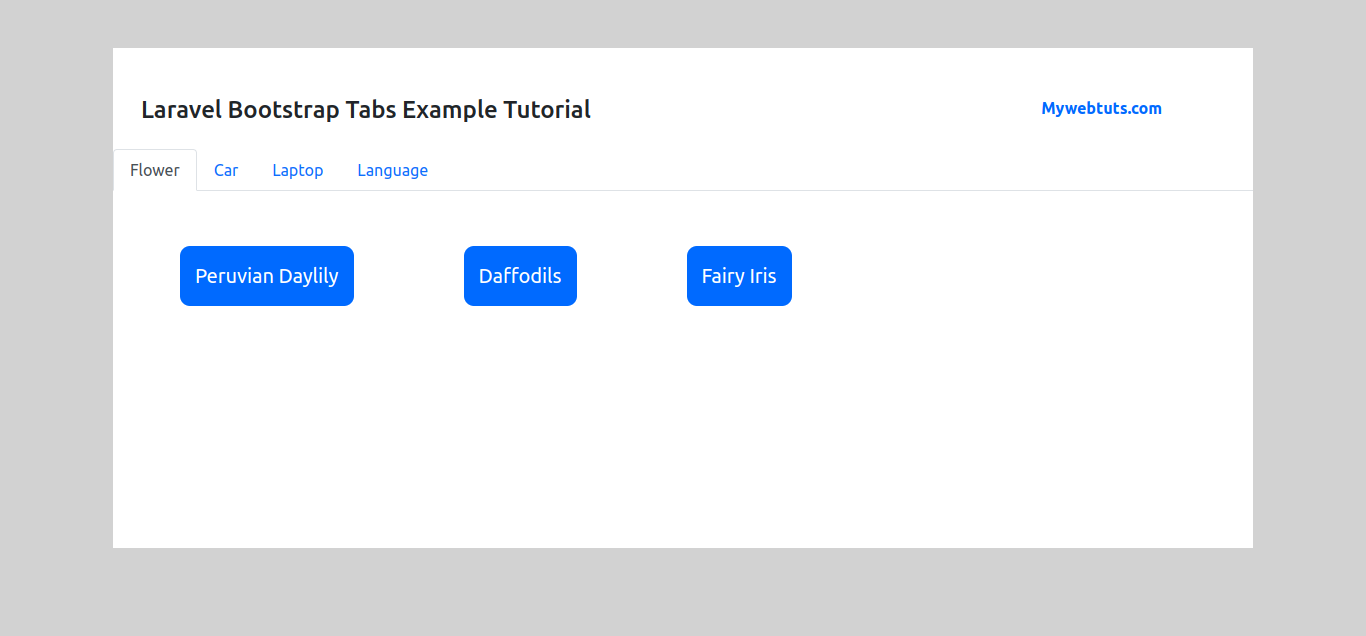
You have just to follow the below step and you will get the layout as below:
Step 1: Install LaravelThis is optional; however, if you have not created the laravel app, then you may go ahead and execute the below command:
composer create-project laravel/laravel example-appStep 2: Create Migration
for this dynamic bootstrap tabs example in the laravel tutorial we have to create our category model and product. so run the below command.
php artisan make:model Category -m
php artisan make:model Product -m
In this step I will use the Category model and Product model to create dynamic bootstrap tabs. So paste this below code to your categories and products table.
database/migrations/create_categories_table.php
<?php

use Illuminate\Database\Migrations\Migration;
use Illuminate\Database\Schema\Blueprint;
use Illuminate\Support\Facades\Schema;

return new class extends Migration
{
    /**
     * Run the migrations.
     *
     * @return void
     */
    public function up()
    {
        Schema::create('categories', function (Blueprint $table) {
            $table->id();
            $table->string('name');
            $table->timestamps();
        });
    }

    /**
     * Reverse the migrations.
     *
     * @return void
     */
    public function down()
    {
        Schema::dropIfExists('categories');
    }
};
database/migrations/create_products_table.php
<?php

use Illuminate\Database\Migrations\Migration;
use Illuminate\Database\Schema\Blueprint;
use Illuminate\Support\Facades\Schema;

return new class extends Migration
{
    /**
     * Run the migrations.
     *
     * @return void
     */
    public function up()
    {
        Schema::create('products', function (Blueprint $table) {
            $table->id();
            $table->foreignId('category_id');
            $table->string('name');
            $table->timestamps();
        });
    }

    /**
     * Reverse the migrations.
     *
     * @return void
     */
    public function down()
    {
        Schema::dropIfExists('products');
    }
};
Then run created new migration with below command:
php artisan migrate
After creating the "categories" and "products table you should set up the Category model and Product model as below
app/Models/Category.php
<?php

namespace App\Models;

use Illuminate\Database\Eloquent\Factories\HasFactory;
use Illuminate\Database\Eloquent\Model;

class Category extends Model
{
    use HasFactory;

    public function products()
    {
        return $this->hasMany(Product::class);
    }
}
app/Models/Product.php
<?php

namespace App\Models;

use Illuminate\Database\Eloquent\Factories\HasFactory;
use Illuminate\Database\Eloquent\Model;

class Product extends Model
{
    use HasFactory;

    public function products()
    {
        return $this->belongsTo(Category::class);
    }
}
Step 3: Define Route
Now, we need to define the routes inside the web.php file.
web.php
<?php

use Illuminate\Support\Facades\Route;
use App\Http\Controllers\TestController;
/*
|--------------------------------------------------------------------------
| Web Routes
|--------------------------------------------------------------------------
|
| Here is where you can register web routes for your application. These
| routes are loaded by the RouteServiceProvider within a group which
| contains the "web" middleware group. Now create something great!
|
*/

Route::namespace('App\Http\Controllers')->middleware('guest')->group(function () {

    Route::get('/form',[TestController::class,'index'])->name('index');
});
Step 4: Create Controller
now we need a controller. so create TestController for laravel dynamic tabs. now open the test controller and paste this below code
php artisan make:controller TestControllerapp/Http/Controllers/TestController.php
<?php

namespace App\Http\Controllers;
use App\Models\Category;
use Illuminate\Http\Request;

class TestController extends Controller
{
    public function index(Request $request)
    {
        $category = Category::with('products')->get();
        $catTab = isset($request->id) ? $request->id : $category->first()->id;
        return view()->exists('welcome') ? view('welcome',compact('category','catTab')) : '';
    }
}
Step 5: Create View File
Now everything is ok. we have to just create our view file. so create a view inside the following directory
resources/views/welcome.blade.php
<!DOCTYPE html>
<html lang="">
<head>
    <meta charset="utf-8">
    <meta http-equiv="X-UA-Compatible" content="IE=edge">
    <meta name="viewport" content="width=device-width, initial-scale=1">
    <title>Laravel Bootstrap Tabs Example Tutorial - Mywebtuts.com</title>
    <link href="https://cdn.jsdelivr.net/npm/bootstrap@5.0.2/dist/css/bootstrap.min.css" rel="stylesheet" integrity="sha384-EVSTQN3/azprG1Anm3QDgpJLIm9Nao0Yz1ztcQTwFspd3yD65VohhpuuCOmLASjC" crossorigin="anonymous">
    <style type="text/css">
        .product{
            margin: 55px;
            text-align: center;
            font-size: 20px;
            padding: 15px;
            border-radius: 10px;
            color: #fff;
            background-color: #008B8B;
        }
        .category{
            display: flex;
        }
        body{
            background-color: #d2d2d2;
        }
        .categorys{
            background-color: #fff;
            height: 500px;
        }
    </style>
</head>
<body>
    <div class="container mt-5 justify-content-center">
        <div class="row">
            <div class="col-md-12 categorys">
                <div class="row">
                    <div class="mt-5 ms-3">
                        <div class="row">
                            <div class="col-md-8 mb-3 ">
                                <h4>Laravel Bootstrap Tabs Example Tutorial</h4>
                            </div>
                            <div class="col-md-3 mb-3 text-end">
                                <strong class="col-md-5 p-0 m-0 text-end"  style="color: #008B8B">Mywebtuts.com</strong>
                            </div>
                        </div>
                    </div>
                    <ul class="nav nav-tabs">
                        @foreach ($category as $item)
                            <li class=" nav-item">
                                <a href="{{ route('index',['id' => $item->id]) }}" class="nav-link {{ $catTab == $item->id ? 'active' : '' }}">{{ $item->name }}</a>
                            </li>
                        @endforeach
                    </ul>
                    <div class="tab-content">
                        @foreach ($category as $item)
                            <div class="tab-pane {{ $catTab == $item->id ? 'active' : '' }}" id="home{{ $item->id }}" class="active">
                                <ul class="list-unstyled category">
                                    @foreach ($item->products as $element)
                                            <li class="product">{{ $element->name}}</li>
                                    @endforeach
                                </ul>
                            </div>
                        @endforeach
                    </div>
                </div>
            </div>
        </div>
    </div>
</body>
</html>
Step 4: Start Development Server
Start the development server. Use the PHP artisan serve command and start your server:
php artisan serve
Now you are ready to run our example so run the below command to quick run.
http://localhost:8000/form
I hope it can help you...