React Native Action Button Example
Jul 12, 2022 . Admin
Hi Guys,
This article will provide some of the most important example react native action button example. In this article, we will implement a action button example in react native. I explained simply step by step how to use action button in react native. I explained simply step by step how to add action button in react native. You just need to some step to done how to implement action button in react native.
Let's start following example:
Step 1: Download ProjectIn the first step run the following command to create a project.
expo init ExampleAppStep 2: Install and Setup
First of all you have to install react-native-action-button package.
npm install react-native-action-button
For the icons, you will install react-native-vector-icons.
npm install react-native-vector-iconsStep 3: App.js
In this step, You will open the App.js file and put the code.
import React from 'react';
import { StyleSheet, View, Text } from 'react-native';
import ActionButton from 'react-native-action-button';
import Icon from 'react-native-vector-icons/Ionicons';

const App = () => {
    return (
        <View style={styles.container}>
            <Text style={styles.welcome}>
            React Native Action Button Example
            </Text>
            <ActionButton buttonColor="rgba(231,76,60,1)">
                <ActionButton.Item buttonColor='#9b59b6' title="New Task" onPress={() => console.log("notes tapped!")}>
                    <Icon name="create" style={styles.actionButtonIcon} />
                </ActionButton.Item>
                <ActionButton.Item buttonColor='#3498db' title="Notifications" onPress={() => { }}>
                    <Icon name="notifications" style={styles.actionButtonIcon} />
                </ActionButton.Item>
                <ActionButton.Item buttonColor='#1abc9c' title="All Tasks" onPress={() => { }}>
                    <Icon name="checkmark-done-sharp" style={styles.actionButtonIcon} />
                </ActionButton.Item>
            </ActionButton>
        </View>
    );
};

const styles = StyleSheet.create({
    container: {
        flex: 1,
        justifyContent: 'center',
        alignItems: 'center',
        backgroundColor: '#F5FCFF'
    },
    welcome: {
        fontSize: 20,
        textAlign: 'center',
        margin: 10
    },
    actionButtonIcon: {
        fontSize: 20,
        height: 22,
        color: 'white',
    }
});

export default App;
Run Project
In the last step run your project using the below command.
expo start
You can QR code scan in Expo Go Application on mobile.
Output :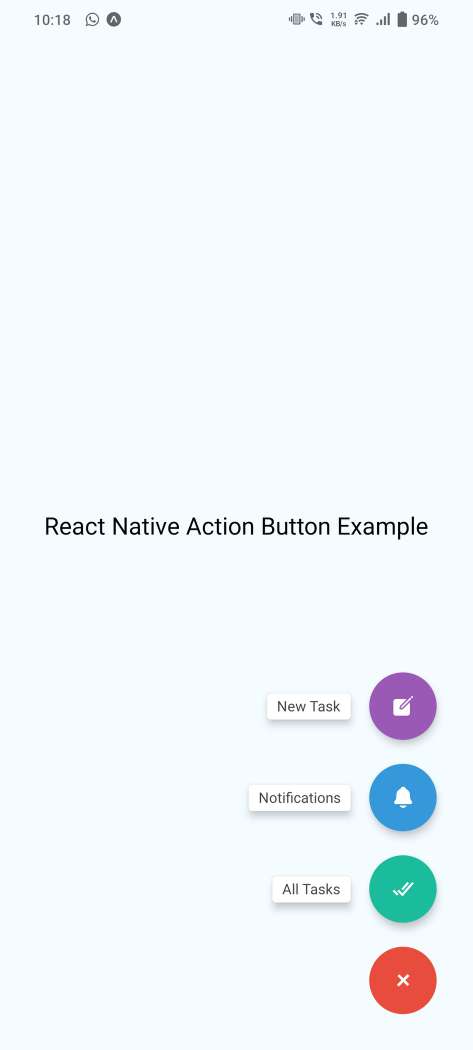
It will help you...