How to Send Email to Multiple User using Laravel?
Dec 31, 2021 . Admin
Hello Dev,
Now let's see example of how to send email to multiple user example. We will check how to send email to multiple user. This is a short guide on send email to multiple user in laravel.Let's get started with how to send email to multiple user in laravel.
Here i will give you many example how to send email to multiple user using laravel.
Step 1 : Install Laravel AppIn this step, You can install laravel fresh app. So open the terminal and put the bellow command.
composer create-project --prefer-dist laravel/laravel sendMailStep 2 : Setup Mail Configuration
After successfully install laravel app next we configure databse setup. We will open ".env" file and change your mail configurations.
.env
MAIL_DRIVER=smtp
MAIL_HOST=smtp.gmail.com
MAIL_PORT=587
MAIL_USERNAME=mygoogle@gmail.com
MAIL_PASSWORD=rrnnucvnqlbsl
MAIL_ENCRYPTION=tls
MAIL_FROM_ADDRESS=mygoogle@gmail.com
MAIL_FROM_NAME="${APP_NAME}"
Step 3 : Create Mail
In this second step we will create a mail class TestUserMail Here we will write code for which view will call and object of user. So let's run bellow command.
php artisan make:mail TestUserMail
app/Mail/TestUserMail.php
<?php

namespace App\Mail;

use Illuminate\Bus\Queueable;
use Illuminate\Contracts\Queue\ShouldQueue;
use Illuminate\Mail\Mailable;
use Illuminate\Queue\SerializesModels;

class TestUserMail extends Mailable
{
    use Queueable, SerializesModels;

    public $details;

    /**
     * Create a new message instance.
     *
     * @return void
     */
    public function __construct($details)
    {
        $this->details = $details;
    }

    /**
     * Build the message.
     *
     * @return $this
     */
    public function build()
    {
        return $this->view('email.testUserMail');
    }
}
Step 4 : Create Route
Now, in this step, we will create a two route one for user display and second one is post rout send mail to multiple user.
<?php

use Illuminate\Support\Facades\Route;
use App\Http\Controllers\UserController;

/*
|--------------------------------------------------------------------------
| Web Routes
|--------------------------------------------------------------------------
|
| Here is where you can register web routes for your application. These
| routes are loaded by the RouteServiceProvider within a group which
| contains the "web" middleware group. Now create something great!
|
*/

Route::get('users', [UserController::class, 'index'])->name('users.index');
Route::post('send-mail', [UserController::class, 'sendMail'])->name('send.mail');
Step 5 : Create UserController
Here, in this step now we should create a new controller as UserController. So run the below command and create a new controller.
php artisan make:controller UserController
app/http/controller/UserController.php
<?php

namespace App\Http\Controllers;

use Illuminate\Http\Request;
use App\Models\User;
use App\Mail\TestUserMail;
use Mail;

class UserController extends Controller
{
    /**
     * Write Your Code..
     *
     * @return string
    */
    public function index()
    {
        $users = User::select('*')
                        ->orderBy('id','DESC')
                        ->paginate(10);

        return view('users', compact('users'));
    }

    /**
     * Write Your Code..
     *
     * @return string
    */
    public function sendMail(Request $request)
    {
        $users = User::whereIn('id',$request->ids)->get();

        if ($users->count() > 0) {
            foreach($users as $key => $value){
                if (!empty($value->email)) {
                    $details = [
                      'subject' => 'Test From MyWebtuts.com',
                    ];

                    Mail::to($value->email)->send(new TestUserMail($details));
                }
            }
        }

        return response()->json(['done']);
    }
}
Step 6 : Create Blade File
In this step we have to create a blade file. So finally you have to create the following file and put bellow code:
/resources/views/users.blade.php
<!DOCTYPE html>
<html>
<head>
    <meta charset="utf-8">
    <meta http-equiv="X-UA-Compatible" content="IE=edge">
    <title>How To Send Email To Multiple User Using Laravel? - MyWebtuts.com</title>
    <meta name="csrf-token" content="{{ csrf_token() }}">
    <link rel="stylesheet" href="https://cdnjs.cloudflare.com/ajax/libs/font-awesome/4.7.0/css/font-awesome.min.css" />
    <link rel="stylesheet" href="https://maxcdn.bootstrapcdn.com/bootstrap/4.5.2/css/bootstrap.min.css">
    <script src="https://ajax.googleapis.com/ajax/libs/jquery/3.5.1/jquery.min.js"></script>
    <script src="https://cdnjs.cloudflare.com/ajax/libs/popper.js/1.16.0/umd/popper.min.js"></script>
    <script src="https://maxcdn.bootstrapcdn.com/bootstrap/4.5.2/js/bootstrap.min.js"></script>
</head>
<body>
    <div class="container mt-5">
        <div class="row">
            <div class="col-md-8">
                <div class="row">
                    <div class="col-md-9 p-0">
                        <h5><b>How To Send Email To Multiple User Using Laravel? - <span class="text-primary">MyWebtuts.com</span></b></h5>
                    </div>
                    <div class="col-md-3 text-right mb-2 p-0">
                        <button type="button" class="btn btn-primary send-mail btn-sm" disabled="disabled"> <i class="fa fa-share"></i> Send Mail</button>
                    </div>
                    <div class="col-md-12 success-mail p-0" style="display: none;">
                        <div class="alert alert-success">
                          Sent Mail Successfully.
                        </div>
                    </div>
                </div>
                <div class="row">
                    <table class="table table-bordered">
                        <thead>
                            <tr>
                                <th><input type="checkbox" value="1" name="user-all" class="user-all"></th>
                                <th>Name</th>
                                <th>Email</th>
                            </tr>
                        </thead>
                        <tbody>
                            @if($users->count() > 0)
                                @foreach($users as $key => $value)
                                    <tr>
                                        <td>
                                            {{ Form::checkbox('ckeck_user', 1, false,['class'=>'ckeck_user','data-id' => $value->id ]) }}
                                        </td>
                                        <td>{{ $value->name }}</td>
                                        <td>{{ $value->email }}</td>
                                    </tr>
                                @endforeach
                            @endif
                        </tbody>
                    </table>
                </div>
            </div>
        </div>
    </div>
</body>

<script>
    $('.user-all').change(function (e) {
        var value = $('.user-all:checked').val();
        if (value == 1) {
            $('input[name="ckeck_user"]').prop('checked',true);
            $('.send-mail').removeAttr('disabled');
        }else{
            $('input[name="ckeck_user"]').prop('checked',false);
            $('.send-mail').attr('disabled','disabled');
        }
    });

    $("input[name='ckeck_user']").change(function () {
        if ($("input[name='ckeck_user']:checked").length > 0) {
          $('.send-mail').removeAttr('disabled');
        }else{
         $('.send-mail').attr('disabled','disabled');
       }
     });

    $('.send-mail').click(function (e) {
        e.preventDefault();
        var ids = [];

        $.each($('input[name="ckeck_user"]:checked'),function(){
            ids.push($(this).data('id'));
        });

        if (ids != '') {
            $(this).attr("disabled", true);
            $(this).html('<i class="fa fa-spinner fa-spin"></i> Send Mail');
            $.ajax({
                url: '{{ route('send.mail') }}',
                type: 'POST',
                data: {
                    _token:$('meta[name="csrf-token"]').attr('content'),
                    ids:ids
                },
                success: function (data) {
                    $('.success-mail').css('display','block');
                    $('.send-mail').attr("disabled", false);
                    $('.send-mail').html('<i class="fa fa-share"></i> Send Mail');
                }
            });
        }
    });
</script>
</html>
Step 7 : Create Send Mail Blade
/resources/views/email/testUserMail.blade.php
<!DOCTYPE html>
<html>
<head>
    <title>MyWebtuts.com</title>
</head>
<body>
    <h1>{{ $details['subject'] }}</h1>

    <p>Thank you!</p>
</body>
</html>
Now we are ready to run our example so run bellow command for quick run:
php artisan serve
Now you can open bellow URL on your browser:
http://localhost:8000/users
Output:
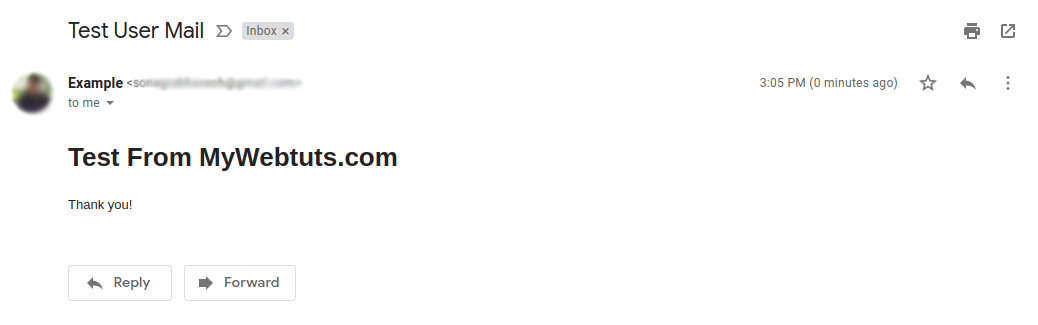
It will help you...