How to Use Mail Markdown Components List using Laravel?
Jan 06, 2022 . Admin
Hello Dev,
This tutorial will give you example of laravel mail markdown components list example. i would like to share with you markdown email laravel. it's simple example of how to send email in laravel using markdown. i explained simply step by step how to send email using laravel with mailable markdown class.
I am going to step by step from how to create new laravel mail component and use it in email blade file as well.
So, let's follow bellow steps:
Step 1 - Install Laravel Fresh ApplicationUse this command then download laravel project setup :
composer create-project --prefer-dist laravel/laravel blogStep 2 - Set Mail Configuration
You have to add your gmail smtp configuration, open your .env file and add your configration.
.env
MAIL_DRIVER=smtp
MAIL_HOST=smtp.gmail.com
MAIL_PORT=587
MAIL_USERNAME=your_username
MAIL_PASSWORD=your_password
MAIL_ENCRYPTION=tls
Step 3 - Create Mailable Class with Markdown
php artisan make:mail SendEmailComponent --markdown=emails.sendEmailComponent
app/Mail/SendEmailComponent.php
<?php

namespace App\Mail;

use Illuminate\Bus\Queueable;
use Illuminate\Contracts\Queue\ShouldQueue;
use Illuminate\Mail\Mailable;
use Illuminate\Queue\SerializesModels;

class SendEmailComponent extends Mailable
{
    use Queueable, SerializesModels;

    public $maildata;

    /**
     * Create a new message instance.
     *
     * @return void
     */
    public function __construct($maildata)
    {
        $this->maildata = $maildata;
    }

    /**
     * Build the message.
     *
     * @return $this
     */
    public function build()
    {
        return $this->markdown('emails.sendEmailComponent')->with('maildata', $this->maildata);
    }
}
Step 4 - Add Route
routes/web.php
<?php

use Illuminate\Support\Facades\Route;
use App\Http\Controllers\MailController;

Route::get('send-mail', [MailController::class, 'sendMail']);
Route::get('send-mail-component', [MailController::class, 'sendMailComponent'])->name('send-mail-component')
Step 5 - Create Controller
php artisan make:controller MailController
app/Http/Controllers/MailController.php
<?php

namespace App\Http\Controllers;

use Illuminate\Http\Request;
use App\Mail\SendEmailComponent;
use Mail;

class MailController extends Controller
{
     /**
     * Show the application dashboard.
     *
     * @return \Illuminate\Contracts\Support\Renderable
    */
    public function sendMail()
    {
        $email = 'aatmaninfotech@gmail.com';

        $maildata = [
            'title' => 'Laravel Mail Markdown SendEmailComponent',
        ];

        Mail::to($email)->send(new SendEmailComponent($maildata));

        dd("Mail has been sent successfully");
    }

    /**
     * Show the application dashboard.
     *
     * @return \Illuminate\Contracts\Support\Renderable
    */
    public function sendMailComponent()
    {
        dd('MyWebtuts.com');
    }
}
Step 6 - Add View File
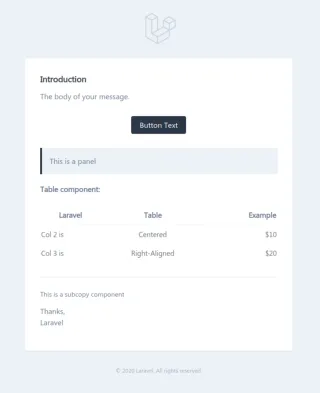
resources/views/emails/sendMailComponent.blade.php
@component('mail::message')
# Introduction

The body of your message.

# Button component:
@component('mail::button', ['url' => ''])
    Button Text
@endcomponent

# Panel component:
@component('mail::panel')
    This is a panel
@endcomponent

# Table component:
@component('mail::table')
    | Laravel       | Table         | Example  |
    | ------------- |:-------------:| --------:|
    | Col 2 is      | Centered      | $10      |
    | Col 3 is      | Right-Aligned | $20      |
@endcomponent

# Promotion component:
@component('mail::promotion')
    This is a promotion component
@endcomponent

# Subcopy component:
@component('mail::subcopy')
    This is a subcopy component
@endcomponent

Thanks,

{{ config('app.name') }}
@endcomponent
Included components
1. button

2. message

3. panel

4. promotion

5. subcopy

6. table
You can run your project by using following command:
php artisan serve
Now open this url:
http://localhost:8000/send-mail
Output:
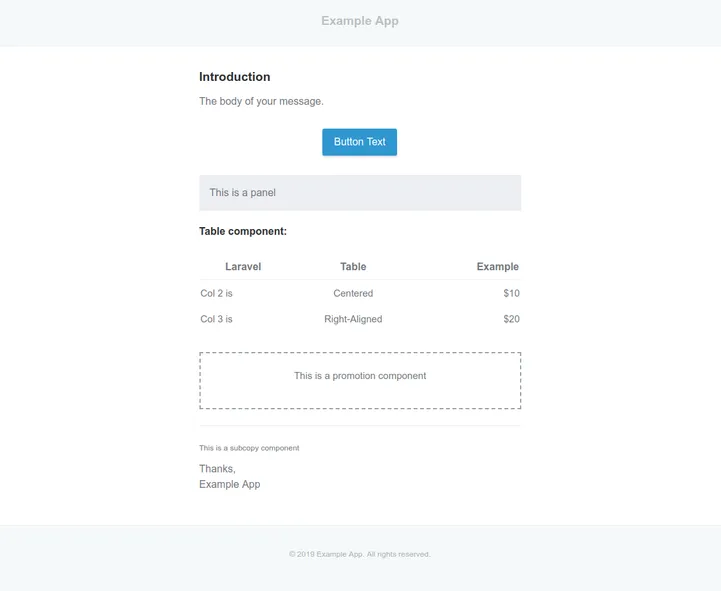
It will help you...