Laravel 9 integrate Razorpay Payment Gateway
Apr 04, 2022 . Admin

Hi dev,
Today, I explain laravel 9 integrate razorpay payment gateway. we will learn how to integrate a razorpay payment gateway in laravel 9 application. I will share with you how to integrate Razorpay payment gateway in Laravel 9 application with example. I will share with you how to integrate Razorpay payment gateway in Laravel 9 application with example. In this Laravel 9 Razorpay Payment Gateway Integration Tutorial with Example tutorial.
Razorpay is very simple, hassle free and easy to integrate payment gateway. Integrating Razorpay payment gateway in laravel 9 is a breeze. Razorpay is one of the popular payment gateway, that allows us to accept payment from your customer.
In this tutorial you will learn to integrate Razorpay in laravel 9. In this step by step tutorial I’ll share laravel 9 Razorpay integration example.
So let's start following example:
Step 1: Download LaravelLet us begin the tutorial by installing a new laravel application. if you have already created the project, then skip following step.
composer create-project laravel/laravel example-appStep 2: Create Razorpay Account
First you need to create account on razorpay. then you can easily get account key id and key secret.
Create Account from here: www.razorpay.com.
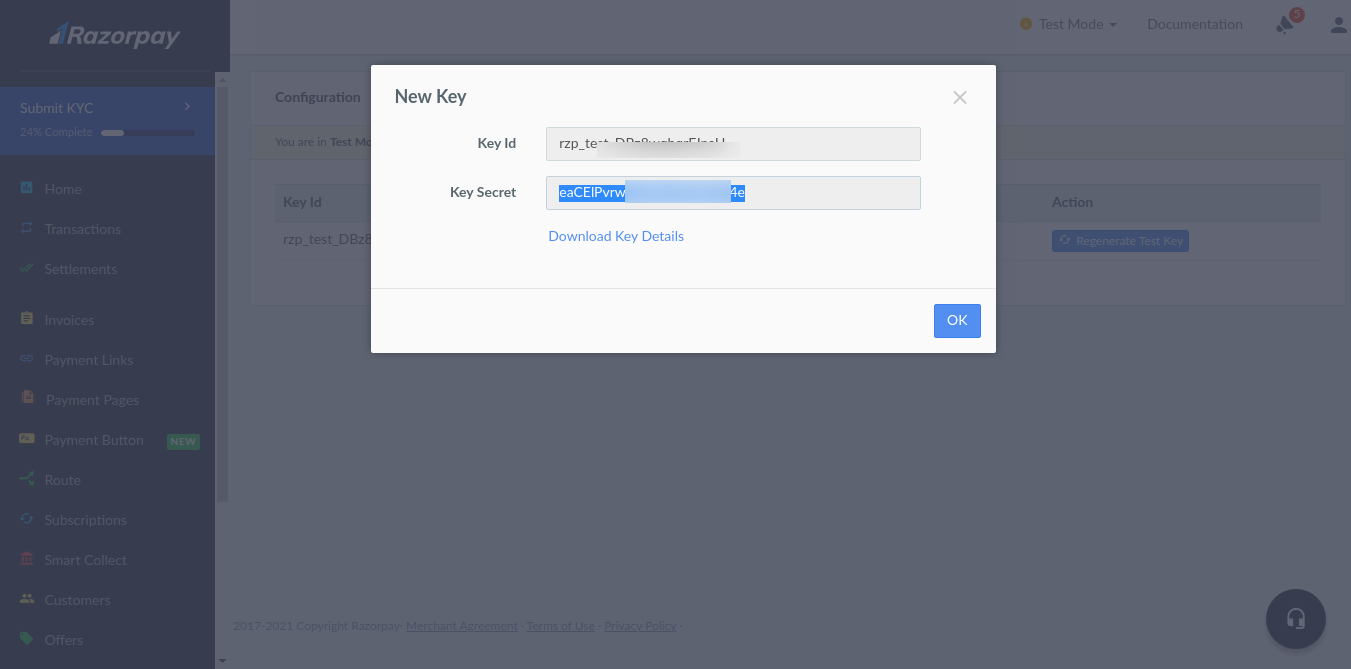
After register successfully. you need to go bellow link and get id and secret as bellow screen shot:
Go Here: https://dashboard.razorpay.com/app/keys.

Next you can get account key id and secret and add on .env file as like bellow:
.envRAZORPAY_KEY=rzp_test_XXXXXXXXX RAZORPAY_SECRET=XXXXXXXXXXXXXXXXStep 3: Install razorpay/razorpay Package
In this step, we need to install razorpay/razorpay composer package to use razorpay api. so let's run bellow command:
composer require razorpay/razorpayStep 4: Create Route
now we will create one route for calling our example, so let's add new route to web.php file as bellow:
routes/web.php
<?php

use Illuminate\Support\Facades\Route;

use App\Http\Controllers\RazorpayPaymentController;

/*
|--------------------------------------------------------------------------
| Web Routes
|--------------------------------------------------------------------------
|
| Here is where you can register web routes for your application. These
| routes are loaded by the RouteServiceProvider within a group which
| contains the "web" middleware group. Now create something great!
|
*/

Route::get('razorpay-payment', [RazorpayPaymentController::class, 'index']);
Route::post('razorpay-payment', [RazorpayPaymentController::class, 'store'])->name('razorpay.payment.store');
Step 5: Create Controller
in this step, we will create RazorpayPaymentController and write send sms logic, so let's add new route to web.php file as bellow:
app/Http/Controllers/RazorpayPaymentController.php
<?php

namespace App\Http\Controllers;

use Illuminate\Http\Request;
use Razorpay\Api\Api;
use Session;
use Exception;

class RazorpayPaymentController extends Controller
{
    /**
     * Write code on Method
     *
     * @return response()
     */
    public function index()
    {
        return view('razorpayView');
    }

    /**
     * Write code on Method
     *
     * @return response()
     */
    public function store(Request $request)
    {
        $input = $request->all();

        $api = new Api(env('RAZORPAY_KEY'), env('RAZORPAY_SECRET'));

        $payment = $api->payment->fetch($input['razorpay_payment_id']);

        if(count($input)  && !empty($input['razorpay_payment_id'])) {
            try {
                $response = $api->payment->fetch($input['razorpay_payment_id'])->capture(array('amount'=>$payment['amount']));

            } catch (Exception $e) {
                return  $e->getMessage();
                Session::put('error',$e->getMessage());
                return redirect()->back();
            }
        }

        Session::put('success', 'Payment successful');
        return redirect()->back();
    }
}
Step 6: Create Blade File
now we need to add blade file. so let's create razorpayView.blade.php file and put bellow code:
resources/views/razorpayView.blade.php
<!DOCTYPE html>
<html lang="{{ str_replace('_', '-', app()->getLocale()) }}">
<head>
    <meta charset="utf-8">
    <meta name="viewport" content="width=device-width, initial-scale=1">
    <!-- CSRF Token -->
    <meta name="csrf-token" content="{{ csrf_token() }}">
    <title>How to Integrate Razorpay Payment Gateway in Laravel 9? - Nicesnippets.com</title>
    <script src="https://cdnjs.cloudflare.com/ajax/libs/jquery/3.6.0/jquery.min.js" crossorigin="anonymous"></script>
    <link rel="stylesheet" href="https://maxcdn.bootstrapcdn.com/bootstrap/4.0.0/css/bootstrap.min.css" integrity="sha384-Gn5384xqQ1aoWXA+058RXPxPg6fy4IWvTNh0E263XmFcJlSAwiGgFAW/dAiS6JXm" crossorigin="anonymous">
</head>
<body>
    <div id="app">
        <main class="py-4">
            <div class="container">
                <div class="row">
                    <div class="col-md-6 offset-3 col-md-offset-6">

                        @if($message = Session::get('error'))
                            <div class="alert alert-danger alert-dismissible fade in" role="alert">
                                <button type="button" class="close" data-dismiss="alert" aria-label="Close">
                                    <span aria-hidden="true">×</span>
                                </button>
                                <strong>Error!</strong> {{ $message }}
                            </div>
                        @endif

                        @if($message = Session::get('success'))
                            <div class="alert alert-success alert-dismissible fade {{ Session::has('success') ? 'show' : 'in' }}" role="alert">
                                <button type="button" class="close" data-dismiss="alert" aria-label="Close">
                                    <span aria-hidden="true">×</span>
                                </button>
                                <strong>Success!</strong> {{ $message }}
                            </div>
                        @endif

                        <div class="card card-default">
                            <div class="card-header">
                                Laravel - Razorpay Payment Gateway Integration
                            </div>

                            <div class="card-body text-center">
                                <form action="{{ route('razorpay.payment.store') }}" method="POST" >
                                    @csrf
                                    <script src="https://checkout.razorpay.com/v1/checkout.js"
                                            data-key="{{ env('RAZORPAY_KEY') }}"
                                            data-amount="1000"
                                            data-buttontext="Pay 10 INR"
                                            data-name="ItSolutionStuff.com"
                                            data-description="Rozerpay"
                                            data-image="https://www.itsolutionstuff.com/frontTheme/images/logo.png"
                                            data-prefill.name="name"
                                            data-prefill.email="email"
                                            data-theme.color="#ff7529">
                                    </script>
                                </form>
                            </div>
                        </div>

                    </div>
                </div>
            </div>
        </main>
    </div>
</body>
</html>
Run Laravel App:
All steps have been done, now you have to type the given command and hit enter to run the laravel app:
php artisan serve
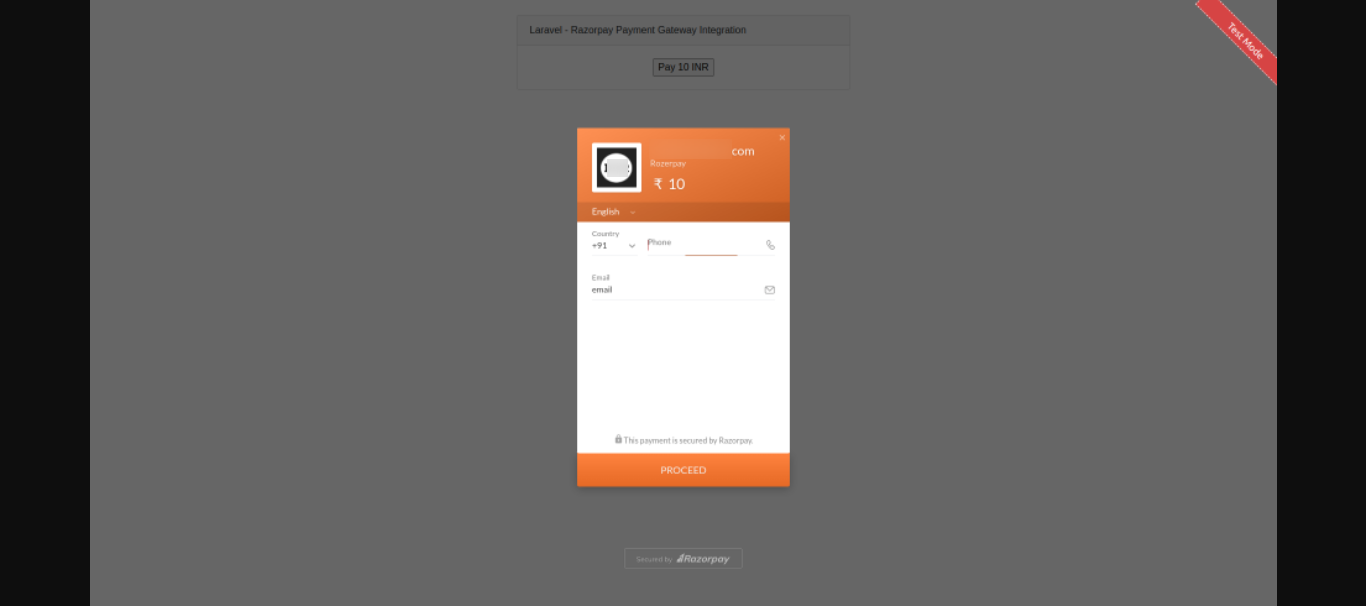
Now, you have to open web browser, type the given URL and view the app output:
http://localhost:8000/razorpay-paymentOutput:

you can get testing card for razorpay from here: Click Here.
Now you can run and check.
I hope it can help you...
