Codeigniter 4 - Ajax Image Upload With Preview Example
Apr 23, 2022 . Admin

Hi guys,
This tutorial will provide an example of Codeigniter 4 Ajax Image Upload With Preview Example Tutorial. if you want to see example of Ajax Image Upload then you are a right place. Here you will learn Ajax Image Upload With Preview Example. you'll learn Codeigniter 4 Ajax Image Upload. Let's get started with Codeigniter 4 Ajax Image Upload With Preview Tutorial.
If you don't know how to uploading an image and display the image preview i will explain this example in the Codeigniter 4 application using the jQuery AJAX.
So, let's started the example..
Step 1: Install Codeigniter 4This is optional; however, if you have not created the codeigniter app, then you may go ahead and execute the below command:
composer create-project codeigniter4/appstarter ci-newsStep 2 : Enable Error Debugging
In this step go to the app/Config/Boot/development.php and app/Config/Boot/production.php file and change the display_errors property to 1 from 0.
app/Config/Boot/development.php
ini_set('display_errors', '1');
Step 3 : Create Database And Table
In this section, we need to understand how to create a new table for file upload using the SQL query. We assume you have already created the database. Run the following command in the SQL tab of PHPMyAdmin to create a new table into the database.
CREATE TABLE users (
    id int(11) NOT NULL AUTO_INCREMENT COMMENT 'Primary Key',
    img_name varchar(100) NOT NULL COMMENT 'Image Name',
    file varchar(255) NOT NULL COMMENT 'File Type',
    created_at varchar(20) NOT NULL COMMENT 'Date Created',
    PRIMARY KEY (id)
) ENGINE=InnoDB DEFAULT CHARSET=latin1 COMMENT='user table' AUTO_INCREMENT=1;
Step 4 : Add Database Details
in the app/Config/Database.php report, search for $default public variable, and there you need to feature the database name, user call and password.
app/Config/Database.php
public $default = [
        'DSN'      => '',
        'hostname' => 'localhost',
        'username' => 'root',
        'password' => '',
        'database' => 'codeigniter_db',
        'DBDriver' => 'MySQLi',
        'DBPrefix' => '',
        'pConnect' => false,
        'DBDebug'  => (ENVIRONMENT !== 'development'),
        'cacheOn'  => false,
        'cacheDir' => '',
        'charset'  => 'utf8',
        'DBCollat' => 'utf8_general_ci',
        'swapPre'  => '',
        'encrypt'  => false,
        'compress' => false,
        'strictOn' => false,
        'failover' => [],
        'port'     => 3306,
    ];
CodeIgniter\Database\Exceptions\DatabaseException
There are a high chance that you might get Unable to connect database : Codeigniter the error, especially if you are working with MAMP or XAMP servers. You can define either of the hostname for MAMP or XAMP.
# XAMP
public $default = [
  'hostname' => '/Applications/XAMPP/xamppfiles/var/mysql/mysql.sock',
]

# MAMP
public $default = [
  'hostname' => '/Applications/MAMP/tmp/mysql/mysql.sock',
]
Step 5 : Create AJAX Image Upload Controller
In the section, we need to create a new controller file inside the app/Controllers folder; there, after open the file and update the given below code.
app/Controllers/AjaxFileUpload.php
<?php
namespace App\Controllers;
use CodeIgniter\Controller;

class AjaxFileUpload extends Controller
{

    /**
     * Write code on Method
     *
     * @return response()
     */
    public function index()
    {
         return view('index');
    }

    /**
     * Write code on Method
     *
     * @return response()
     */
    public function upload()
    {
        helper(['form', 'url']);
        $database = \Config\Database::connect();
        $builder = $database->table('users');

        $validateImage = $this->validate([
            'file' => [
                'uploaded[file]',
                'mime_in[file, image/png, image/jpg,image/jpeg, image/gif]',
                'max_size[file, 4096]',
            ],
        ]);

        $response = [
            'success' => false,
            'data' => '',
            'msg' => "Image could not upload"
        ];

        if ($validateImage) {
            $imageFile = $this->request->getFile('file');
            $imageFile->move(WRITEPATH . 'uploads');
            $data = [
                'img_name' => $imageFile->getClientName(),
                'file'  => $imageFile->getClientMimeType()
            ];
            $save = $builder->insert($data);
            $response = [
                'success' => true,
                'data' => $save,
                'msg' => "Image successfully uploaded"
            ];
        }
        return $this->response->setJSON($response);
    }
}
Step 6 : Create Route
Next Step open the file and define the route that will allow you to open the CI app on the browser.
app/Config/Routes.php
$routes->get('/', 'AjaxFileUpload::index');
Step 7 : Set Up File Upload View
Next, head over to app/Views/ folder inside here create the index.php file and update the following code inside the app/Views/index.php file.
<!DOCTYPE html>
<html lang="en">
<head>
    <meta charset="UTF-8">
    <title>Codeigniter 4 Ajax Image Upload With Preview Example Tutorial - Mywebtuts.com</title>
    <meta name="viewport" content="width=device-width, initial-scale=1.0">
    <link href="https://cdn.jsdelivr.net/npm/bootstrap@5.0.0/dist/css/bootstrap.min.css" rel="stylesheet">
    <style>
    .container {
        max-width: 750px
    }
    </style>
</head>
<body>
    <div class="container mt-5">
        <form method="post" id="upload_image_form" enctype="multipart/form-data">

            <div id="alertMessage" class="alert alert-warning mb-3" style="display: none">
                <span id="alertMsg"></span>
            </div>

            <div class="d-grid text-center">
               <img class="mb-3" id="ajaxImgUpload" alt="Preview Image" src="https://via.placeholder.com/300" />
            </div>

            <div class="mb-3">
                <input type="file" name="file" multiple="true" id="finput" onchange="onFileUpload(this);"
                    class="form-control form-control-lg"  accept="image/*">
            </div>

            <div class="d-grid">
               <button type="submit" class="btn btn-danger uploadBtn">Upload</button>
            </div>
        </form>
    </div>

    <script src="https://ajax.googleapis.com/ajax/libs/jquery/3.5.1/jquery.min.js"></script>
    <script>

        /*------------------------------------------
        --------------------------------------------
        File Upload
        --------------------------------------------
        --------------------------------------------*/
        function onFileUpload(input, id) {
            id = id || '#ajaxImgUpload';
            if (input.files && input.files[0]) {
                var reader = new FileReader();
                reader.onload = function (e) {
                    $(id).attr('src', e.target.result).width(300)
                };
                reader.readAsDataURL(input.files[0]);
            }
        }

        /*------------------------------------------
        --------------------------------------------
        Upload Image
        --------------------------------------------
        --------------------------------------------*/
        $(document).ready(function () {
            $('#upload_image_form').on('submit', function (e) {
                $('.uploadBtn').html('Uploading ...');
                $('.uploadBtn').prop('Disabled');
                e.preventDefault();
                if ($('#file').val() == '') {
                    alert("Choose File");
                    $('.uploadBtn').html('Upload');
                    $('.uploadBtn').prop('enabled');
                    document.getElementById("upload_image_form").reset();
                } else {
                    $.ajax({
                        url: "<?php echo base_url(); ?>/AjaxFileUpload/upload",
                        method: "POST",
                        data: new FormData(this),
                        processData: false,
                        contentType: false,
                        cache: false,
                        dataType: "json",
                        success: function (res) {
                            console.log(res.success);
                            if (res.success == true) {
                                $('#ajaxImgUpload').attr('src', 'https://via.placeholder.com/300');
                                $('#alertMsg').html(res.msg);
                                $('#alertMessage').show();
                            } else if (res.success == false) {
                                $('#alertMsg').html(res.msg);
                                $('#alertMessage').show();
                            }
                            setTimeout(function () {
                                $('#alertMsg').html('');
                                $('#alertMessage').hide();
                            }, 4000);

                            $('.uploadBtn').html('Upload');
                            $('.uploadBtn').prop('Enabled');
                            document.getElementById("upload_image_form").reset();
                        }
                    });
                }
            });
        });
    </script>
</body>
</html>
Step 8 : Run Codeigniter Project
In the final segment of this guide, we have to start the CI development server, and this can be done by executing the below command.
php spark serve
Then next run the url in your browser.
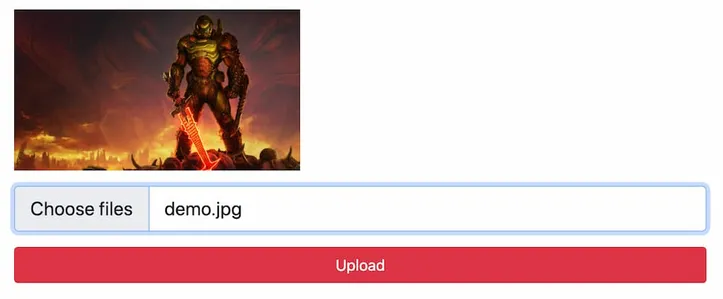
http://localhost:8080Output
i hope it will help you...