Eloquent Mutators and Accessors in Laravel 10 Example
Feb 24, 2023 . Admin
Hi Dev,
This tutorial will provide example of laravel 10 accessor and mutator example. This article goes in detailed on step-by-step laravel 10 accessor and mutator example. We will look at example of laravel 10 accessor and mutator. We will use mutators and accessors of the eloquent orm in the laravel 10 web framework. Here, Creating a basic example of Laravel 10.
So, mutators and accessors sanction you to alter data afore it's preserved to and fetched from a database. To be categorical, the mutator sanctions you to alter data afore it's preserved to a database. On the other hand, the accessor sanctions you to alter data after it's fetched from a database.
The Laravel model is the central place where you can engender mutator and accessor methods. And of course, it's nice to have all your modifications in a single place rather than scattered over different places.
So let's start following example.
Step 1: Download LaravelLet us begin the tutorial by installing a new laravel application. if you have already created the project, then skip following step.
composer create-project laravel/laravel example-appStep 2 : Create Migration and Model
Here, we will update migration with adding new column publish_date for "posts" table, let's update code on following file.
database/migrations/2014_10_12_000000_create_posts_table.php
<?php

use Illuminate\Database\Migrations\Migration;
use Illuminate\Database\Schema\Blueprint;
use Illuminate\Support\Facades\Schema;

return new class extends Migration
{
    /**
     * Run the migrations.
     *
     * @return void
     */
    public function up()
    {
        Schema::create('posts', function (Blueprint $table) {
            $table->bigIncrements('id');
            $table->string('title');
            $table->text('body');
            $table->date('publish_date');
            $table->timestamps();
        });
    }

    /**
     * Reverse the migrations.
     *
     * @return void
     */
    public function down()
    {
        Schema::dropIfExists('posts');
    }
};
Next, run create new migration using laravel migration command as bellow:
php artisan migrate
Now we will update Post model by using following command:
app/Models/Post.php
<?php

namespace App\Models;

use Illuminate\Database\Eloquent\Model;
use Illuminate\Database\Eloquent\Casts\Attribute;
use Carbon\Carbon;

class Post extends Model
{
    /**
     * The attributes that are mass assignable.
     *
     * @var array

     */
    protected $fillable = [
        'title',
        'body',
        'publish_date'
    ];

    /**
     * Interact with the user's first name.
     *
     * @param  string  $value
     * @return \Illuminate\Database\Eloquent\Casts\Attribute
     */
    protected function publishDate(): Attribute
    {
        return new Attribute(
            get: fn ($value) =>  Carbon::parse($value)->format('m/d/Y'),
            set: fn ($value) =>  Carbon::parse($value)->format('Y-m-d'),
        );
    }
}
Step 3 : Create Controller
Let's create PostController by following command:
php artisan make:controller PostControllerapp/Http/Controllers/PostController.php
<?php

namespace App\Http\Controllers;

use App\Models\Post;
use Illuminate\Http\Request;

class PostController extends Controller
{
    /**
     * Write code on Method
     *
     * @return response()
     */
    public function create()
    {
        $input = [
            'title' => 'PHP',
            'body' => 'This is a Nice Language.',
            'publish_date' => '02/12/2022'
        ];

        $post = Post::create($input);

        dd($post);
    }

    /**
     * Write code on Method
     *
     * @return response()
     */
    public function show()
    {
        $post = Post::first();

        dd($post->toArray());
    }
}
Step 4: Create and Add Routes
Next, You have to open and update the following routes in the routes/web.php file.
routes/web.php
<?php

use Illuminate\Support\Facades\Route;
use App\Http\Controllers\PostController;

/*
|--------------------------------------------------------------------------
| Web Routes
|--------------------------------------------------------------------------
|
| Here is where you can register web routes for your application. These
| routes are loaded by the RouteServiceProvider within a group that
| contains the "web" middleware group. Now create something great!
|
*/

Route::controller(PostController::class)->group(function(){
    Route::get('create-post', 'create');
    Route::get('get-post', 'show');
});
Run Laravel App:
All steps have been done, now you have to type the given command and hit enter to run the laravel app:
php artisan serve
Now, you have to open web browser, type the given URL and view the app output:
http://localhost:8000/create-post
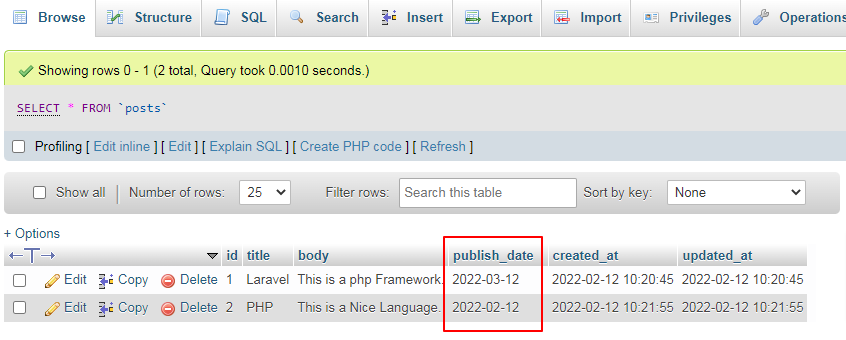
It will create post as like bellow screen shot:
Output for Accessor:
Now, Go to your web browser, type the given URL and view the app output:
http://localhost:8000/get-post
It will create post as like bellow screen shot:
array:6 [
    "id" => 1
    "title" => "Laravel"
    "body" => "This is a php Framework."
    "publish_date" => "03/12/2022"
    "created_at" => "2022-02-12T10:20:45.000000Z"
    "updated_at" => "2022-02-12T10:20:45.000000Z"
]
I hope it can help you...