How to Create Views using Artisan Command?
Sep 08, 2022 . Admin

Hello Friends,
Now, let's see a tutorial on how to create views using the artisan command. it's a simple example of how to create a blade file in laravel using a command. you can see laravel create blade command example. I explained simply how to create a view file in laravel using the artisan command.
Laravel provides default artisan commands to create a model, controller, rule, etc. but you can not create blade files using the artisan command. so we will create our own custom artisan command to create a blade file using it. we will create php artisan make:view {filename} to make blade file.
You can use this example with laravel 6, laravel 7, laravel 8, and laravel 9 versions.
You have just to follow the below step and you will get the layout as below:
Step 1: Install LaravelThis is optional; however, if you have not created the laravel app, then you may go ahead and execute the below command:
composer create-project laravel/laravel example-appStep 2: Create Custom Artisan Command
Here, we will create a custom artisan command using the following command, so let's run it:
php artisan make:command MakeViewCommand
Next, let's update MakeViewCommand.php file with below code:
app/Console/Commands/MakeViewCommand.php
<?php

namespace App\Console\Commands;

use Illuminate\Console\Command;
use File;

class MakeViewCommand extends Command
{
    /**
     * The name and signature of the console command.
     *
     * @var string
     */
    protected $signature = 'make:view {view}';

    /**
     * The console command description.
     *
     * @var string
     */
    protected $description = 'Create a new blade template.';

    /**
     * Execute the console command.
     *
     * @return mixed
     */
    public function handle()
    {
        $view = $this->argument('view');

        $path = $this->viewPath($view);

        $this->createDir($path);

        if (File::exists($path))
        {
            $this->error("File {$path} already exists!");
            return;
        }

        File::put($path, $path);

        $this->info("File {$path} created.");
    }

     /**
     * Get the view full path.
     *
     * @param string $view
     *
     * @return string
     */
    public function viewPath($view)
    {
        $view = str_replace('.', '/', $view) . '.blade.php';

        $path = "resources/views/{$view}";

        return $path;
    }

    /**
     * Create view directory if not exists.
     *
     * @param $path
     */
    public function createDir($path)
    {
        $dir = dirname($path);

        if (!file_exists($dir))
        {
            mkdir($dir, 0777, true);
        }
    }
}
Step 3: Use Artisan Command
Now, you can use the following artisan command to create a blade file.
You will be able to create a demo.blade.php blade file in the resources/views directory using the below command:
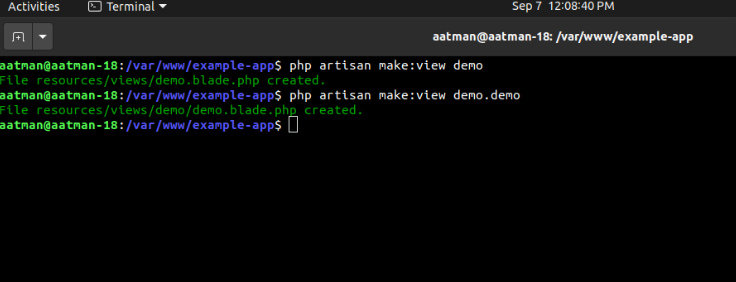
php artisan make:view demo
You will be able to create a demo.blade.php blade file in the resources/views/demo directory using the below command:
php artisan make:view demo
you can see below a preview of the newly created blade file.
resources/views/demo.blade.phpresources/views/demo.blade.php
You can see below terminal preview:
I hope it can help you...