How to Sweet Alert Confirm Delete Example in Laravel 9?
Mar 01, 2022 . Admin

Hi dev,
Today, I am explaining how to sweet alert confirm delete example in laravel 9?. you'll learn laravel 9 sweet alert box using data delete in the database. Here you will learn laravel sweet alert delete confirmation. you will do the following things for laravel 9 sweet alert using record delete. Below we use sweet alert CDN to show confirm box alert before deleting any row from laravel 9 blade file.
The sweet alert in any project is very important because the confirmation delete is very required to make confirm once the user is satisfied to delete your record. So the Laravel Delete with Sweetalert has been used in all projects.
In this example, we will learn how to open a sweet alert before deleting a user in laravel 9 application. I will show the sweet alert jquery plugin using delete in laravel 9. I will show an easy example of a sweet alert before deleting the user in laravel 9.
Let’s Delete method with Sweet Alert in Laravel 8, Laravel 7, Laravel 6, Laravel 5 easy way step by step from scratch.
Step 1: Download LaravelLet us begin the tutorial by installing a new laravel application. if you have already created the project, then skip following step.
composer create-project laravel/laravel example-appStep 2: Add Dummy Users
In this step, we need to create add some dummy users using factory.
php artisan tinker

User::factory()->count(10)->create()
Step 3: Create Route
In this is step we need to create some routes for add to cart function.
<?php

use Illuminate\Support\Facades\Route;

use App\Http\Controllers\UserController;

/*
|--------------------------------------------------------------------------
| Web Routes
|--------------------------------------------------------------------------
|
| Here is where you can register web routes for your application. These
| routes are loaded by the RouteServiceProvider within a group which
| contains the "web" middleware group. Now create something great!
|
*/

Route::get('users', [UserController::class, 'index'])->name('users.index');
Route::delete('users/{id}', [UserController::class, 'delete'])->name('users.delete');
Step 4: Create Controller
in this step, we need to create UserController and add following code on that file:
app/Http/Controllers/UserController.php
<?php

namespace App\Http\Controllers;

use Illuminate\Http\Request;
use App\Models\User;
use DataTables;

class UserController extends Controller
{
     /**
     * Display a listing of the resource.
     *
     * @return \Illuminate\Http\Response
     */
    public function index(Request $request)
    {
        $users = User::select("*")->paginate(8);
        return view('users', compact('users'))->with('no', 1);
    }

    /**
     * Write code on Method
     *
     * @return response()
     */
    public function delete($id)
    {
        User::find($id)->delete();
        return back();
    }
}
Step 5: Create Blade Files
here, we need to create blade files for users, products and cart page. so let's create one by one files:
resources/views/users.blade.php
<!DOCTYPE html>
<html>
<head>
    <title>How to Sweet Alert Confirm Delete Example in Laravel 9? - Mywebtuts.com</title>
    <meta name="csrf-token" content="{{ csrf_token() }}">
    <link href="https://cdn.jsdelivr.net/npm/bootstrap@5.0.2/dist/css/bootstrap.min.css" rel="stylesheet">
    <link href="https://cdnjs.cloudflare.com/ajax/libs/limonte-sweetalert2/5.0.7/sweetalert2.min.css" rel="stylesheet">
</head>
<body>

<div class="container">

    <h3 class="text-center mt-4 mb-5">How to Sweet Alert Confirm Delete Example in Laravel 9? - Mywebtuts.com</h3>

    <table class="table table-bordered table-striped data-table">
        <thead>
            <tr>
                <th>No</th>
                <th>Name</th>
                <th>Email</th>
                <th class="text-center">Action</th>
            </tr>
        </thead>
        <tbody>
            @foreach($users as $user)
                <tr>
                    <td>{{ $no++ }}</td>
                    <td>{{ $user->name }}</td>
                    <td>{{ $user->email }}</td>
                    <td class="text-center">
                        <form method="POST" action="{{ route('users.delete', $user->id) }}">
                            @csrf
                            <input name="_method" type="hidden" value="DELETE">
                            <button type="submit" class="btn btn-xs btn-danger btn-flat show-alert-delete-box btn-sm" data-toggle="tooltip" title='Delete'>Delete</button>
                        </form>
                    </td>
                </tr>
            @endforeach
        </tbody>
    </table>
</div>

<script src="https://cdnjs.cloudflare.com/ajax/libs/jquery/3.6.0/jquery.min.js"></script>
<script src="https://cdnjs.cloudflare.com/ajax/libs/sweetalert/2.1.2/sweetalert.min.js"></script>

<script type="text/javascript">
    $('.show-alert-delete-box').click(function(event){
        var form =  $(this).closest("form");
        var name = $(this).data("name");
        event.preventDefault();
        swal({
            title: "Are you sure you want to delete this record?",
            text: "If you delete this, it will be gone forever.",
            icon: "warning",
            type: "warning",
            buttons: ["Cancel","Yes!"],
            confirmButtonColor: '#3085d6',
            cancelButtonColor: '#d33',
            confirmButtonText: 'Yes, delete it!'
        }).then((willDelete) => {
            if (willDelete) {
                form.submit();
            }
        });
    });
</script>

</body>
</html>
Run Laravel App:
All steps have been done, now you have to type the given command and hit enter to run the laravel app:
php artisan serve
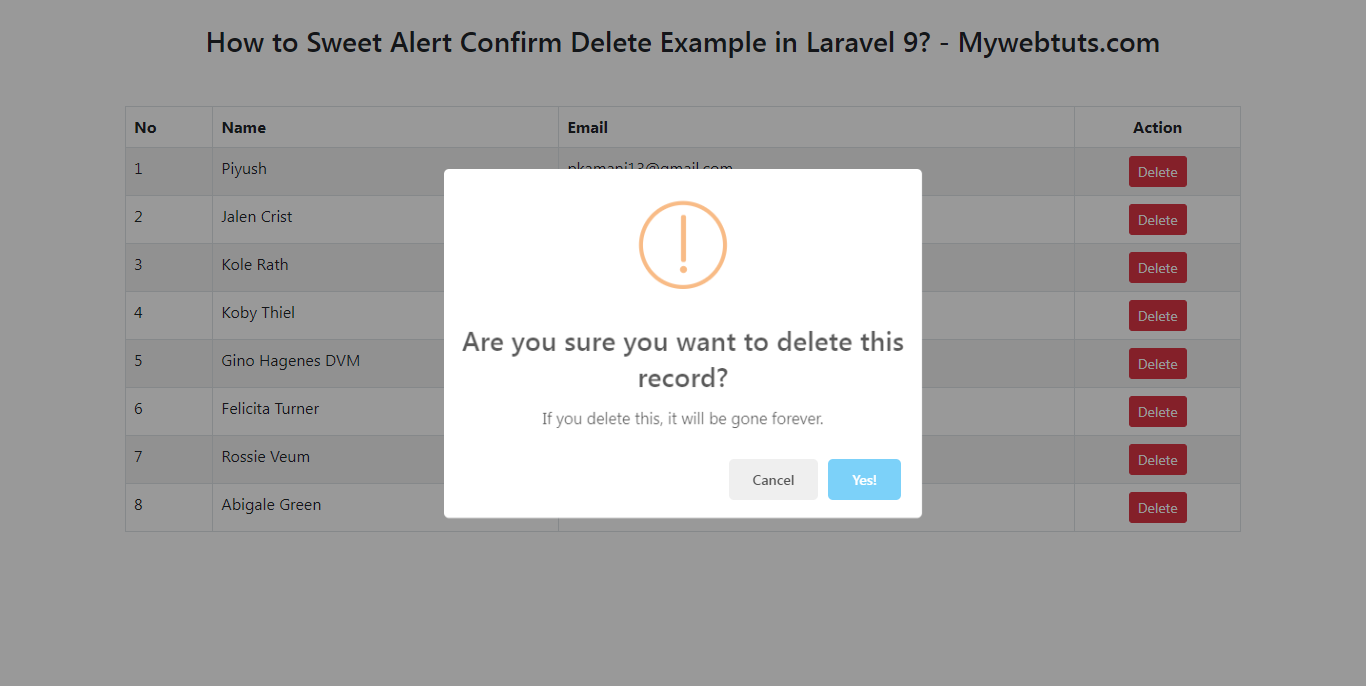
Now, you have to open web browser, type the given URL and view the app output:
localhost:8000/users
Output:

I hope it can help you...
