Laravel 9 Factory Tinker Example
May 13, 2022 . Admin
Hi Artisan
Today, In this article, I will explain to you how to create dummy records in your database table using the tinker factory of Laravel 9.
Sometime we need to integrate millions of records in your employee table, OR maybe thousands or millions of records. Also, think about if you need to use pagination. then you have to add some records for testing. So what you will do it at that moment, You will add manually thousands or millions of records. If you add manually thousands of records then it can take more time.
Here, Laravel 9 has a composer package "laravel/tinker" that we will provide you to generate dummy records by using their command. So Laravel 9 by default takes the "laravel/tinker" package for the project. Also, they provide by default one factory for the user table. You can check the path here : database/factories/. In this folder, you can add your different factories for a different model.
Here, I will give you a full example for simply creating dummy data using tinker factory using laravel 9 as below.
Step 1: Download LaravelLet us begin the tutorial by installing a new laravel application. if you have already created the project, then skip the following step.
composer create-project laravel/laravel example-appStep 2: Create Model and Migration
Here this step, we will create one model and migration name Employee. Use the below following command and create it.
php artisan make:model Employee -m
next,open employees migration file and put the below code.
database/migrations/2021_06_30_041820_create_employees_table.php
<?php

use Illuminate\Database\Migrations\Migration;
use Illuminate\Database\Schema\Blueprint;
use Illuminate\Support\Facades\Schema;

class CreateEmployeesTable extends Migration
{
    /**
     * Run the migrations.
     *
     * @return void
     */
    public function up()
    {
        Schema::create('employees', function (Blueprint $table) {
            $table->id();
            $table->string('name');
            $table->string('email');
            $table->timestamps();
        });
    }

    /**
     * Reverse the migrations.
     *
     * @return void
     */
    public function down()
    {
        Schema::dropIfExists('employees');
    }
}
Next, go to app/Models/Employee.php and open the Employee model file, and put the below code. here following the path of model fille
app/Models/Employee.php
<?php

namespace App\Models;

use Illuminate\Database\Eloquent\Factories\HasFactory;
use Illuminate\Database\Eloquent\Model;

class Employee extends Model
{
    use HasFactory;

    /**
     * The attributes that are mass assignable.
     *
     * @var array
     */
    protected $fillable = [
        'name',
        'email',
    ];
}
Step 3: Create Factory
In this step, I will create EmployeeFactory in the following command As you see the above command is for a user, But you can not do the same for other model. If you want to do this then you have to add a factory for that model. So I am going to give you a full example of the factory from scratch.
php artisan make:factory EmployeeFactory --model=Employee
I have an Employee model with an employee table. Now we want to add dummy records for the Employee model. So we have to add factory like as bellow:
database/factories/EmployeeFactory.php
<?php

namespace Database\Factories;

use App\Models\Employee;
use Illuminate\Database\Eloquent\Factories\Factory;
use Illuminate\Support\Str;

class EmployeeFactory extends Factory
{
    /**
     * The name of the factory's corresponding model.
     *
     * @var string
     */
    protected $model = Employee::class;

    /**
     * Define the model's default state.
     *
     * @return array
     */
    public function definition()
    {
        return [
            'name' => $this->faker->name,
            'email' => $this->faker->email,
        ];
    }
}
after run command in terminal
composer dump-autoloadand
php artisan tinker
Employee::factory()->count(6)->create()
So i hope you created your 6 dummy records on employees table.
Output: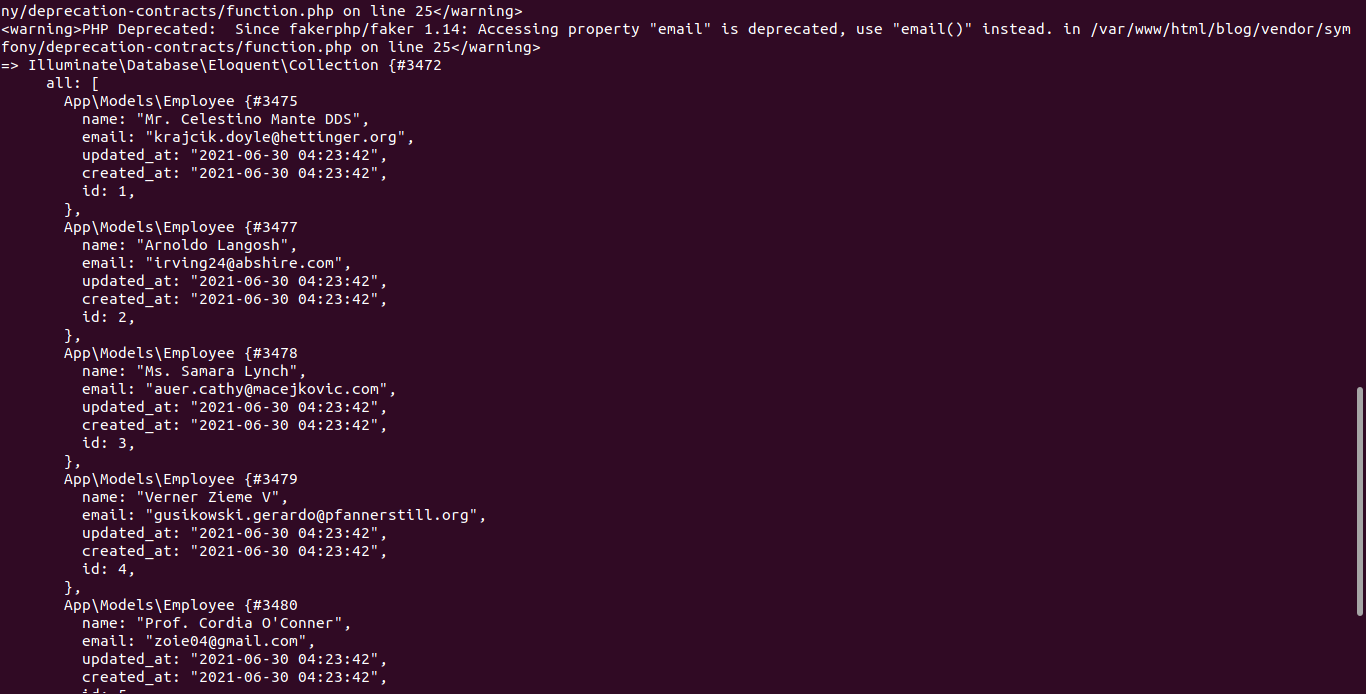
It Will help you...