Using Laravel to Add Google Sheet Tutorial
Dec 21, 2022 . Admin
Hello Friends,
We will discover how to add a Google Sheet using Laravel in this article. You've come to the correct spot if you want to see an example of how I added Google Sheets using Laravel. Adding a sheet to a Google Sheet using Laravel is demonstrated here simply. You can get a general idea of how I upload data automatically to Google Sheets. You only need to complete a few steps while using Laravel. Adding a Google sheet: how to do it.
In this example, Laravel will be used to add a Google Sheet. Google Sheet Add in Laravel. So let's explore the next steps:
So let's follow the below steps:
Step 1: Install LaravelThis is optional; however, if you have not created the laravel app, then you may go ahead and execute the below command:
composer create-project laravel/laravel example-appStep 2: Installation of revolution/laravel-google-sheets
On an installation of Laravel, run:
composer require revolution/laravel-google-sheets
Followed by:
php artisan vendor:publish --provider="PulkitJalan\Google\GoogleServiceProvider" --tag="config"Step 3: Set up Google credentials (API Key)
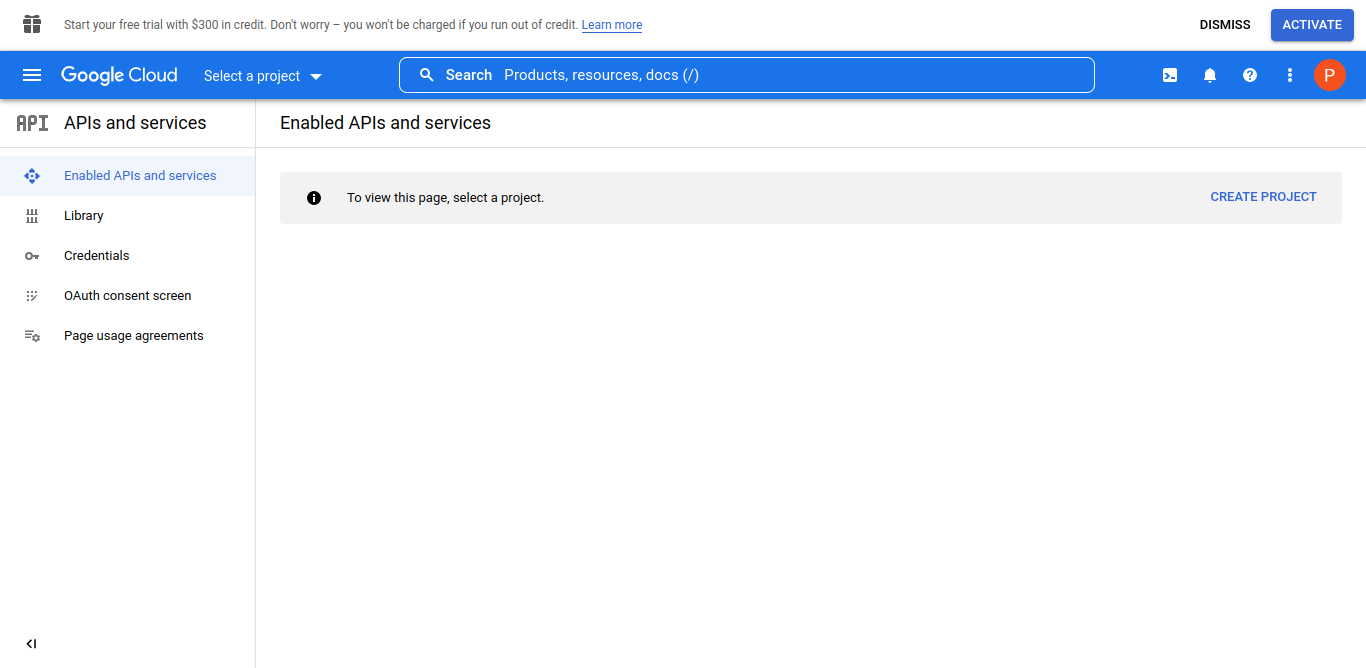
Go to https://developers.google.com/console and sign in (if necessary)
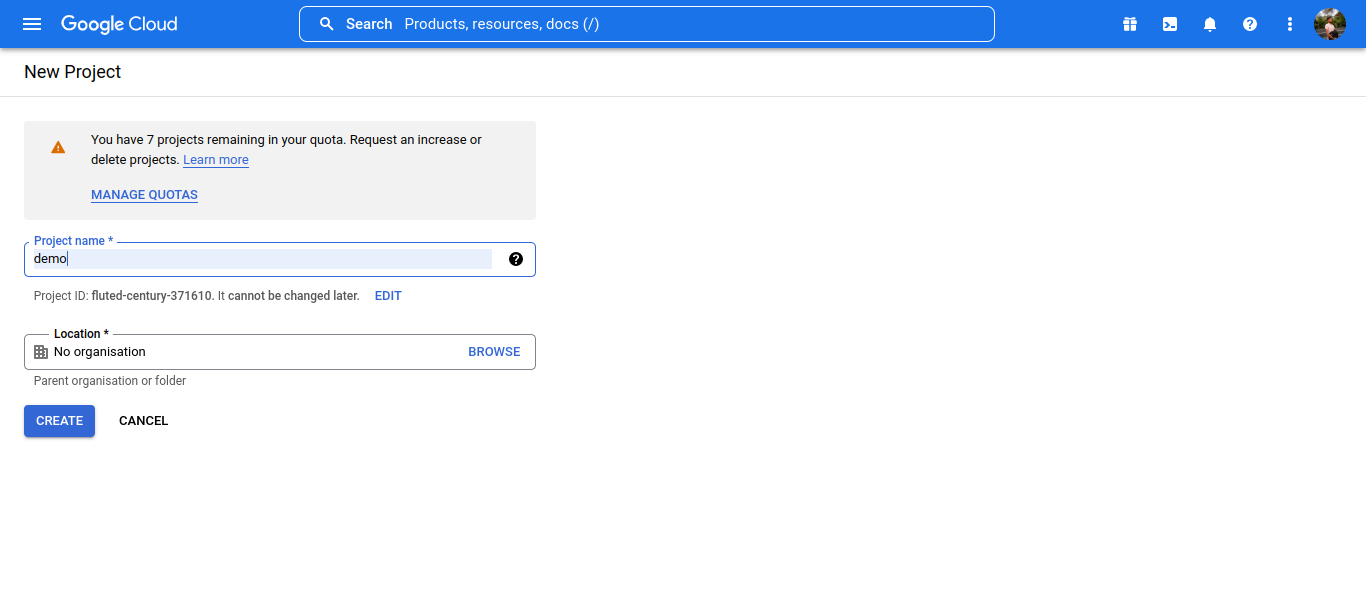
Create a new project (if necessary)
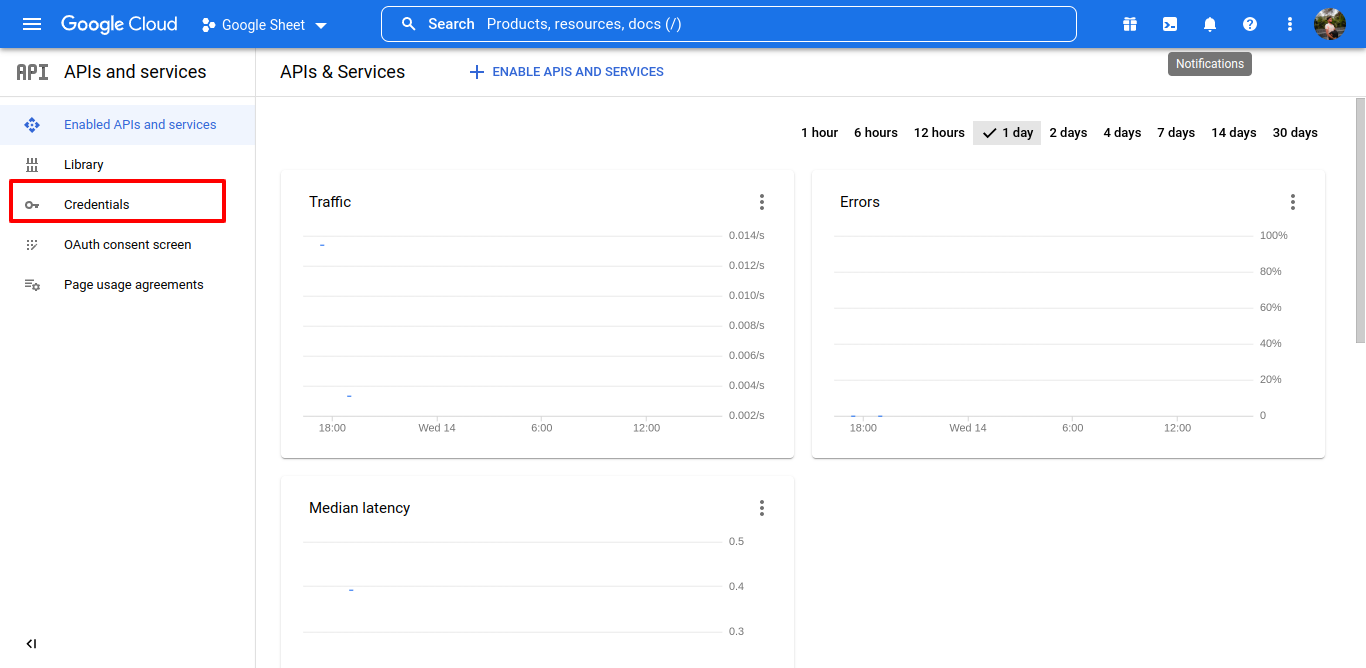
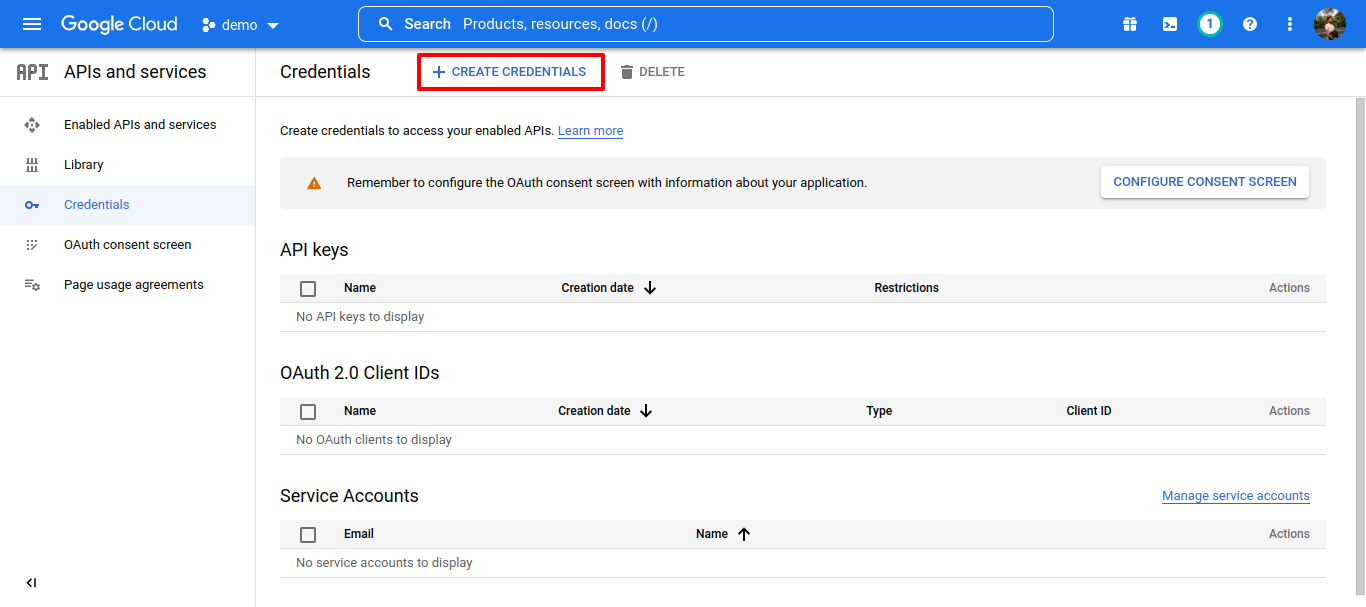
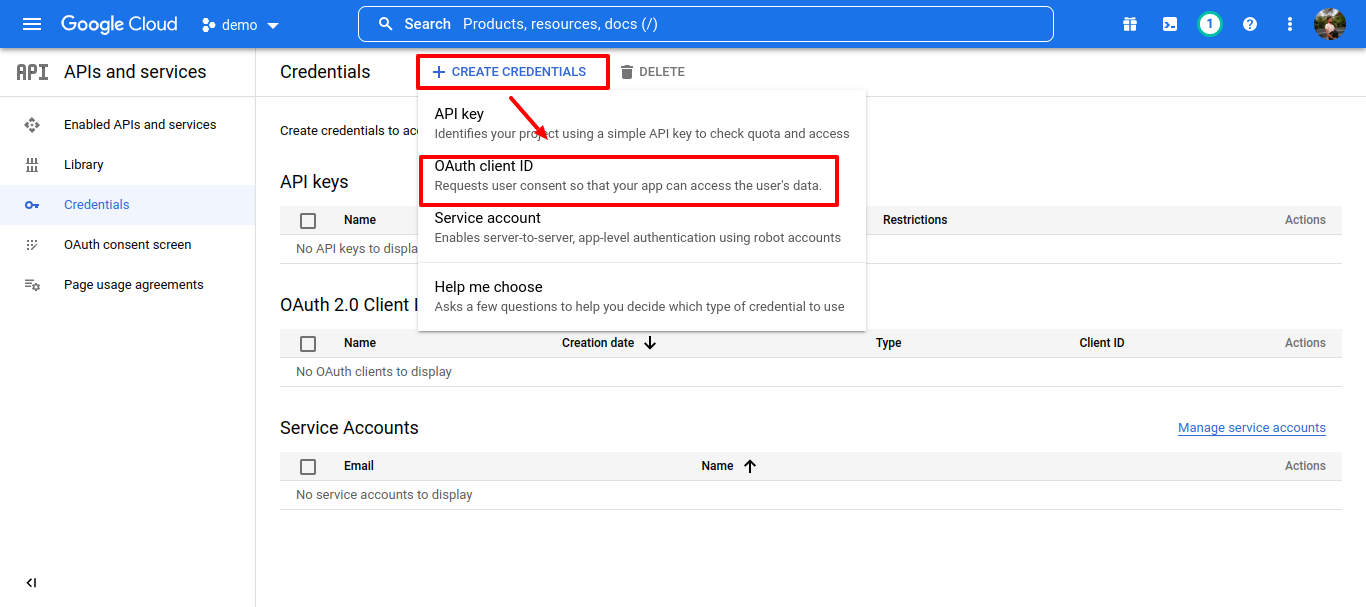
Click on “credentials” from the left-hand menu.
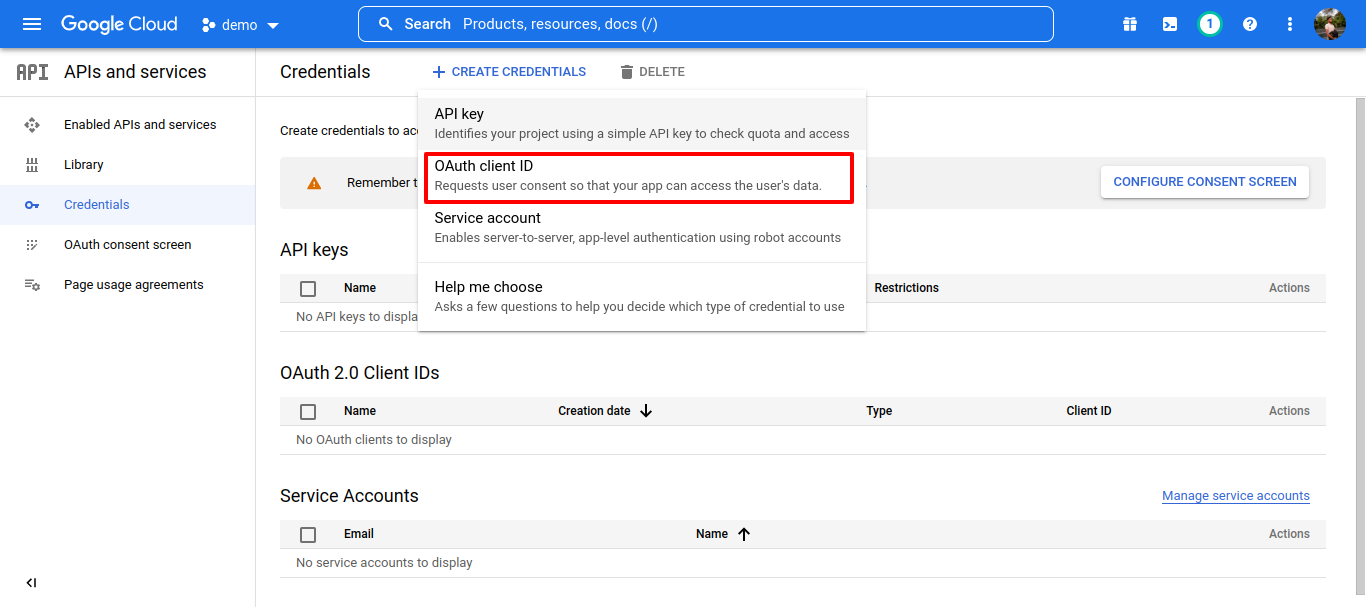
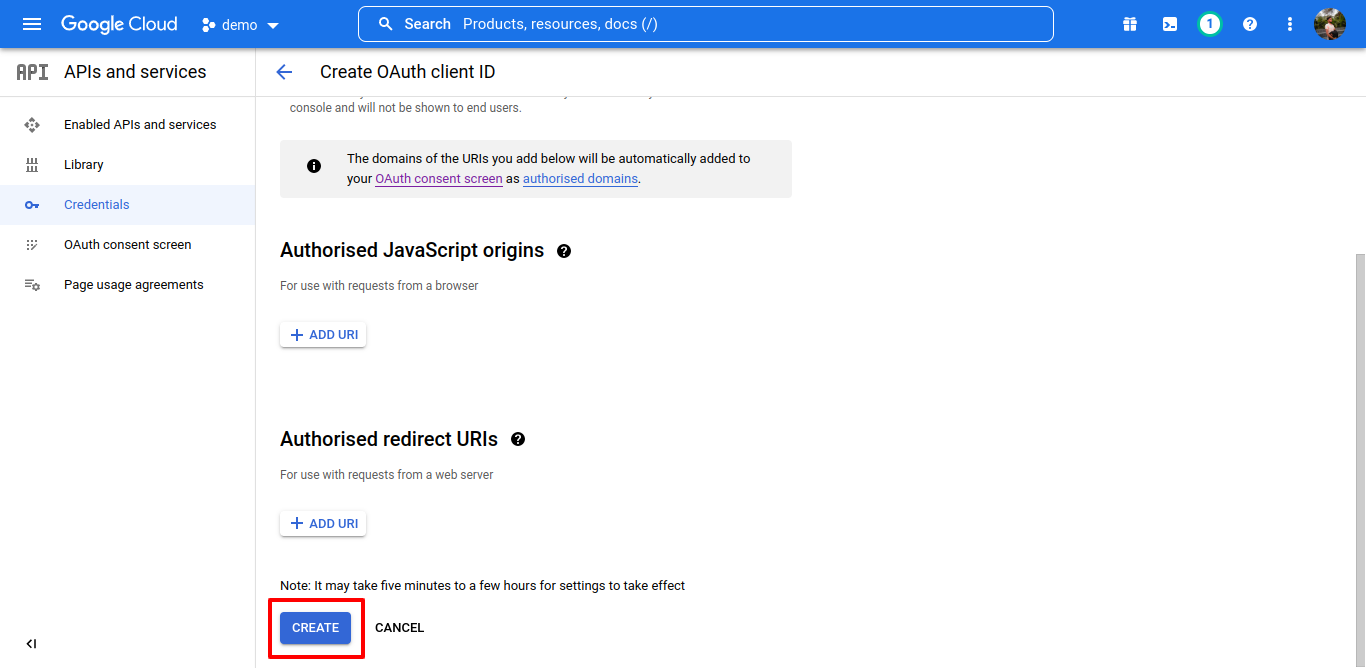
Click “Create credentials” followed up “OAuth client ID”.
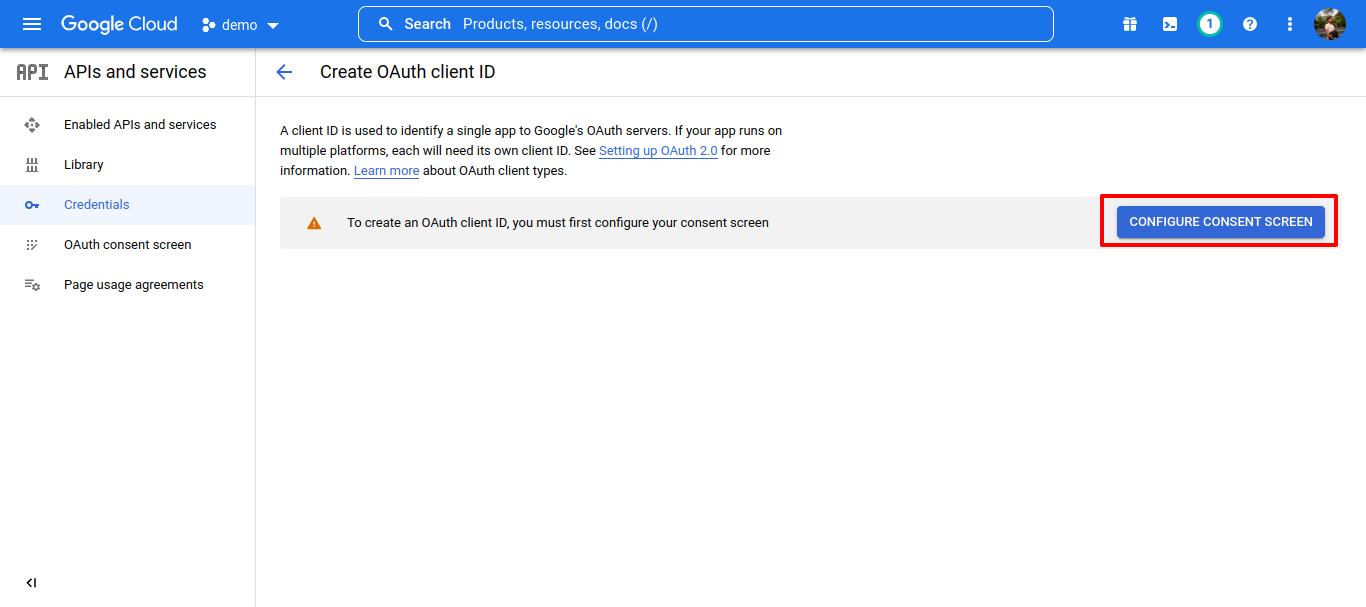
If necessary, “Configure consent screen”.
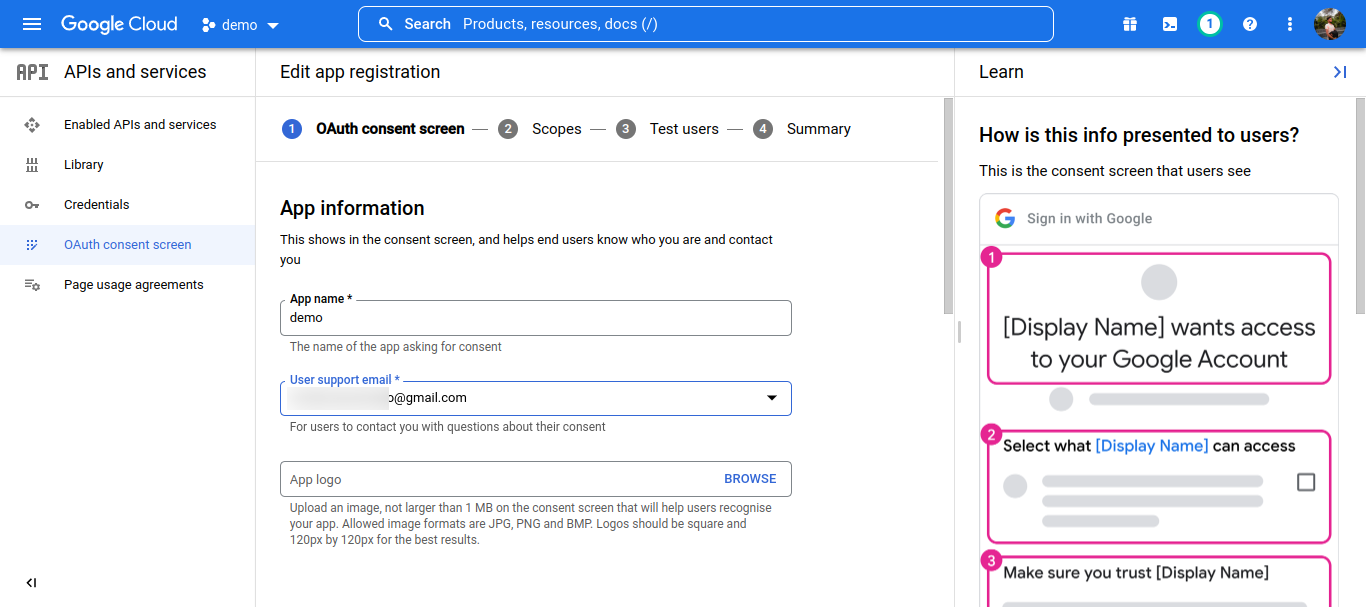
select "External" and create.

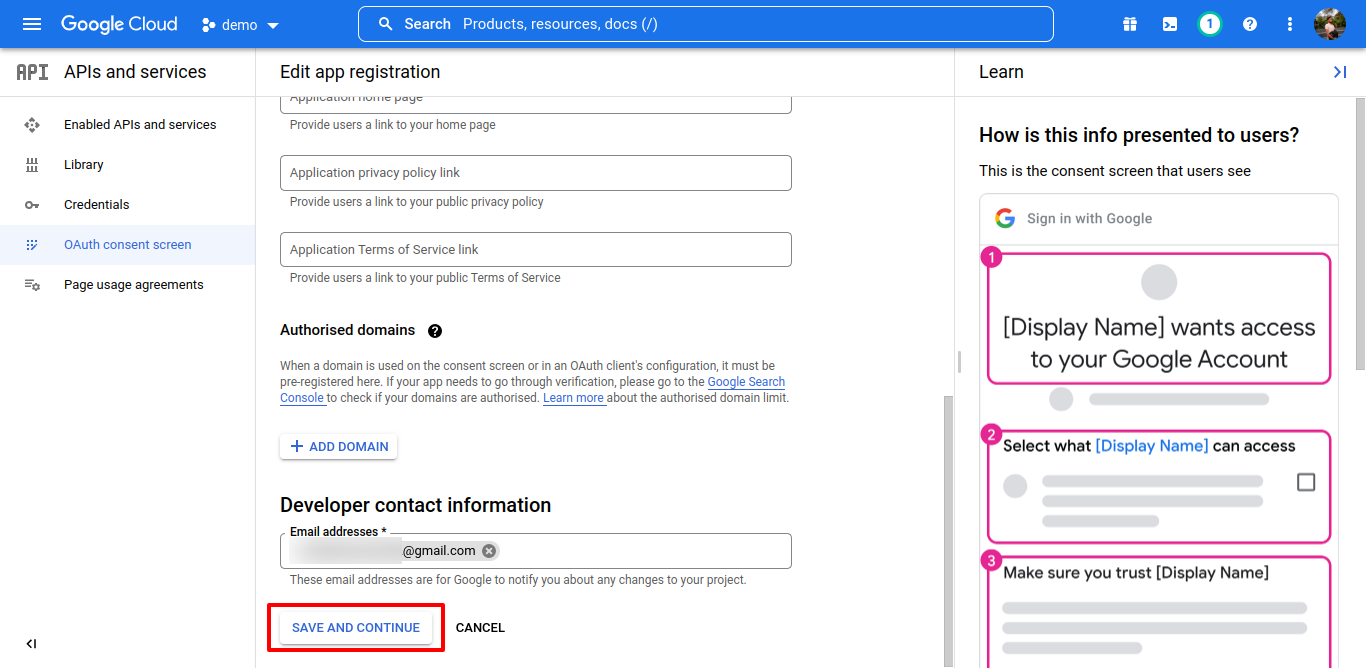
Add Your Email in "User support email" and "Developer contact information" thane save and continue it.
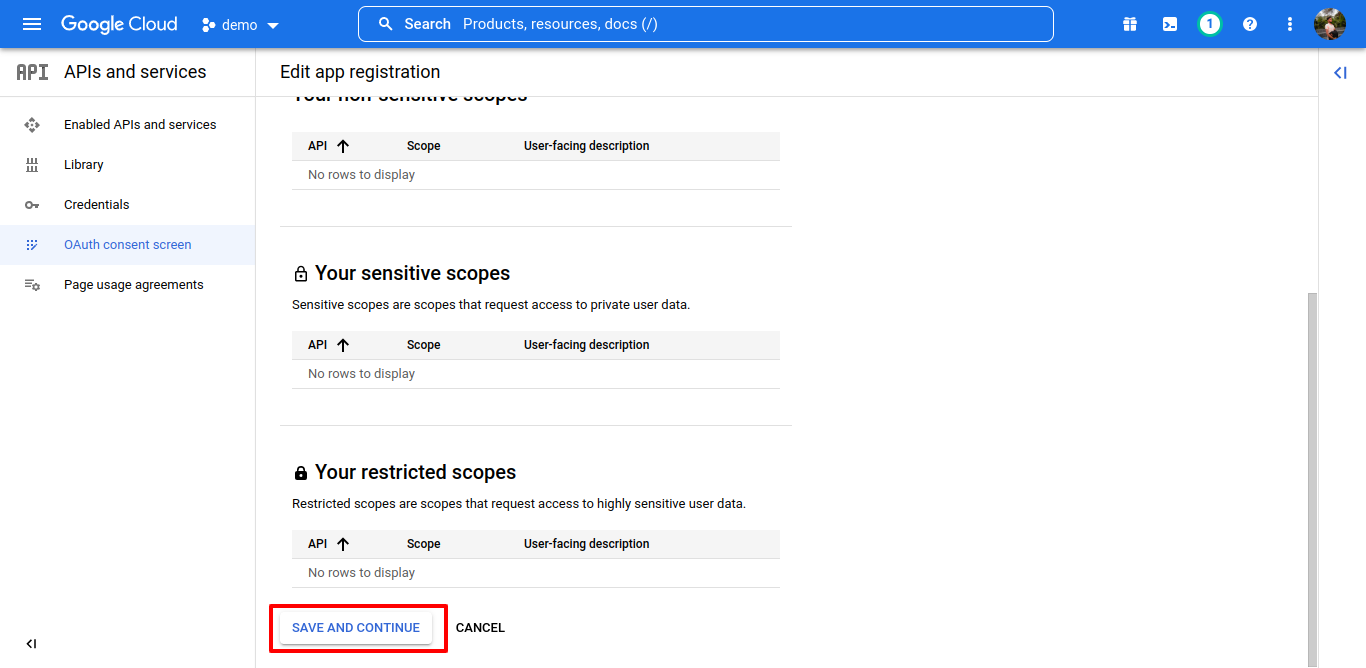
Scopes are optional (if necessary).
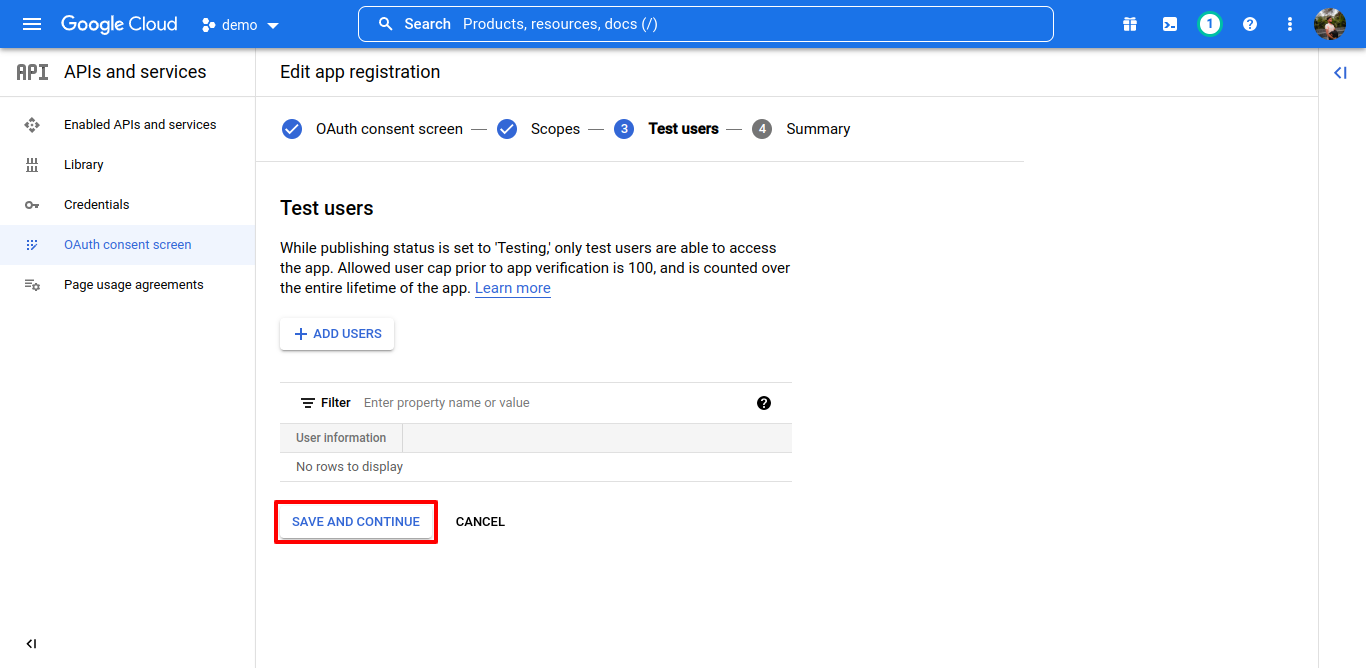
Test users are optional (if necessary).
Summary is optional (if necessary).
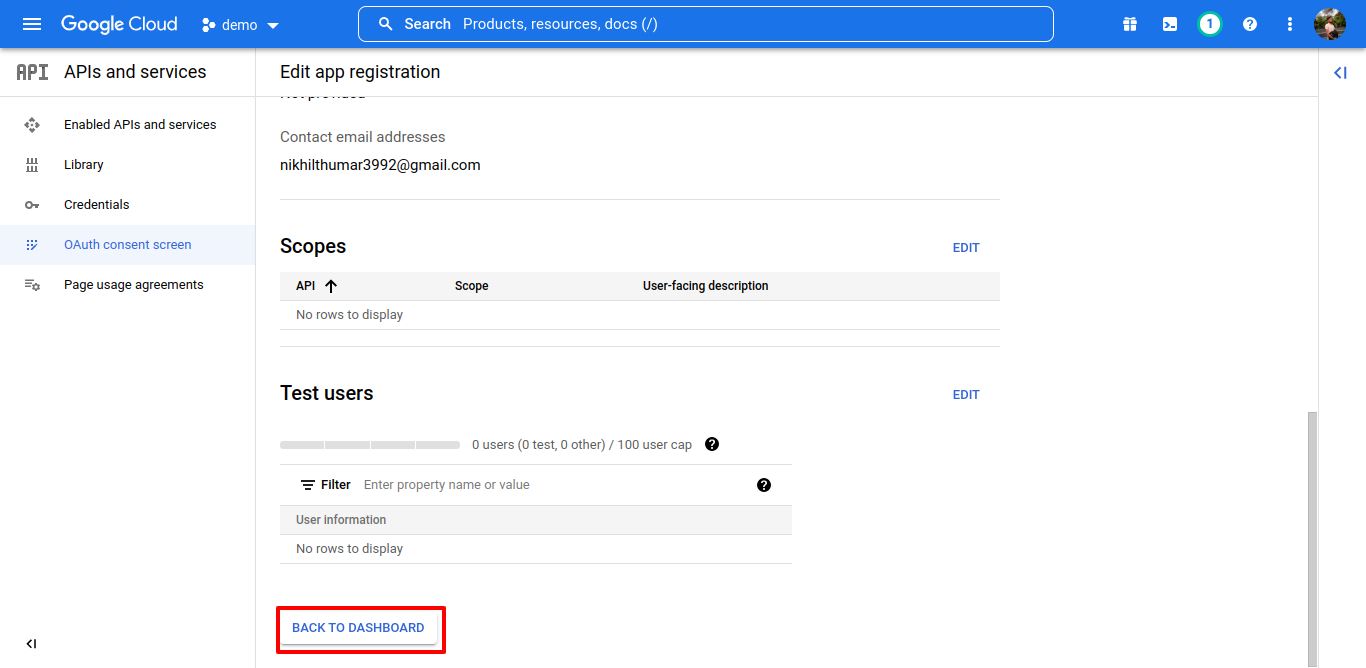
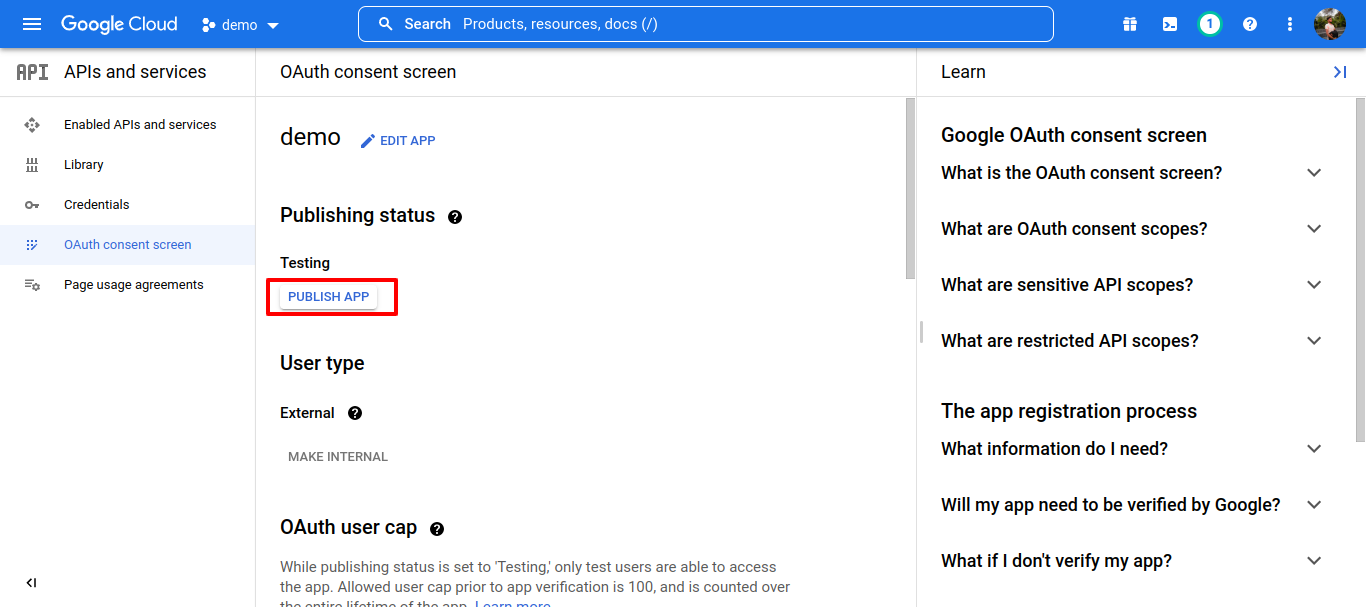
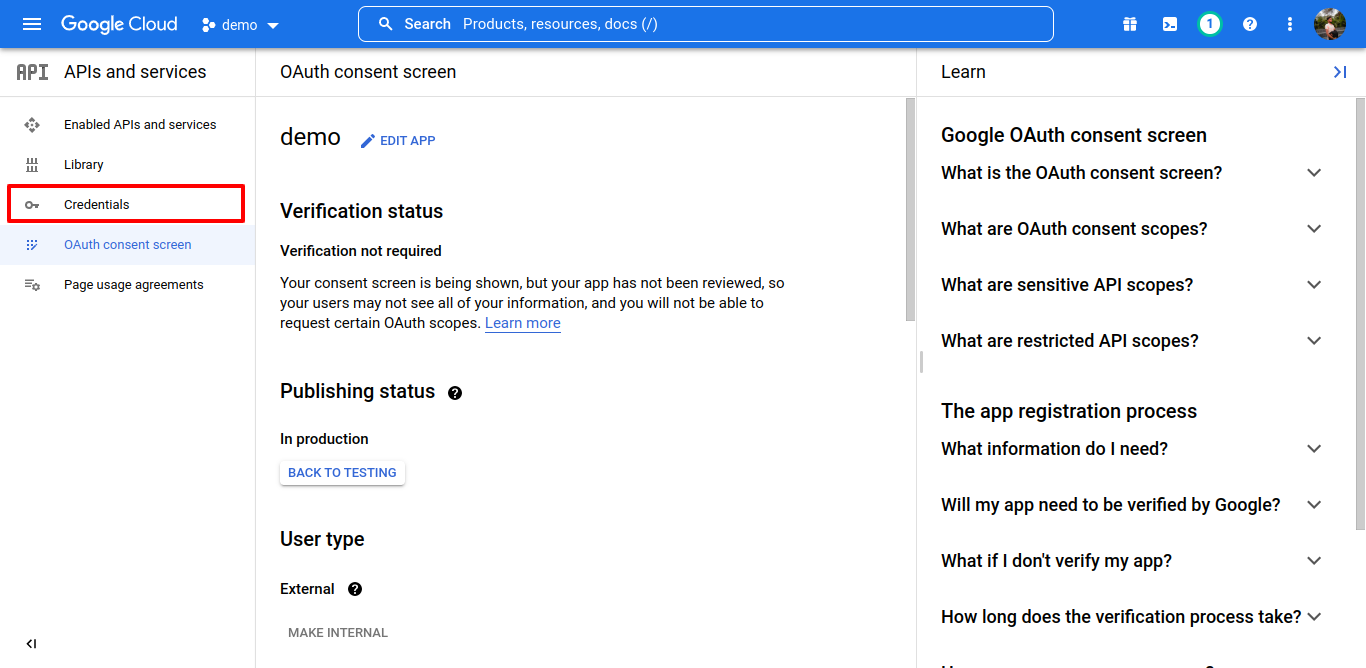
After publishing your app go back to credentials.
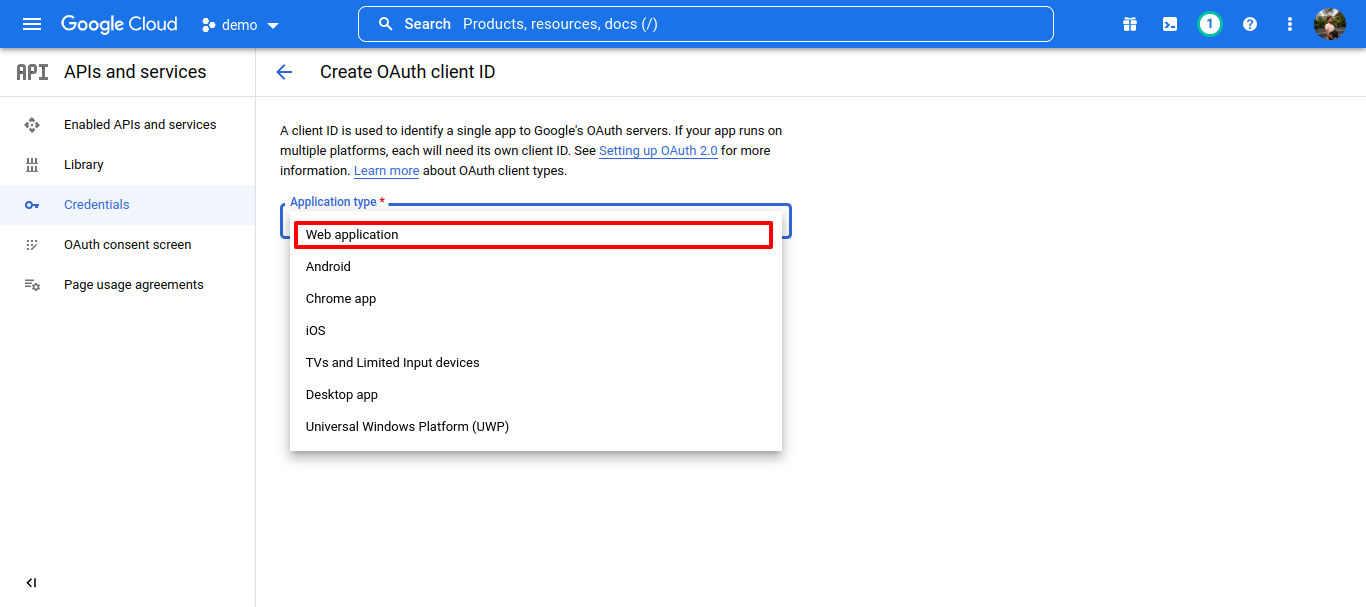
Set the type to “Web application”.
Copy the “Client ID” (leave this window open)
Open /.env and paste the ID next to GOOGLE_CLIENT_ID=
Open /config/google.php and paste the ID into 'client_id' => env('GOOGLE_CLIENT_ID', '')
Go back to the Google Console and copy the “Client Secret”
Open /.env and paste the ID next to GOOGLE_CLIENT_SECRET=
Open /config/google.php and paste the ID into 'client_secret' => env('GOOGLE_CLIENT_SECRET', '')
.png) Step 4: Set up Google credentials (Service account key).
Step 4: Set up Google credentials (Service account key).
Go back to the developer console and create a new “Service account key”.
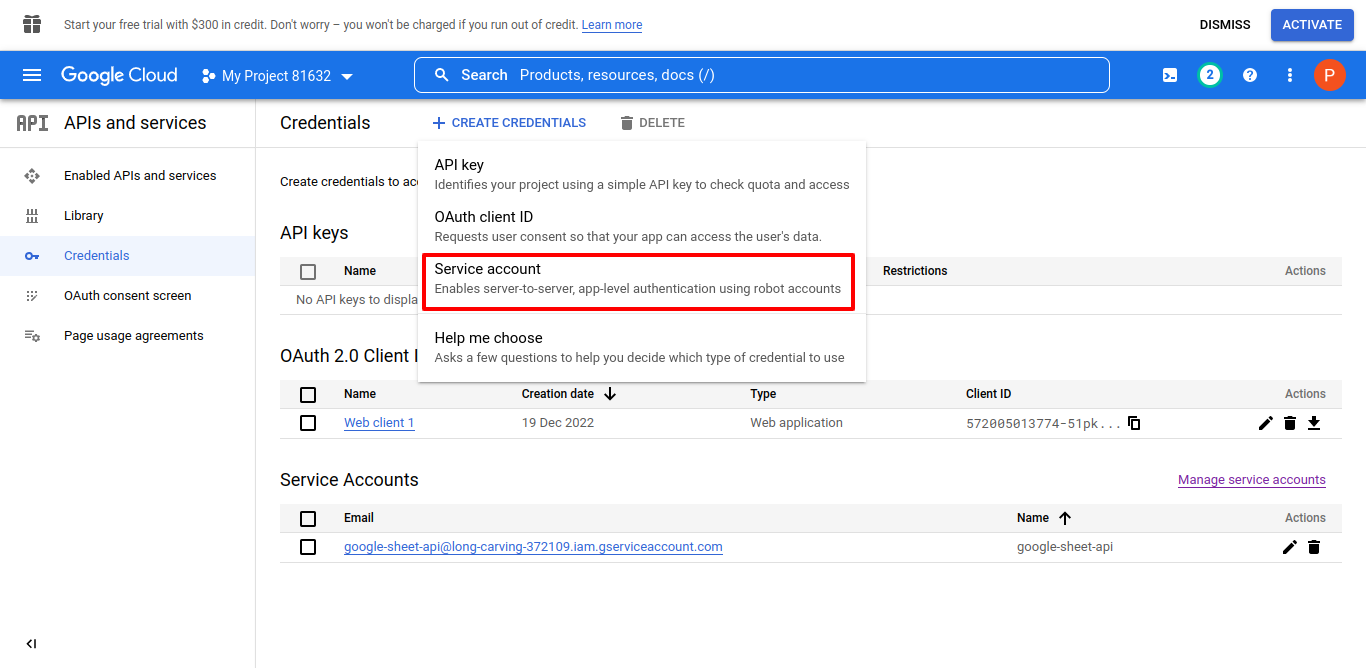
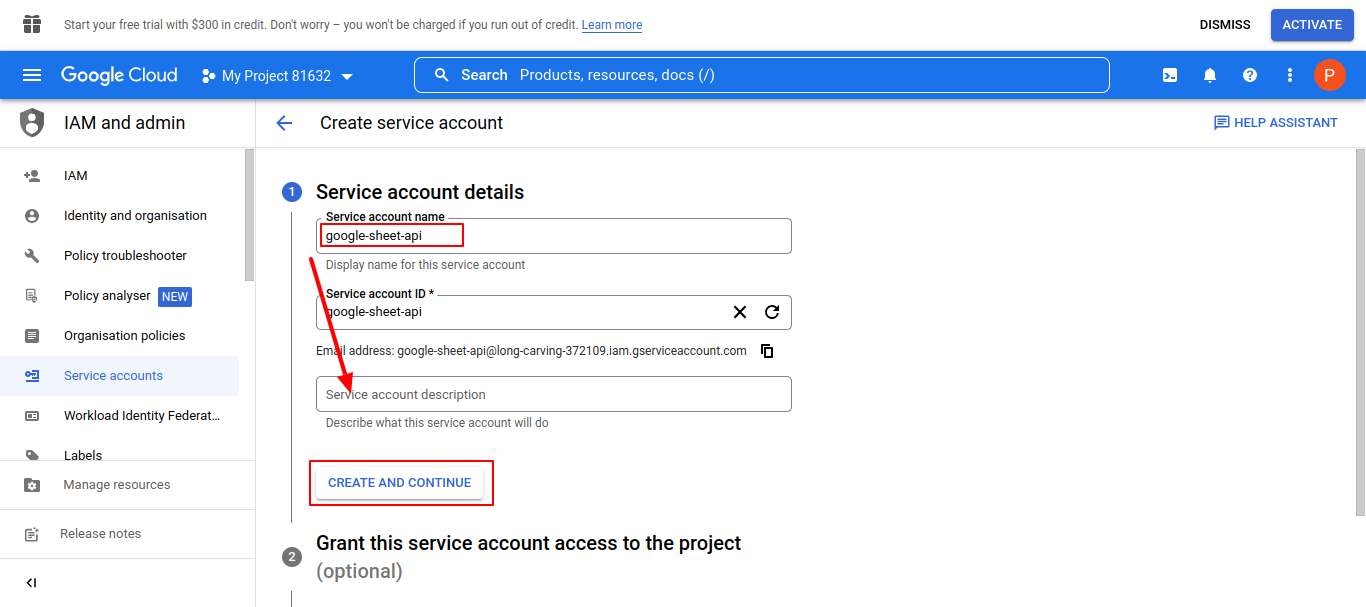
Select a service account (create a new one if necessary – Role > Project > Owner).
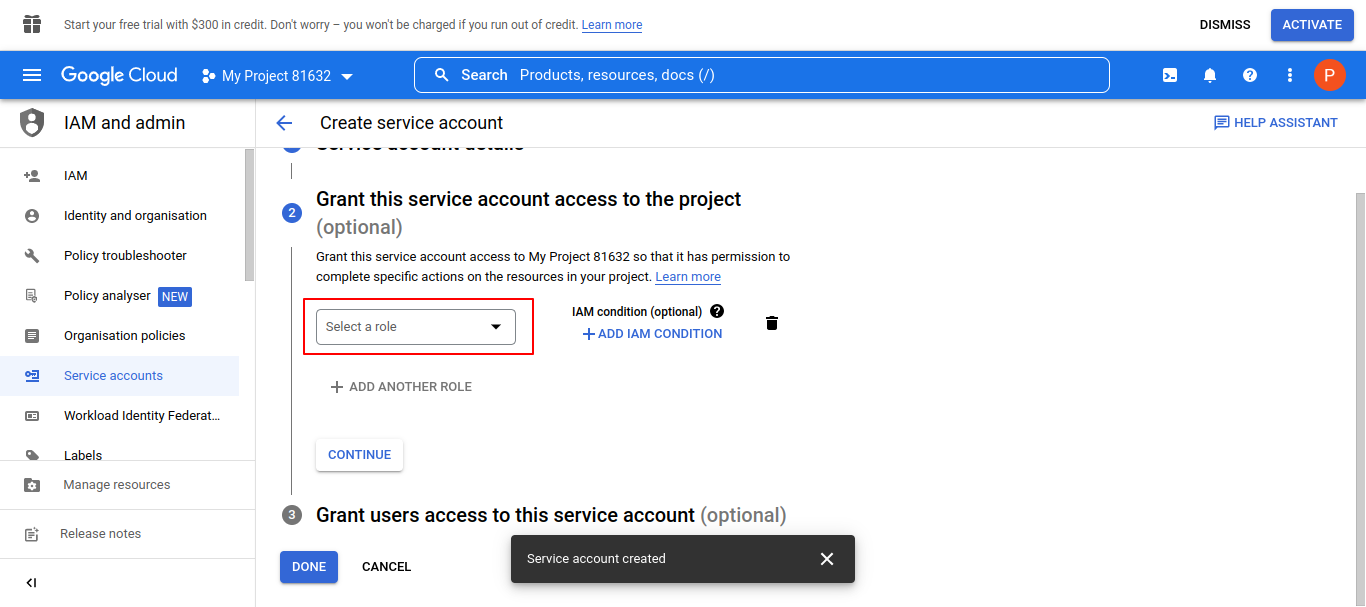

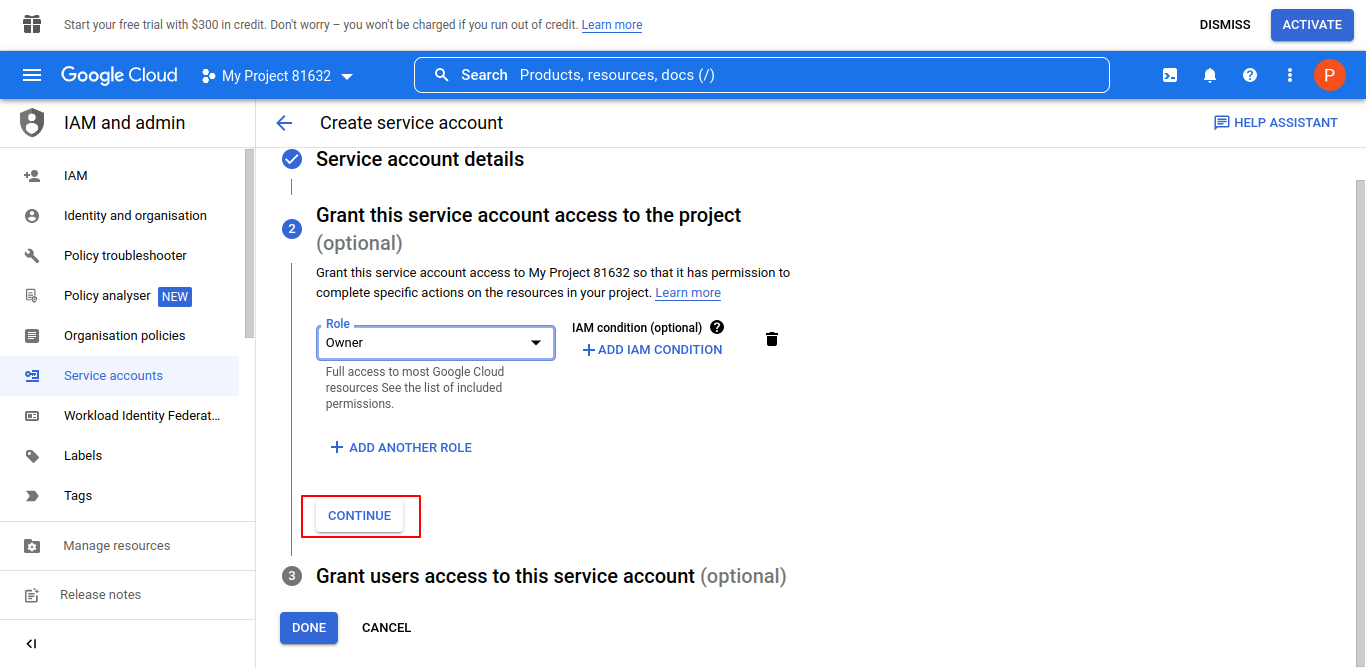
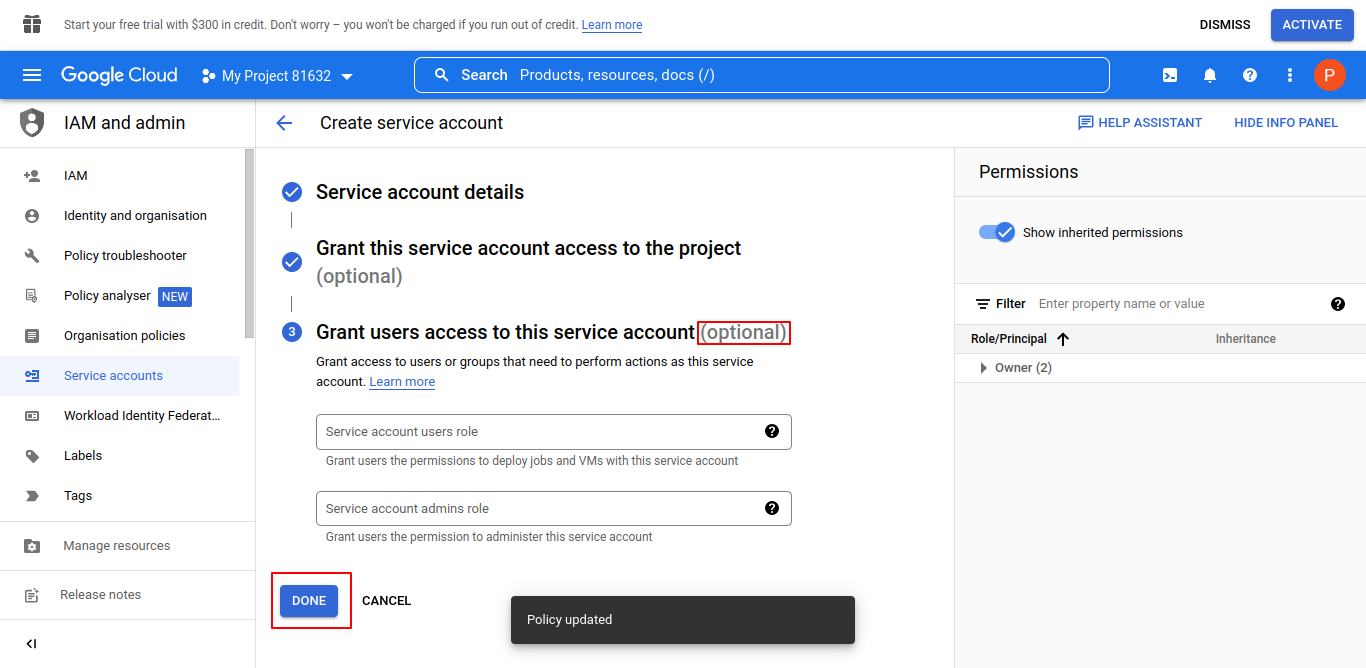
Grant users access to this service account is optional (if necessary).
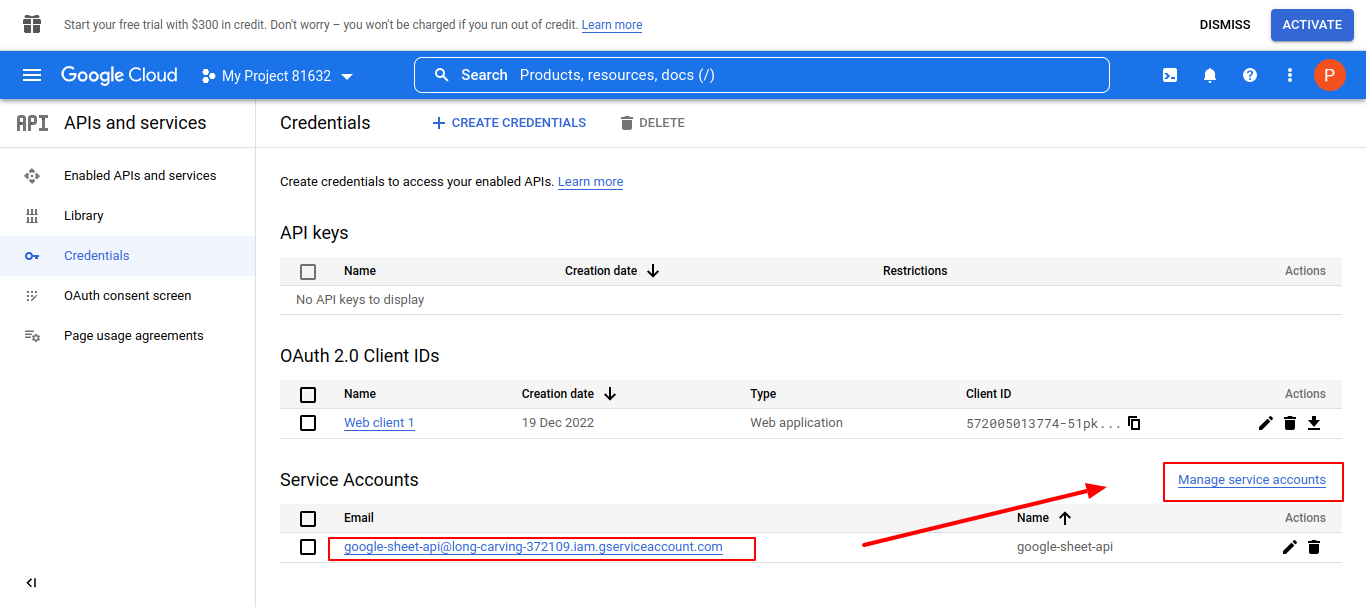
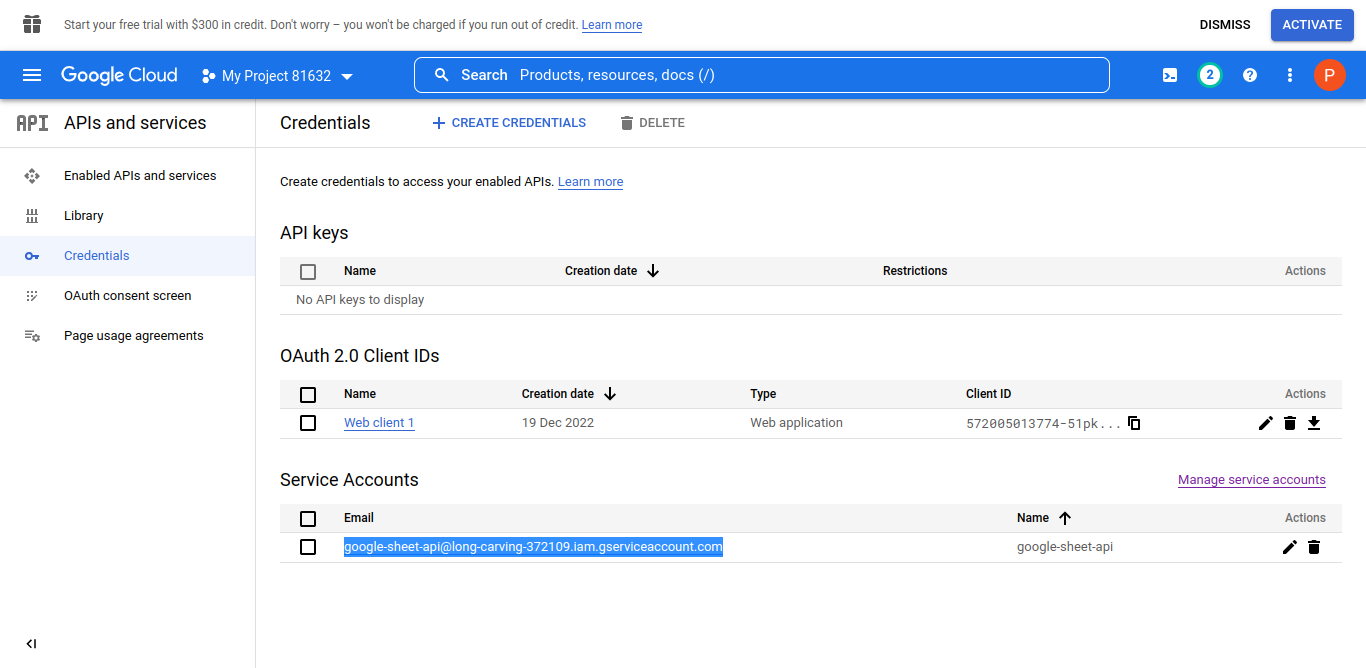
Copy your Service Account's Email and go to "Manage service accounts".
click on Actions and select "Manage Key".
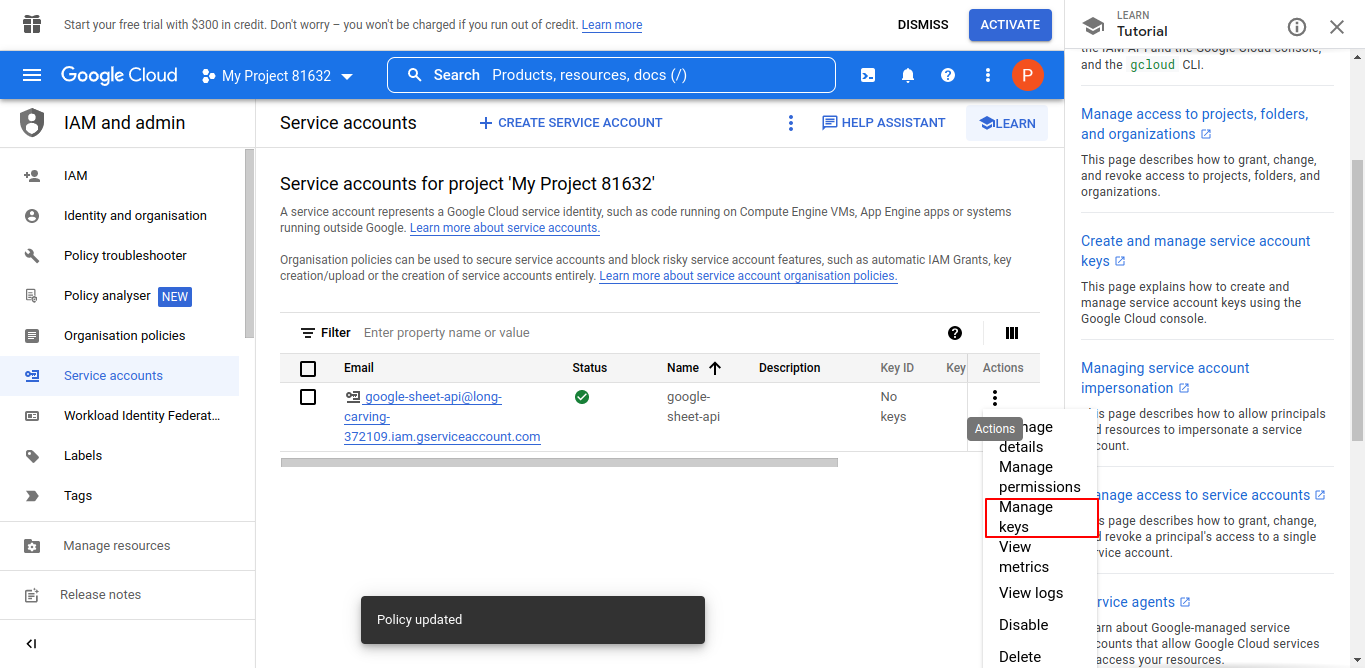
go to "Add Key" and "Crete New Key".
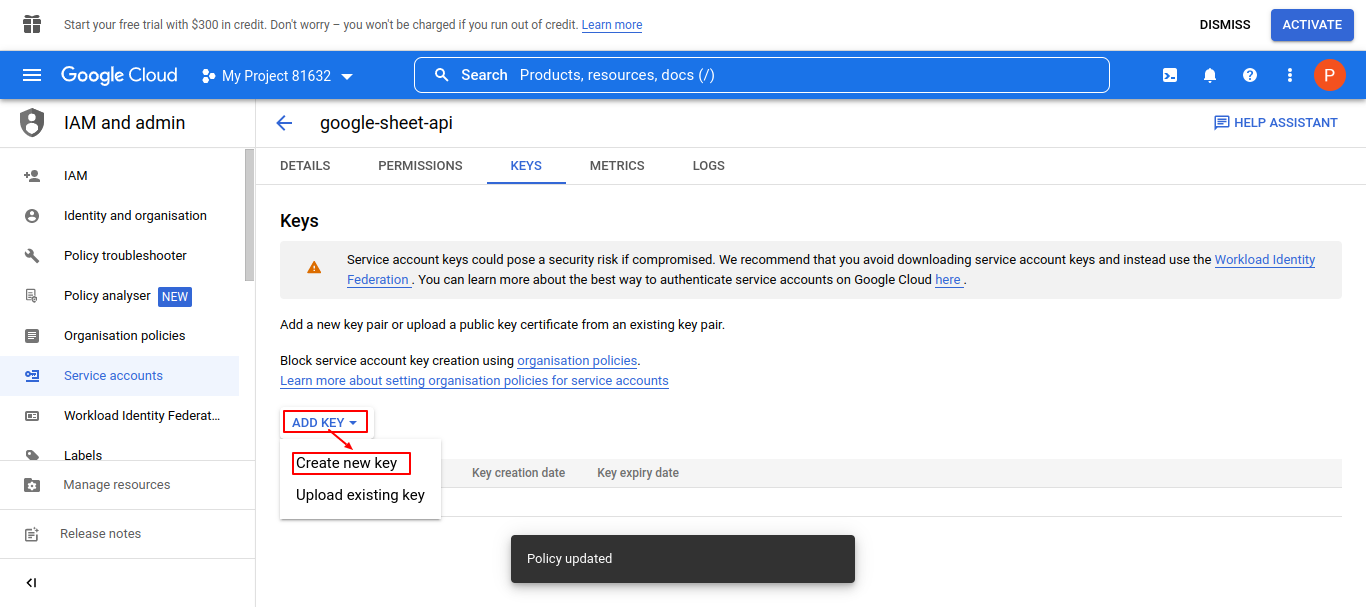
Key Type should be “JSON”.

Save the .json file under the project’s /storage/ folder as “credentials.json” (and upload to the server if applicable).
 Step 5: Enable required Google APIs
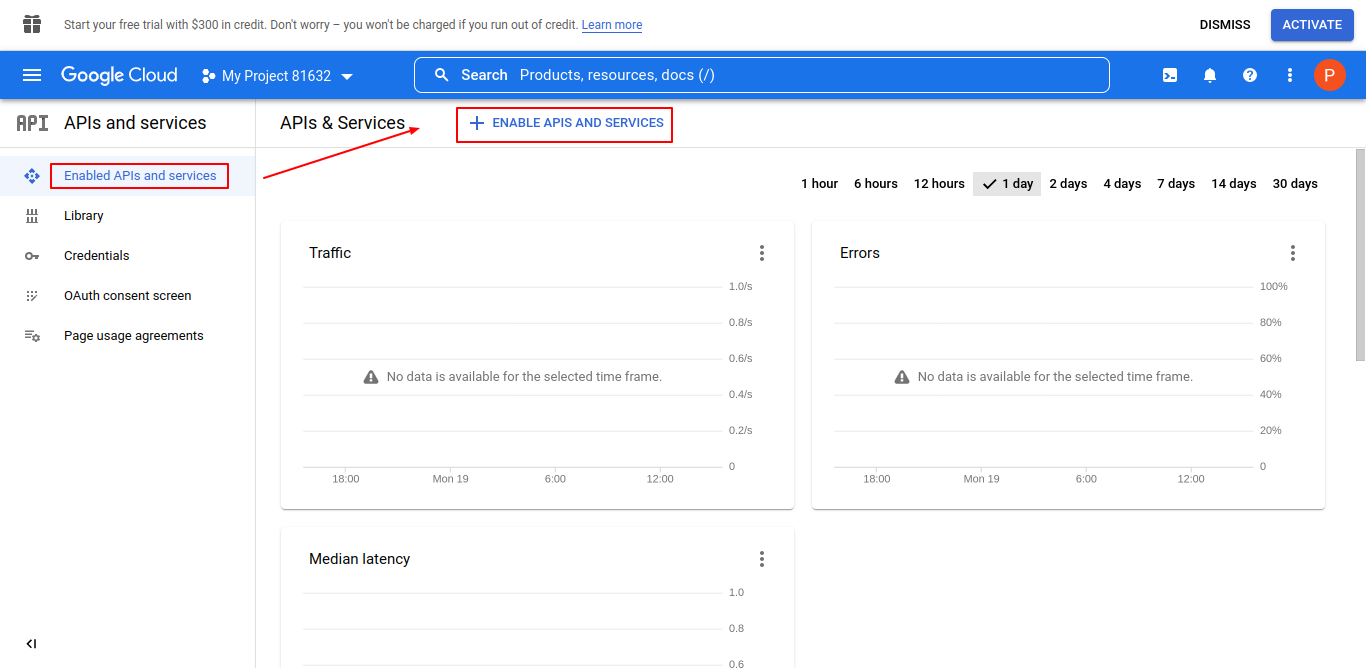
Return to the main Developer Dashboard https://developers.google.com/console.
Click "Enable APIs and Services".
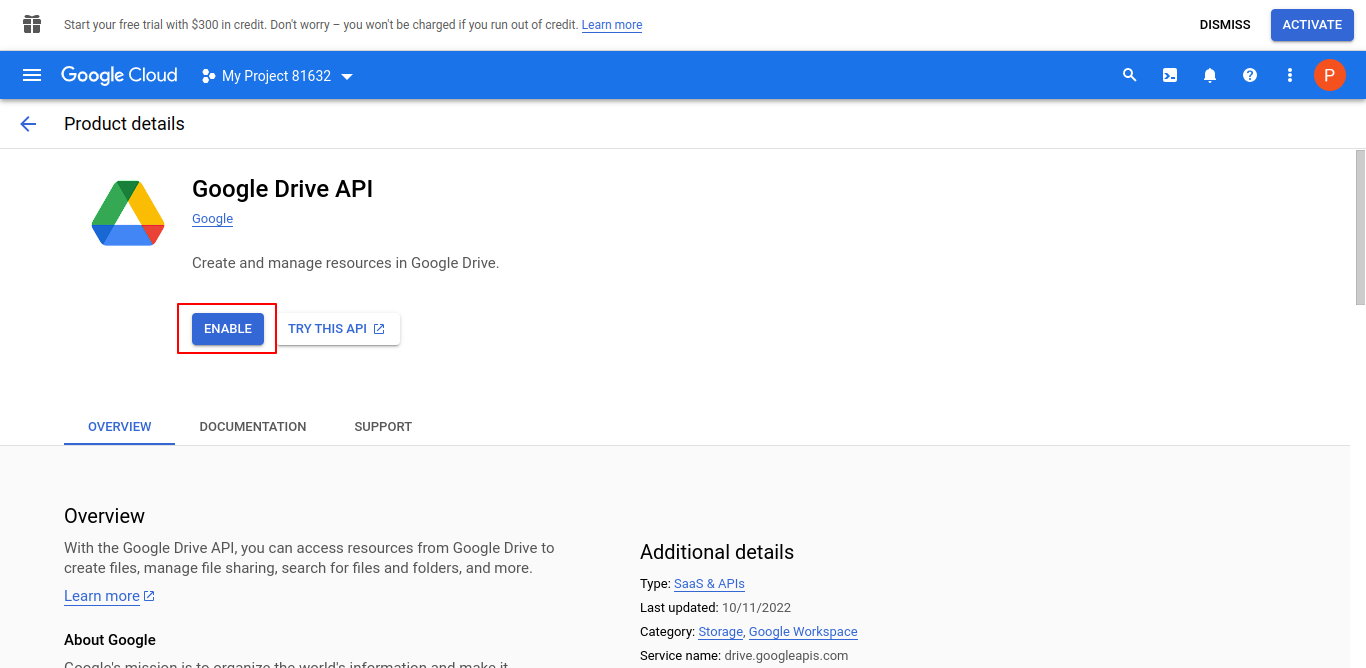
In the search box, type “drive api” and click on the “Google Drive API” option.

Click “ENABLE”.
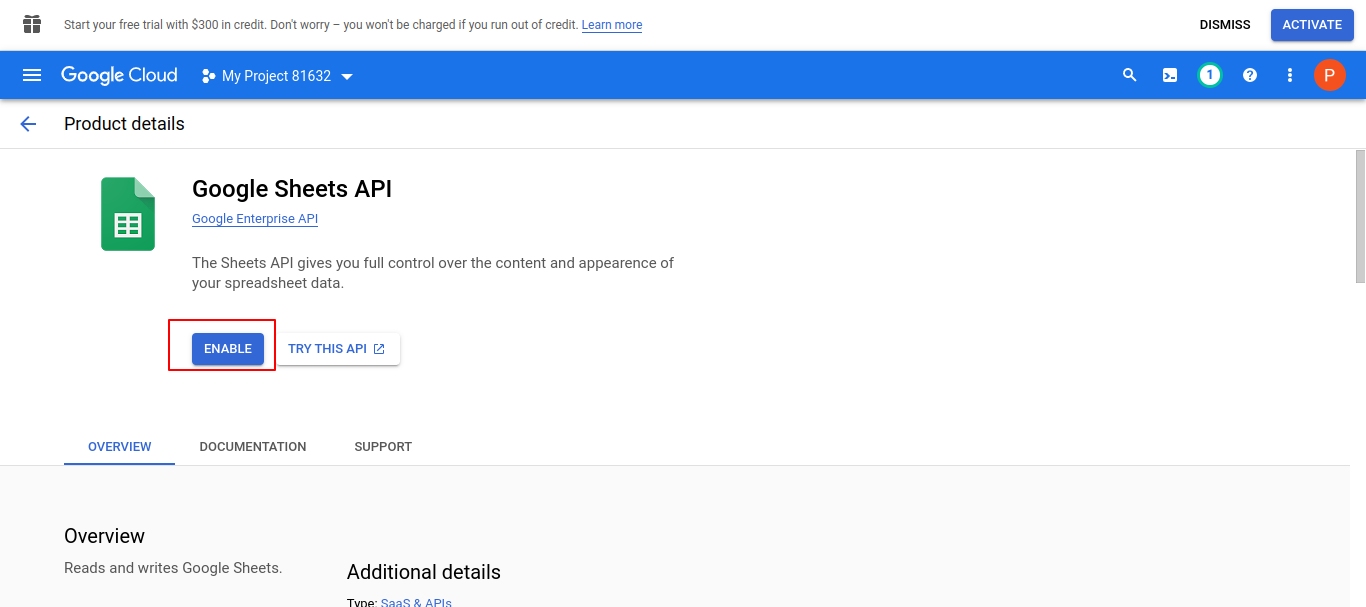
Search for “sheets api” and click on “Google Sheets API”.
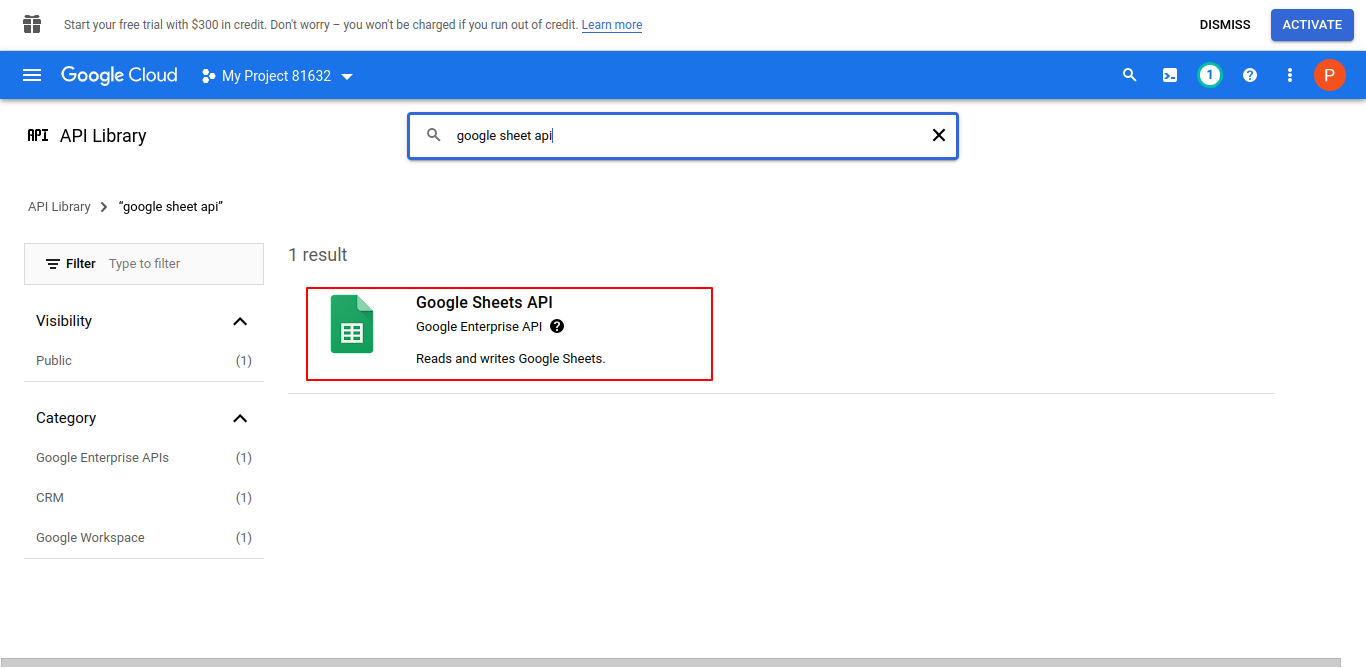
Click “ENABLE”.
 Step 6: Set up Google Sheet
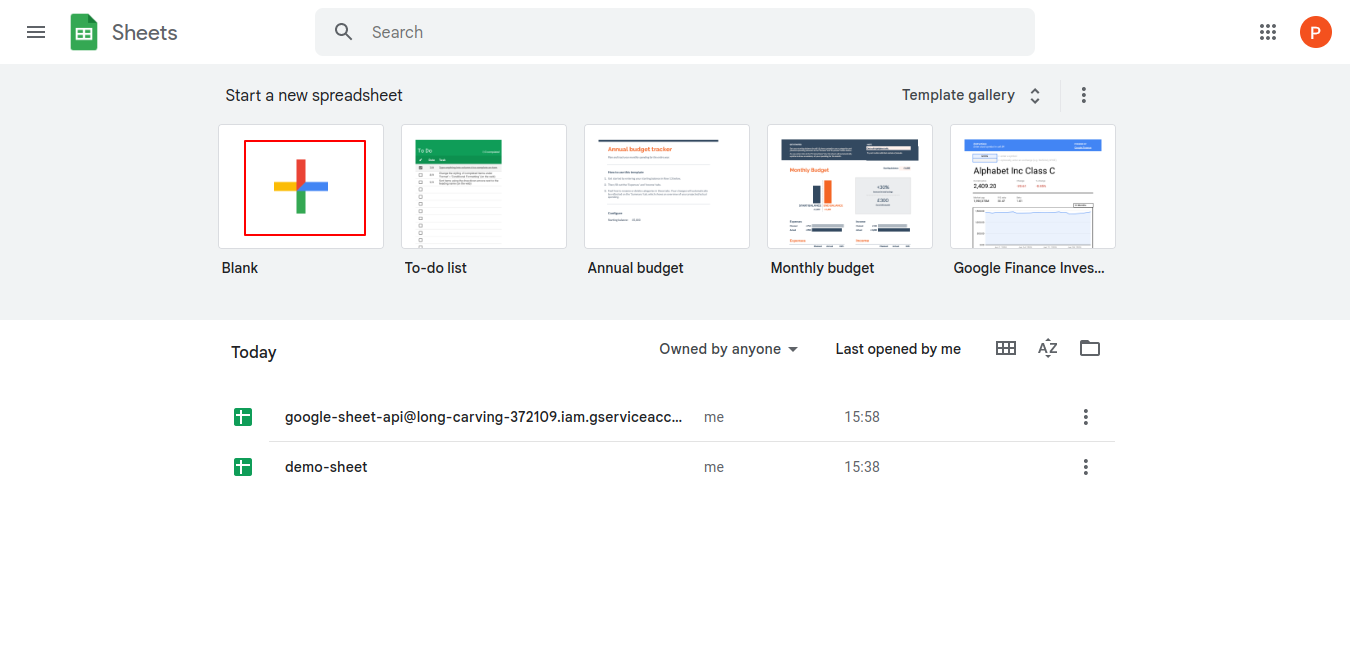
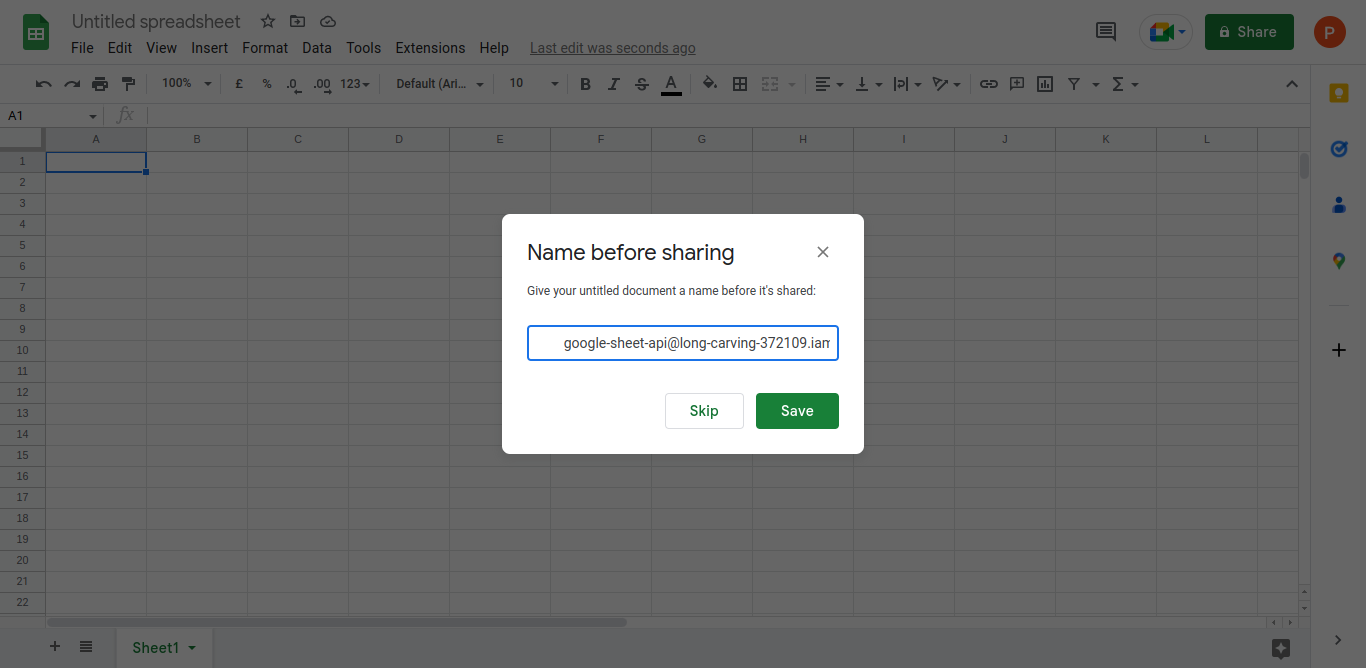
http://sheets.google.comOpen and create a new document.
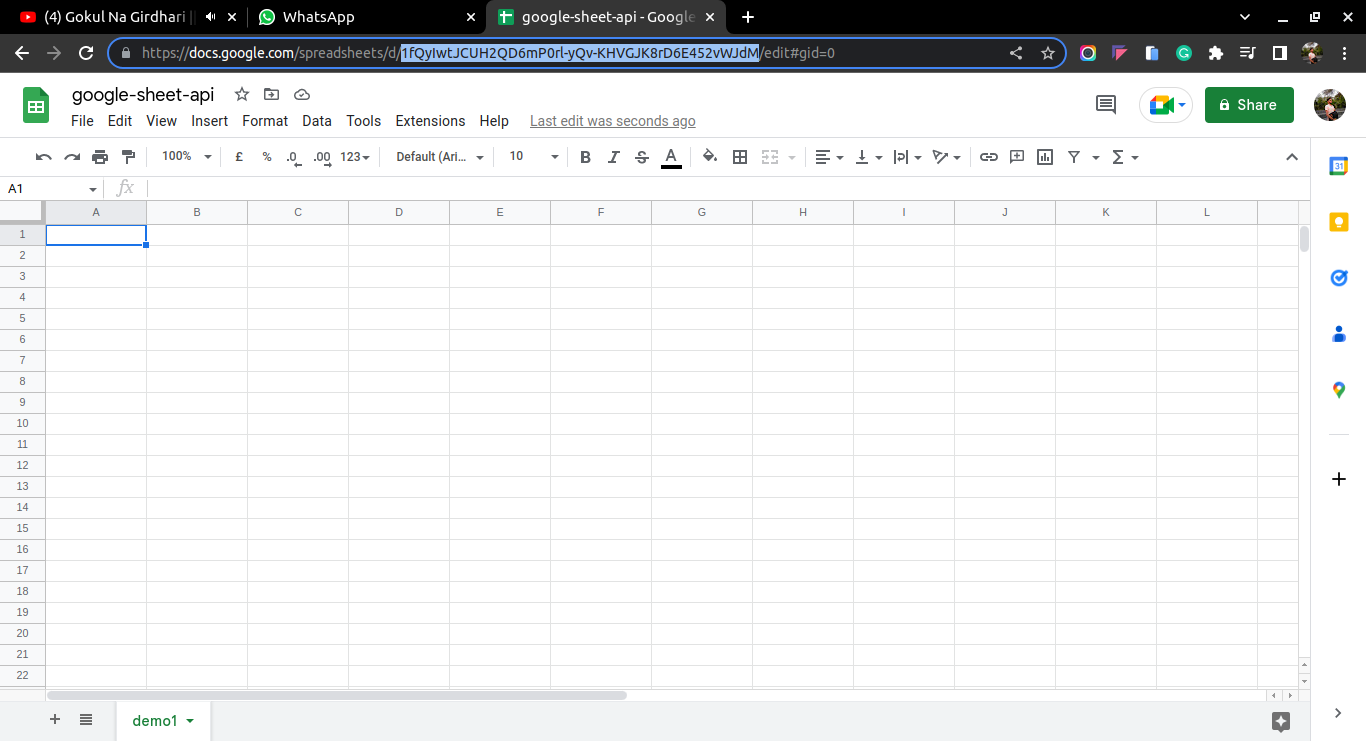
Give your new Sheet a name, Give the specific sheet (tab) a name, and Copy the ID of the document from the URL.
Copy your Service Account's Email.
Go back to your Sheet Click on “Share” Paste the email address for the service account and make sure to give it “edit” access.
 Step 7: Final configuration of Laravel Settings / Files
.env
Step 7: Final configuration of Laravel Settings / Files
.env
GOOGLE_SERVICE_ENABLED=true
GOOGLE_SERVICE_ACCOUNT_JSON_LOCATION=../storage/credentials.jsonStep 8: some change in google.php config/google.php
Add following code in scopes
/*

|----------------------------------------------------------------------------
| Google OAuth 2.0 access
|----------------------------------------------------------------------------
|
| Keys for OAuth 2.0 access, see the API console at
| https://developers.google.com/console
|
*/
'client_id' => env('GOOGLE_CLIENT_ID', ''),
'client_secret' => env('GOOGLE_CLIENT_SECRET', ''),
'redirect_uri' => env('GOOGLE_REDIRECT', ''),
'scopes' => [\Google\Service\Sheets::DRIVE, \Google\Service\Sheets::SPREADSHEETS],
'access_type' => 'online',
'approval_prompt' => 'auto',
pass the path of credentials.json in the file path
/*
|----------------------------------------------------------------------------
| Google service account
|----------------------------------------------------------------------------
|
| Set the credentials JSON's location to use assert credentials, otherwise
| app engine or compute engine will be used.
|
*/
'service' => [
    /*
    | Enable service account auth or not.
    */
    'enable' => env('GOOGLE_SERVICE_ENABLED', false),

    /*
     * Path to service account json file. You can also pass the credentials as an array
     * instead of a file path.
     */
    'file' => storage_path('credentials.json'),
],
Step 9: Create Route
<?php

use Illuminate\Support\Facades\Route;
use App\Http\Controllers\GoogleSpreadsheetController;

/*
|--------------------------------------------------------------------------
| Web Routes
|--------------------------------------------------------------------------
|
| Here is where you can register web routes for your application. These
| routes are loaded by the RouteServiceProvider within a group which
| contains the "web" middleware group. Now create something great!
|
*/

Route::get('addsheet-google-api', [GoogleSpreadsheetController::class, 'addsheet']);
Step 10: Create Controller
app/Http/Controllers/GoogleSpreadsheetController.php
<?php

namespace App\Http\Controllers;

use Illuminate\Http\Request;
use Sheets;

class GoogleSpreadsheetController extends Controller
{
    /**
     * Write code on Method
     *
     * @return response()
     */
    public function addsheet()
    {
        Sheets::spreadsheet('1_RmzVf7sGXZj1Y1U_DFbGHQzq6qOxJtmVmeS8XIgGOs')->addSheet('New_dexGroupe2');
        dd('New Sheet Added');
    }
}
Run Laravel App:
All the required steps have been done, now you have to type the given below command and hit enter to run the Laravel app:
php artisan serve
Now, Go to your web browser, type the given URL and view the app output:
http://localhost:8000/addsheet-google-api
I hope it can help you...