Laravel 9 Notification Message PopUp using Toastr Js Plugin Example
Apr 29, 2022 . Admin
Hi Dev,
In this Article, I will explain to you how to integrate toastr js plugin notification popup in laravel 9 from scratch. toaster plugin provides us with success message notification, info message notification, warning message notification, error message notification that way we can integrate notification with a good layout.
Laravel 9 has also provided a different package for notification but I use the toastr js plugin, that provides a nice layout and is so much pretty interesting.
We need to integrate one-time toastr jquery code for notification, then we can manage to utilize session. In this example, you can easily understand how to implement and use it.
In this article we create a route, ToastrController, and blade file let's implement and here we go jump to the full example follow my bellow step
So let's start to the example and follow to the my all step.
Step 1: Download LaravelLet us begin the tutorial by installing a new laravel application. if you have already created the project, then skip following step.
composer create-project laravel/laravel example-appStep 2: Create Route
Last step to create a route in web.php file and use this code.
routes/web.php
<?php

use Illuminate\Support\Facades\Route;
use App\Http\Controllers\ToastrController;

/*
|--------------------------------------------------------------------------
| Web Routes
|--------------------------------------------------------------------------
|
| Here is where you can register web routes for your application. These
| routes are loaded by the RouteServiceProvider within a group which
| contains the "web" middleware group. Now create something great!
|
*/

Route::get('home', [ToastrController::class, 'index'])->name('home');
Step 3: Create Controller
Next, now we need to integrate controller method, so if you haven't ToastrController then create new ToastrController and add code as bellow:
php artisan make:controller ToastrControllerapp/Http/Controllers/ToastrController.php
<?php

namespace App\Http\Controllers;

use App\Http\Requests;
use Illuminate\Http\Request;

class ToastrController extends Controller
{
    /**
     * Write code on Method
     *
     * @return response()
     */
    public function index()
    {
        session()->put('success','Item created successfully.');

        return view('toastr-check');
    }

}
Step 4: Create Blade File
Next, we need to create toastr-check.blade.php file for layout so create new toastr-check.blade.php file in resources directory.
resources/views/toastr-check.blade.php
<!DOCTYPE html>
<html>
<head>
    <title>Laravel 9 Notification Message PopUp Using Toastr Js Plugin Example</title>
    <link rel="stylesheet" type="text/css" href="//cdnjs.cloudflare.com/ajax/libs/toastr.js/latest/css/toastr.css">
    <link rel="stylesheet" href="https://maxcdn.bootstrapcdn.com/bootstrap/4.5.2/css/bootstrap.min.css">
    <script src="https://ajax.googleapis.com/ajax/libs/jquery/3.5.1/jquery.min.js"></script>
    <script src="//cdnjs.cloudflare.com/ajax/libs/toastr.js/latest/js/toastr.js"></script>
</head>
<body>
@include('toastr')
<div class="container mt-5">
    <div class="row">
        <div class="col-md-6 mx-auto">
            <div class="card">
                <div class="card-header">
                    <h5>Dashboard</h5>
                </div>
                <div class="card-body">
                    <h5>Welcome to the Mywebtuts.com</h5>
                </div>
            </div>
        </div>
    </div>
</div>
</body>
</html>
At the last step we need to create a toastr.blade.php file to display the toastr.js notification. this file we can include in our default file that way we don't require to write same code in all place.
Now we create toastr.blade.php file let's check bellow code.
resources/views/toastr.blade.php
<script src="//cdnjs.cloudflare.com/ajax/libs/toastr.js/latest/js/toastr.js"></script>
<script src="https://cdnjs.cloudflare.com/ajax/libs/toastr.js/2.1.4/toastr<.js"<"sha512-lbwH47l/tPXJYG9AcFNoJaTMhGvYWhVM9YI43CT+uteTRRaiLCui8snIgyAN8XWgNjNhCqlAUdzZptso6OCoFQ==" crossorigin="anonymous" referrerpolicy="no-referrer"></script>
<link rel="stylesheet" type="text/css" href="//cdnjs.cloudflare.com/ajax/libs/toastr.js/latest/css/toastr<>
<link rel="stylesheet" href="https://cdnjs.cloudflare.com/ajax/libs/toastr.js/2.1.4/toastr.css"<"sha512-oe8OpYjBaDWPt2VmSFR+qYOdnTjeV9QPLJUeqZyprDEQvQLJ9C5PCFclxwNuvb/GQgQngdCXzKSFltuHD3eCxA==" crossorigin="anonymous" referrerpolicy="no-referrer" /<;


<script>

  // success message popup notification
  @if(Session::has('success'))
        toastr.success("{{ Session::get('success') }}");
  @endif

  // info message popup notification
  @if(Session::has('info'))
        toastr.info("{{ Session::get('info') }}");
  @endif

  // warning message popup notification
  @if(Session::has('warning'))
        toastr.warning("{{ Session::get('warning') }}");
  @endif

  // error message popup notification
  @if(Session::has('error'))
        toastr.error("{{ Session::get('error') }}");
  @endif

</script>
Run Laravel App:
All steps have been done, now you have to type the given command and hit enter to run the laravel app:
php artisan serve
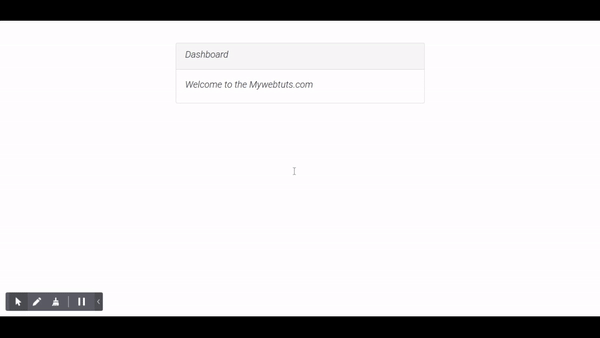
Now, you have to open web browser, type the given URL and view the app output:
http://localhost:8000/homeOutput:
It will help you...