Laravel - Column Chart Example using Google Charts API
May 14, 2021 . Admin
Hello Friends,
Now let's see example of how to column chart in laravel. This is a short guide on laravel if column chart. We will use how to use column chart using google charts api in laravel. Here you will learn how to use column chart in laravel. We will use how to use if column chart using google charts api in laravel. Let's get started with how to column chart use in laravel.
Here i will give you many example how you can check column chart using google charts api in laravel.
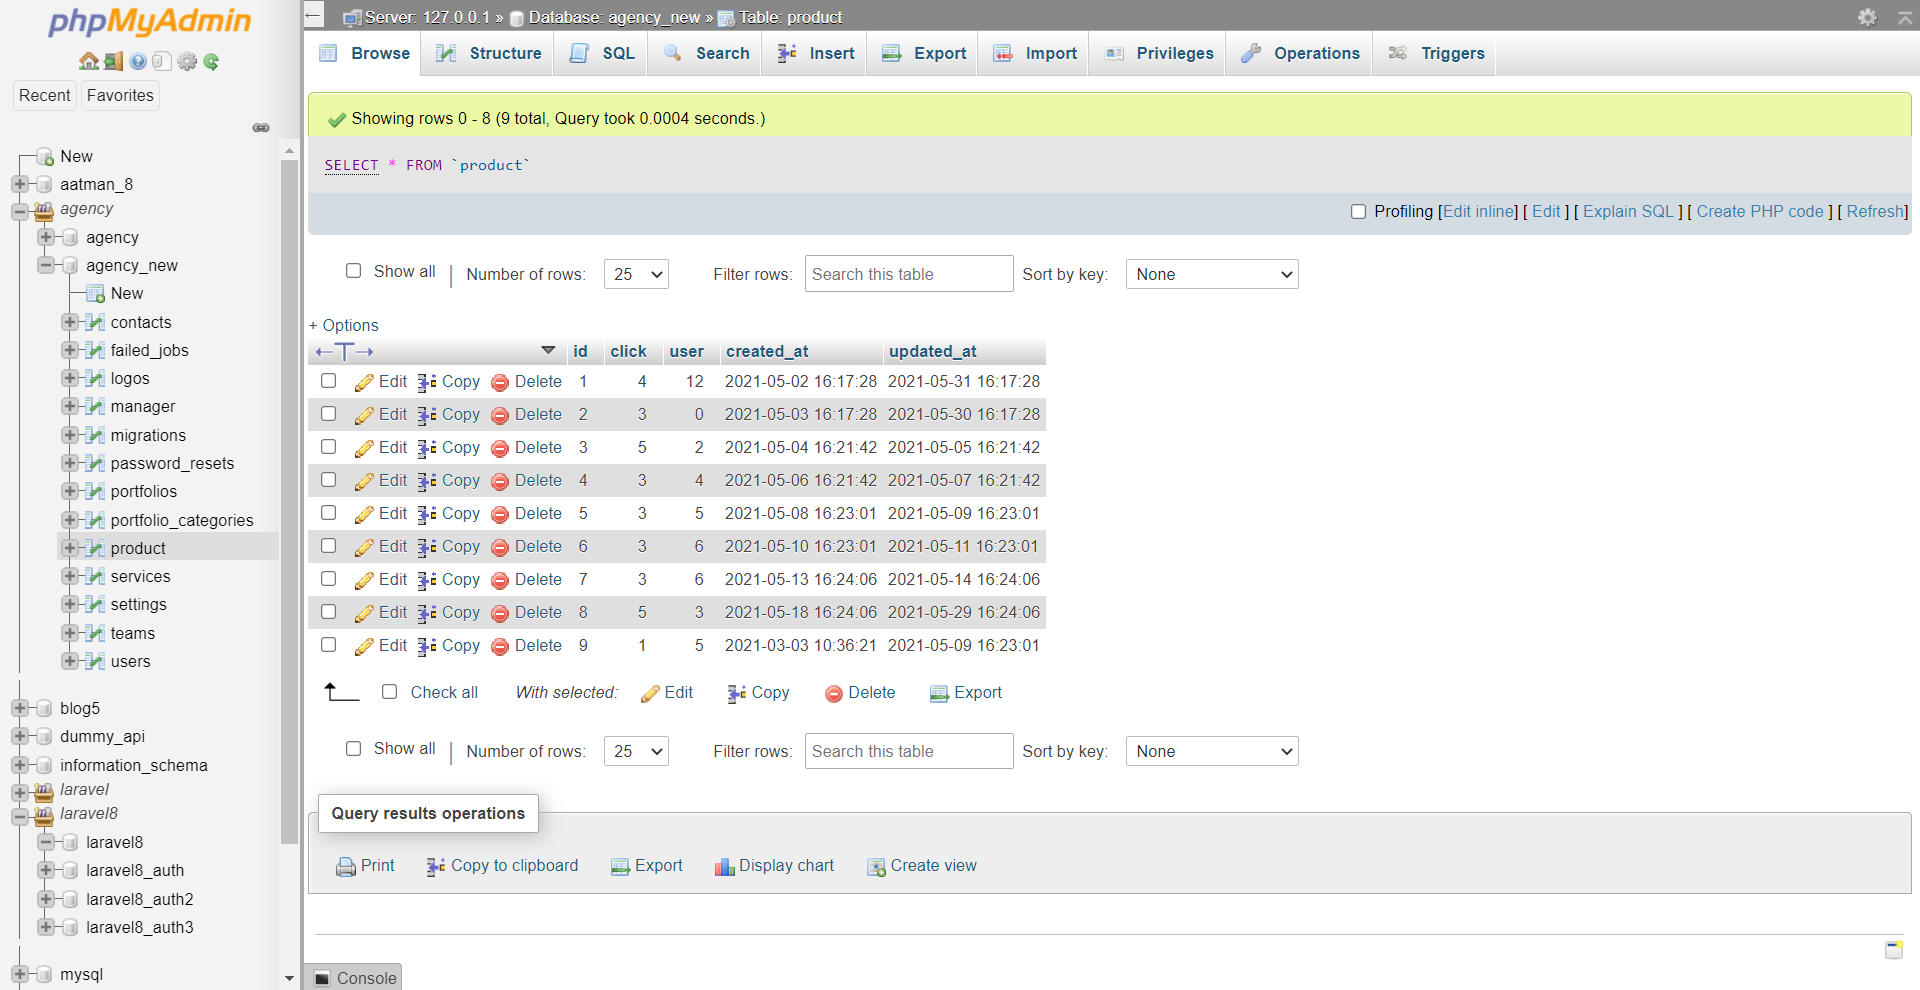
Step 1: Add Table and Datawe require to create new table "product" that way we will get data from this table, you can use your own table but this is for example. we have to create migration for product table using Laravel 5 php artisan command, so first fire bellow command:
php artisan make:migration create_product_table
After this command you will find one file in following path database/migrations and you have to put bellow code in your migration file for create product table.
<?php

	use Illuminate\Database\Migrations\Migration;
	use Illuminate\Database\Schema\Blueprint;
	use Illuminate\Support\Facades\Schema;

	class CreateProductTable extends Migration
	{
	    /**
	     * Run the migrations.
	     *
	     * @return void
	     */
	    public function up()
	    {
	        Schema::create('product', function (Blueprint $table) {
	            $table->increments('id');
	            $table->integer('click');
	            $table->integer('user');
	            $table->timestamps();
	        });
	    }

	    /**
	     * Reverse the migrations.
	     *
	     * @return void
	     */
	    public function down()
	    {
	        Schema::dropIfExists('product');
	    }
	}
?>
Ok, now you can add few records like as bellow :
 Stb00jep 2: Add Route
In this is step we need to add route for generate view. so open your app/Http/routes.php file and add following route.
Route::get('google-column-chart', 'ChartController@googleColumnChart');
Step 3: Create Controller
If you haven't ChartController then we should create new controller as ChartController in this path app/Http/Controllers/ChartController.php. Make sure you should have product table with some data. this controller will manage data and chart data and view file, so put bellow content in controller file:
app/Http/Controllers/ChartController.php
<?php

	namespace App\Http\Controllers;

	use App\Http\Requests;
	use Illuminate\Http\Request;
	use App\Http\Controllers\Controller;
	use App\Models\Product;
	use Carbon\Carbon;

	class ChartController extends Controller
	{
	    public function googleColumnChart()
	    {

	        $products = Product::get();

	        $result[] = ['Year','Click','User'];
	        foreach ($products as $key => $value) {
	            $year = Carbon::createFromFormat('Y-m-d H:i:s', $value->created_at)->format('Y');
	            $result[++$key] = [$year, (int)$value->click, (int)$value->user];
	        }


	        return view('google-column-chart')
	            ->with('product',json_encode($result));
	    }
	}
?>
Step 4: Create View File
In last step, we have to create view file "google-column-chart.blade.php" for generate view chart, so create google-column-chart file and put bellow code:
resources/view/google-column-chart.blade.php
<html>
<head>
<script type="text/javascript" src="https://www.gstatic.com/charts/loader.js"></script>
<script type="text/javascript">
var product = {{ $product ;}}
google.charts.load('current', {'packages':['corechart']});
google.charts.setOnLoadCallback(drawChart);
function drawChart() {
var data = google.visualization.arrayToDataTable(product);
var options = {
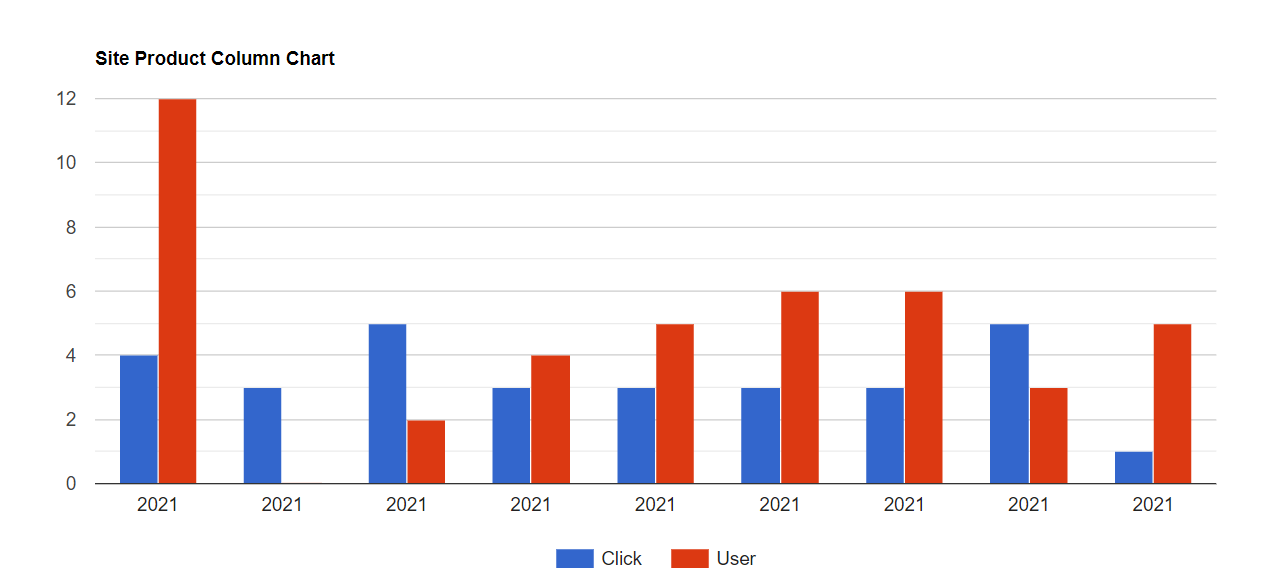
title: 'Site Product Column Chart',
curveType: 'function',
legend: { position: 'bottom' }
};
var chart = new google.visualization.ColumnChart(document.getElementById('columnchart'));
chart.draw(data, options);
}
</script>
</head>
<body>
<div id="columnchart" style="width: 900px; height: 500px"></div>
</body>
</html>
Output:
It will help you....