React Native Axios PUT Request Example
Jun 09, 2021 . Admin

Hi Guys,
Today, I will learn you how to put request using axios in react native we can show instance of react native axios https placed request,
You could easliy use react native axios put response.In this case import stylesheet namespace from axios and react-native-paper. React native affords the axios placed API for your networking wishes. axios put will appear familiar when you have used XMLHttpRequest or different networking APIs earlier than. you could discuss with MDN's manual on using axios put for additional data.
Here, i can give you complete example for definitely react native axios https put request as bellow.
Step 1 - Create projectIn the first step Run the following command for create project.
expo init MyWebtutsAppStep 2 - Install Package
In the step,I will install npm i react-native-paper package.
yarn add react-native-paper
After,I will install npm i yarn add axios.
yarn add axiosStep 3 - App.js
In this step, You will open App.js file and put the code.
import React, { Component } from "react";
import { Text, View,StyleSheet,Button} from 'react-native';
import { Provider ,Appbar,Card,IconButton,Avatar,TextInput} from 'react-native-paper';
import axios from 'axios';

const MyWebtutsComponent = () => {

  const [isLoading, setLoading] = React.useState(true);

  const [firstName, setFirstNameText] = React.useState('Field');

  const [lastName, setLastNameText] = React.useState('Mark');

  const [email, setEmailText] = React.useState('fieldmark@gmail.com');

  const handleClick = async () => {
    axios.put('https://api.mywebtuts.com/api/users/13', { first_name:firstName,last_name:lastName,email:email })
        .then(response => console.log(response.data));

  };

  const _goBack = () => console.log('Went back');

  const _handleSearch = () => console.log('Searching');

  const _handleMore = () => console.log('Shown more');

  return (
    <Provider>
    <Appbar.Header style={styles.header}>
      <Appbar.BackAction onPress={_goBack} />
      <Appbar.Content title="User" subtitle="Subtitle" />
      <Appbar.Action icon="magnify" onPress={_handleSearch} />
      <Appbar.Action icon="dots-vertical" onPress={_handleMore} />
    </Appbar.Header>
      <View style={styles.mainbox}>
           <Text style={styles.labelText}>Fist Name:</Text>
          <TextInput
            style={styles.inputText}
            placeholder="Enter Fist Name"
            onChangeText={firstName => setFirstNameText(firstName)}
            defaultValue={firstName}
          />
           <Text style={styles.labelText}>Last Name:</Text>
          <TextInput
            style={styles.inputText}
            placeholder="Enter Last Name"
            onChangeText={lastName => setLastNameText(lastName)}
            defaultValue={lastName}
          />
          <Text style={styles.labelText}>Email:</Text>
          <TextInput
            style={styles.inputText}
            placeholder="Enter Email"
            onChangeText={email => setEmailText(email)}
            defaultValue={email}
          />
           <Button
            title="Submit"
            onPress={() => handleClick(this)}
            style={styles.buttonstyle}
            color="#6200EE"
          />
      </View>
    </Provider>
  );
};


const styles = StyleSheet.create({
  title:{
    margin: 10,
    fontSize: 15,
    fontSize: 35
  },
  mainbox:{
    textAlign:'center',
    margin: 15,
    justifyContent: 'space-between',
  },
  cardbox:{
    margin: 10,
  },
    labelText:{
    marginTop: 10,
    marginBottom: 5,
  },
  inputText:{
    height:45,
    marginBottom: 15,
  },
  buttonstyle:{
    marginTop: 10,
  },
});
export default MyWebtutsComponent;
Step 4 - Run project
In the last step run your project using bellow command.
npm startOutput
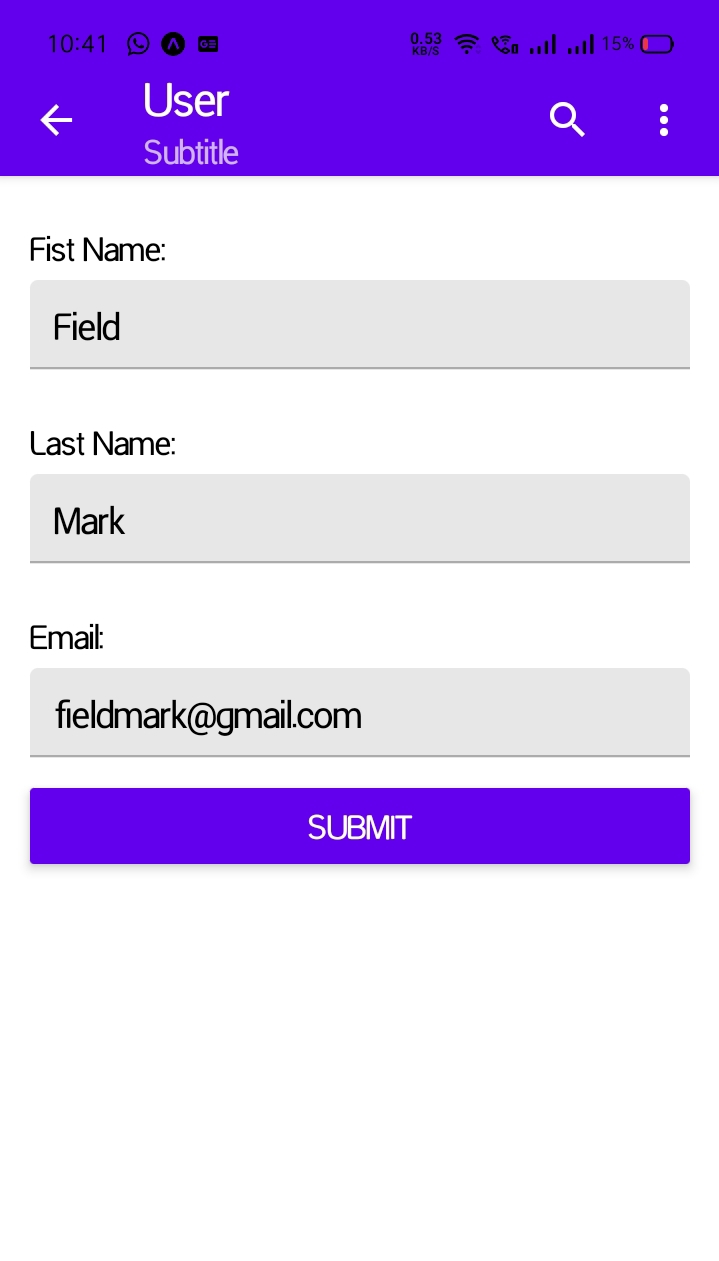
It will help you...