How to Delete Data Firebase In Expo React Native?
Dec 19, 2022 . Admin
This post will give you an example of how to delete data to firebase realtime database. I explained simply about how to remove data in firebase. we will help you to give example of expo delete firebase. you'll learn how to remove data in firebase. follow bellow step for expo firebase firestore example.
Firebase is a Backend-as-a-Service (Baas). It provides developers with various tools and services to help them develop quality apps, grows their user base, and earn profit. It is built on Google’s infrastructure.
Firebase is categorized as a NoSQL database program, which stores data in JSON-like documents.
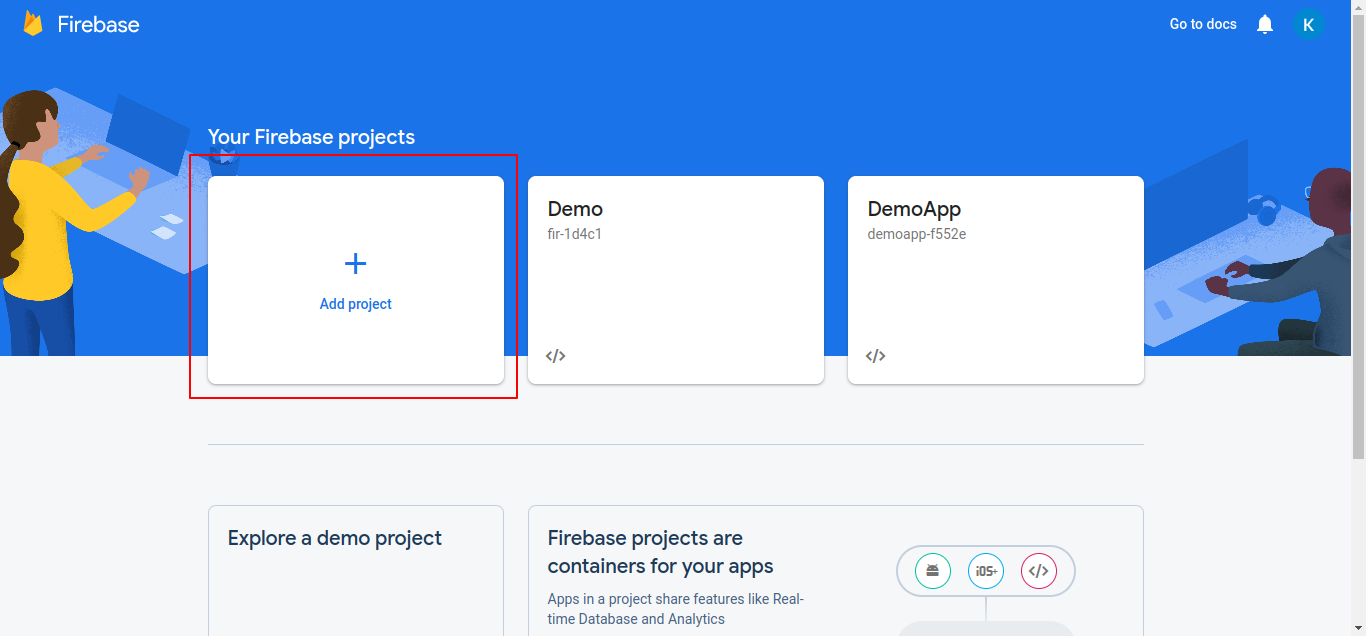
Step 1: Firebase Get Start Step 2: Firebase Create Project
The second step, you can click to add a project box. you can display this image.
Step 2: Firebase Create Project
The second step, you can click to add a project box. you can display this image.
 In this step.you can add to project name add to the input box. then your database creates to firebase database.
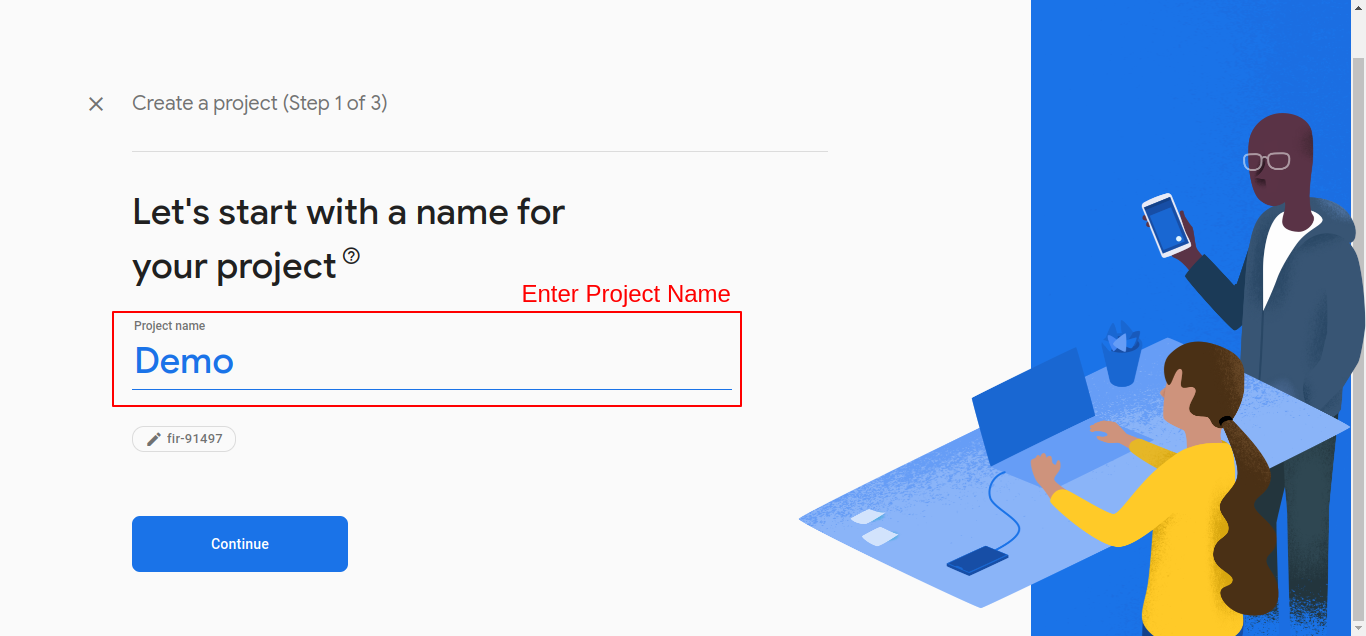 Click the “Create project” button, and you should be redirected to the dashboard screen. You should see your newly-created project on that dashboard.
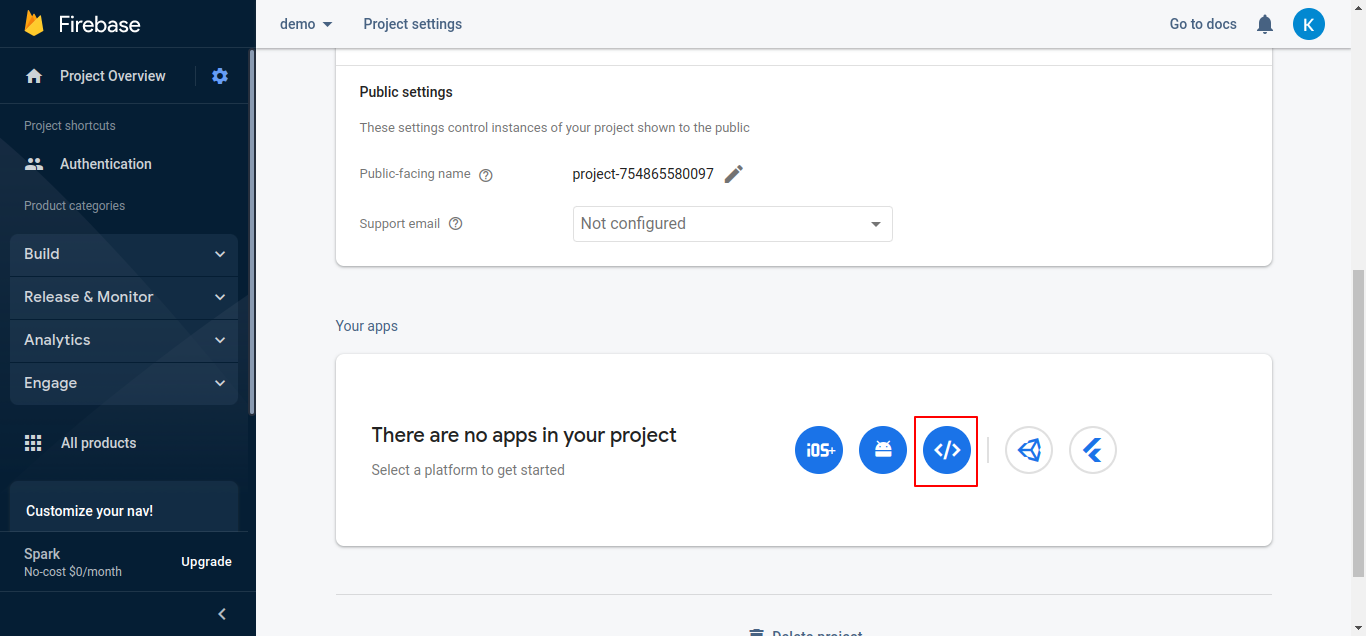
Step 3: Firebase Project Setting
The third step, you can firebase setting click to then open drop down. you can click to project setting.
Click the “Create project” button, and you should be redirected to the dashboard screen. You should see your newly-created project on that dashboard.
Step 3: Firebase Project Setting
The third step, you can firebase setting click to then open drop down. you can click to project setting.
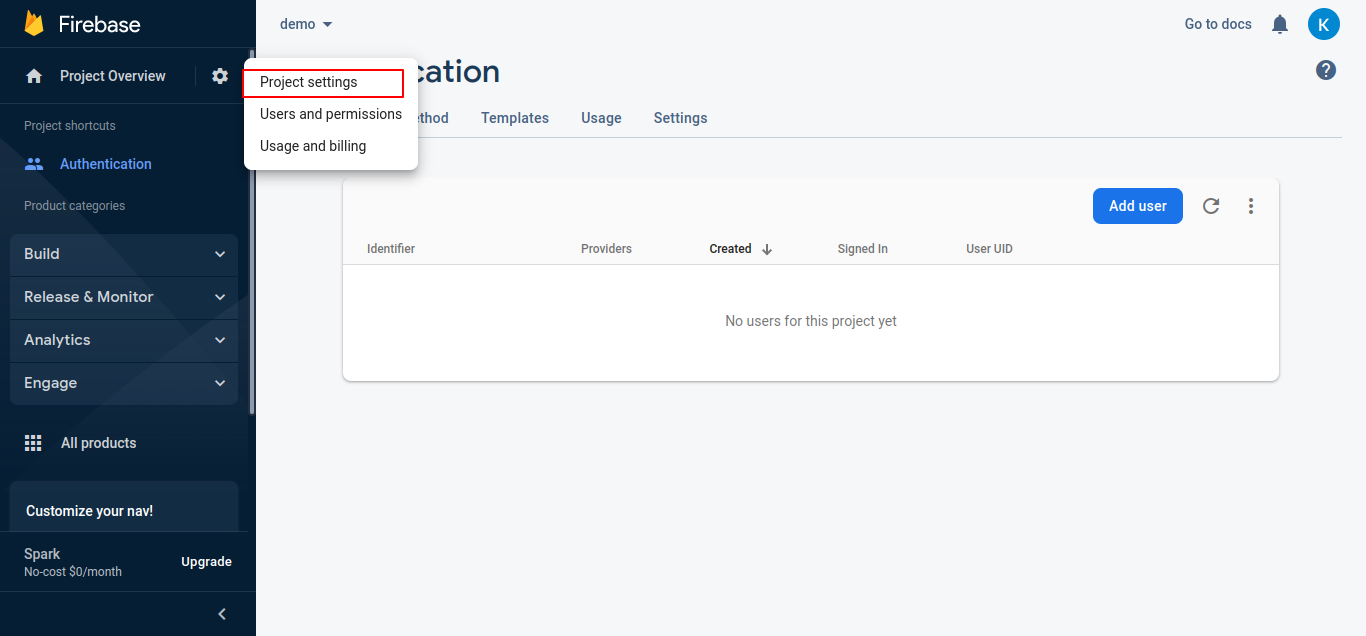 you can click to IMG red square part.
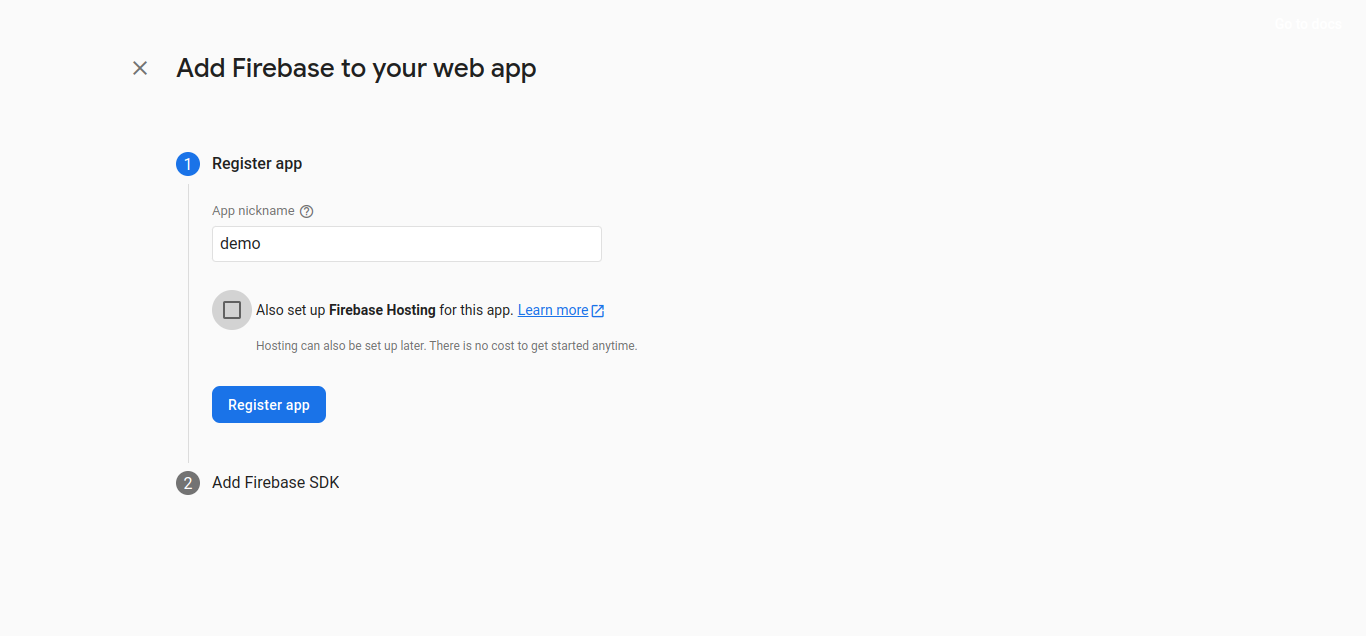
 Step 4: App Name
In this step, you can add to the project nickname.
Step 4: App Name
In this step, you can add to the project nickname.
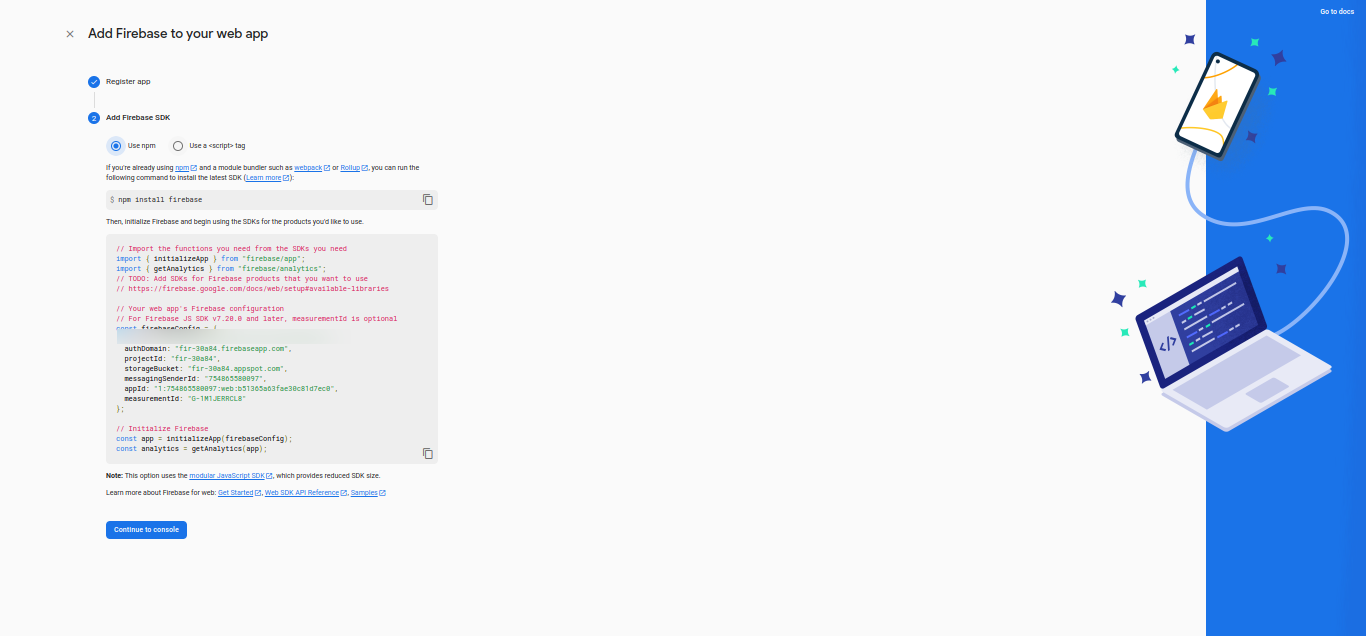
 you can create to the config file in your project, then add to this code your config file
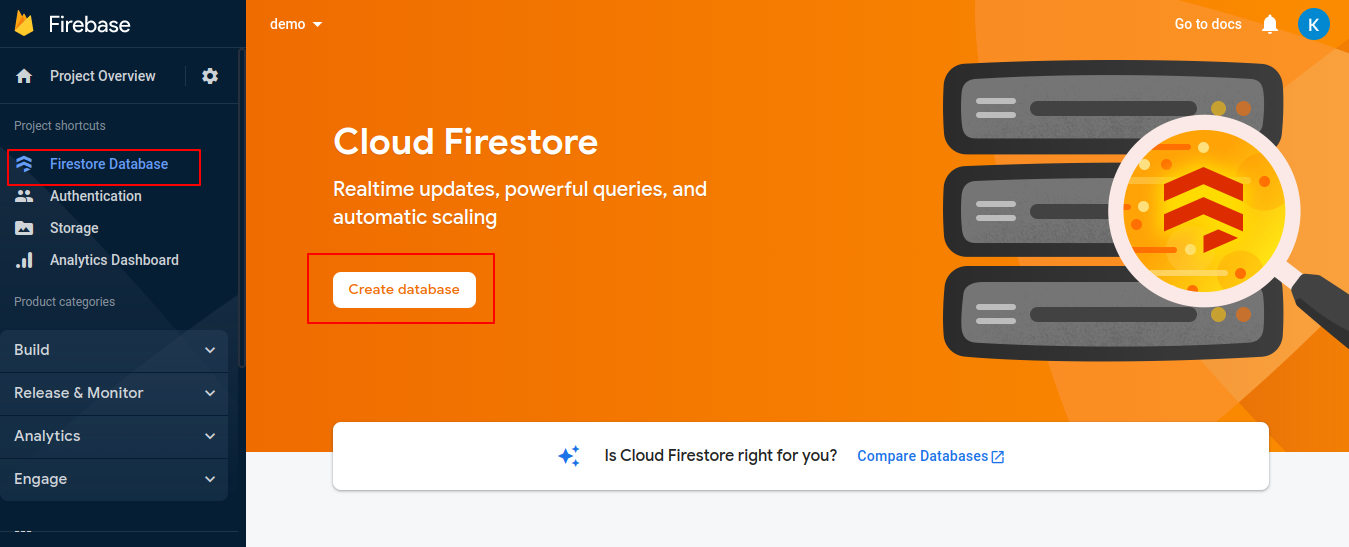
 Step 5: Firestore Database Start
In this step, you can start to firestore database. you can select drop-down mumbai.
Step 5: Firestore Database Start
In this step, you can start to firestore database. you can select drop-down mumbai.
 Step 6: Download Project
In the first step run the following command to create a project.
expo init ExampleAppStep 7: Install Firebase in Expo
In the first step run the following command to install firebase a project.
npm install firebaseStep 8: Create Config File
In the first step, you can create to config file for your project.
// Import the functions you need from the SDKs you need
import firebase from 'firebase/compat/app';

import firestore from "firebase/compat/firestore";
// TODO: Add SDKs for Firebase products that you want to use
// https://firebase.google.com/docs/web/setup#available-libraries

// Your web app's Firebase configuration
// For Firebase JS SDK v7.20.0 and later, measurementId is optional
const firebaseConfig = {
    apiKey: "Your Api Key Add",
    authDomain: "fir-66ba7.firebaseapp.com",
    projectId: "fir-66ba7",
    storageBucket: "fir-66ba7.appspot.com",
    messagingSenderId: "620063574511",
    appId: "1:620063574511:web:838d671a60d7d916530e1a",
    measurementId: "G-FKH0ZZY2Z2"
};

if(!firebase.apps.length){
  firebase.initializeApp(firebaseConfig);
}

export {firebase};
Step 9: App.js
In this step, You will open the App.js file and put the code.
import { FlatList, StyleSheet, Text, View } from 'react-native'
import React from 'react'
import { firebase } from './config';

const App = () => {

  const [user, setUser] = React.useState([]);

  React.useEffect(() => {
    getData();
  }, [])

  const getData = () => {
    firebase.firestore()
      .collection('users')
      .onSnapshot(querySnapshot => {
        const userlist = [];
        querySnapshot.forEach(documentShot => {

          userlist.push({
            ...documentShot.data(),
            keys:documentShot.id,
          })
          setUser(userlist);
        })
      })

  }

  const deleteItem = (item) => {
    firebase.firestore()
      .collection('users')
      .doc(item.keys) // doc id to record
      .delete()
      .then(() => {
        console.log('delete User');
      })
  }

  const renderItem = ({ item }) => {
    return (
      <View style={{
        backgroundColor: 'red',
        margin: 5,
        padding: 10,
        flexDirection: 'row',
        justifyContent: 'space-between'
      }}>
        <Text style={{ color: 'white' }}>{item.userName}</Text>
        <TouchableOpacity
          onPress={() => deleteItem(item)}
        >
          <Text>Delete</Text>
        </TouchableOpacity>
      </View>
    )
  }

  return (
    <View style={{
      marginTop: 50
    }}>
      <FlatList
        data={user}
        renderItem={renderItem}
        keyExtractor={item => item.id}
      >
      </FlatList>
    </View>
  )
}

export default App
Step 10: Run Project
In the last step run your project using the below command.
expo start
You can QR code scan in Expo Go Application on mobile.
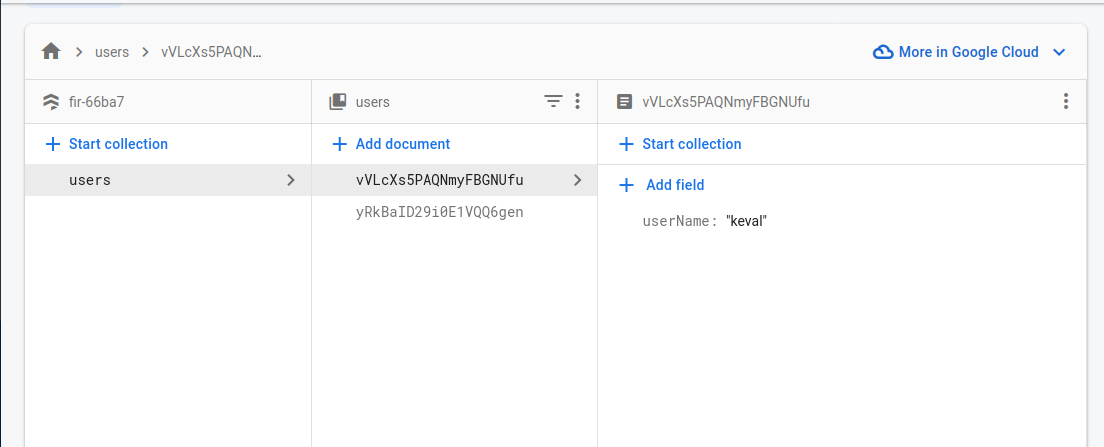
Firebase Databse User Table:
Output:
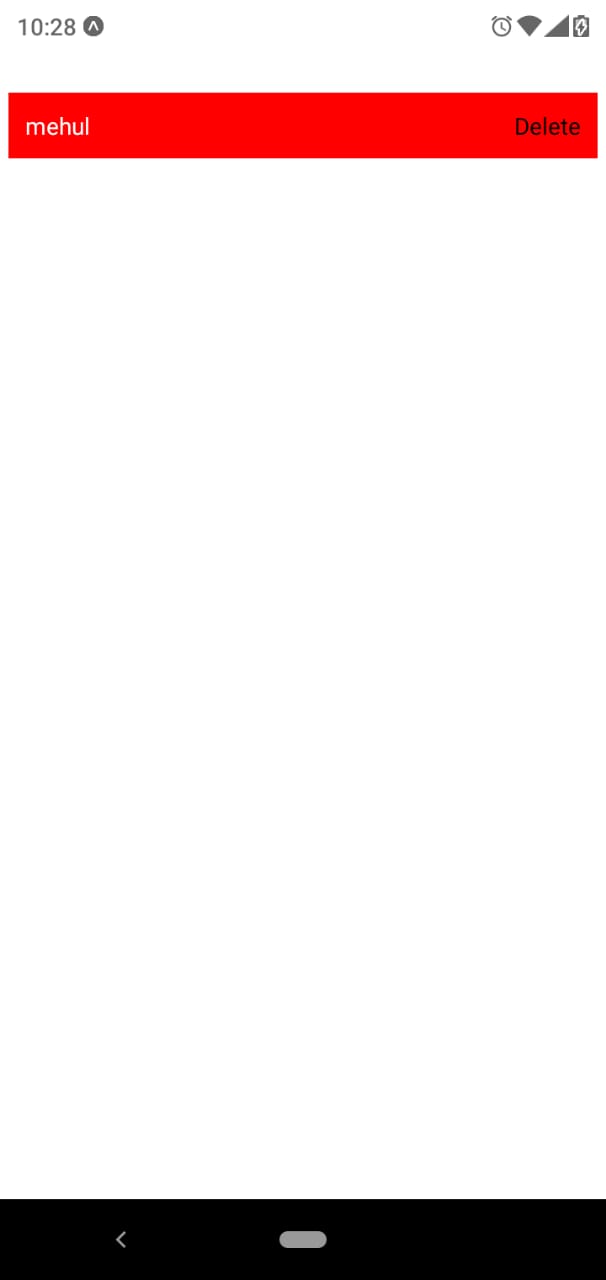
It will help you...