React Native App Intro Slider Example
Oct 11, 2022 . Admin

This post will give you example of react native app intro slider expo. This post will give you simple example of app intro slider example. I’m going to show you about react native app intro slider custom next button. I would like to share with you react native app intro slider functional component.
In this example,We will create slider in react native.you can easy to silder in mobile.you can easy to install library in react native mobile app.below's this example.
Step 1: Download ProjectIn the first step run the following command to create a project.
expo init ExampleAppStep 2: Install Library
In the step install react-native-app-intro-slider in your terminal.
npm i react-native-app-intro-sliderStep 3: Install Icon Library
In the step install react-native-vector-icons in your terminal.
npm i react-native-vector-iconsStep 4: App.js
In this step, You will open the App.js file and put the code.
import React from 'react';
import {Text, StyleSheet, View, Image} from 'react-native';
import AppIntroSlider from 'react-native-app-intro-slider';
import Icon from 'react-native-vector-icons/Ionicons';

const App = () => {
  const slides = [
  {
    key: 1,
    title: 'Title 1',
    text: 'Description.\nSay something cool',
    image: require('./assets/image1.png'),
    backgroundColor: '#59b2ab',
  },
  {
    key: 2,
    title: 'Title 2',
    text: 'Other cool stuff',
    image: require('./assets/image2.png'),
    backgroundColor: '#febe29',
  },
  {
    key: 3,
    title: 'Rocket guy',
    text: 'I\'m already out of descriptions\n\nLorem ipsum bla bla bla',
    image: require('./assets/image3.png'),
    backgroundColor: '#22bcb5',
  }
];

 const renderItem = ({ item }) => {
    return (
      <View style={styles.slide}>
        <Image source={item.image} style={styles.slideImage}/>
      </View>
    );
  }

  const renderNextButton = () => {
    return (
      <View style={styles.buttonCircle}>
        <Icon
          name="arrow-forward-circle-outline"
          color="white"
          size={40}
        />
      </View>
    );
  };

  const renderDoneButton = () => {
    return (
      <View style={styles.buttonCircle}>
        <Icon
          name="checkmark-circle-outline"
          color="rgba(255, 255, 255, .9)"
          size={40}
        />
      </View>
    );
  };

  return (
    <AppIntroSlider
        data={slides}
        renderDoneButton={renderDoneButton}
        renderNextButton={renderNextButton}
        renderItem = {renderItem}
      />
  );
};

const styles = StyleSheet.create({
 slideImage:{
  width:'100%',
  height:'100%',
  resizeMode: 'cover'
 }
});

export default App;
Step 5: Run Project
In the last step run your project using the below command.
expo start
You can QR code scan in Expo Go Application on mobile.
Output:
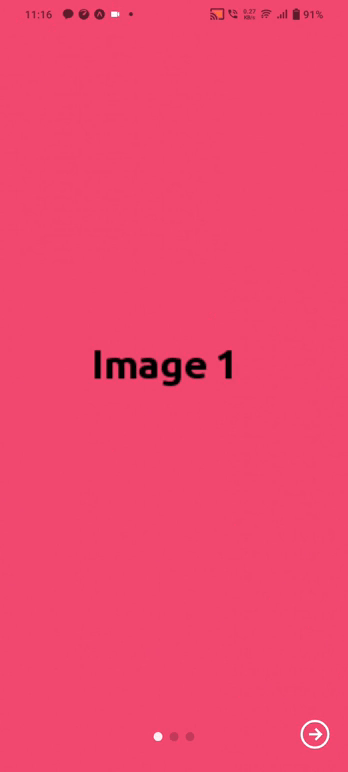
It will help you...