React Native Table Component Example
May 14, 2021 . Admin

Hi Guys,
Today, I will learn you how to create table component text in react native. You can easily create table component text in react native. First i will import stylesheet namespace from react-native-paper, after I will make paper Avatar text using in react native.
Here, I will give you full example for simply display table component using react native as bellow.
Step 1 - Create projectIn the first step Run the following command for create project.
expo init TableComponentStep 2 - Install Package
In the step,I will install npm i react-native-paper package.
npm i react-native-paperStep 3 - App.js
In this step, You will open App.js file and put the code.
import React, { Component } from "react";
import { Text, View,StyleSheet} from 'react-native';
import { Provider ,Appbar,Card,IconButton,Avatar,DataTable} from 'react-native-paper';

const MyWebtutsComponent = () => {

  const itemsPerPage = 2;

  const [page, setPage] = React.useState(0);
  const from = page * itemsPerPage;
  const to = (page + 1) * itemsPerPage;

  const [data, setData] = React.useState([]);
  const [isLoading, setLoading] = React.useState(true);

   React.useEffect(() => {
    fetch('https://api.mywebtuts.com/api/users?page=1')
      .then((response) => response.json())
      .then((json) => setData(json.data))
      .catch((error) => console.error(error))
      .finally(() => setLoading(false));
  }, []);

  const _goBack = () => console.log('Went back');

  const _handleSearch = () => console.log('Searching');

  const _handleMore = () => console.log('Shown more');

  return (
    <Provider>
    <Appbar.Header style={styles.header}>
      <Appbar.BackAction onPress={_goBack} />
      <Appbar.Content title="User" subtitle="Subtitle" />
      <Appbar.Action icon="magnify" onPress={_handleSearch} />
      <Appbar.Action icon="dots-vertical" onPress={_handleMore} />
    </Appbar.Header>
      <View style={styles.mainbox}>
       <Card>
         <DataTable>
          <DataTable.Header style={styles.databeHeader}>
            <DataTable.Title>Photo</DataTable.Title>
            <DataTable.Title>First Name</DataTable.Title>
            <DataTable.Title >Last Name</DataTable.Title>
          </DataTable.Header>
           {
                data.map((l, i) => (
                <DataTable.Row style={styles.databeBox} key={i}>
                  <DataTable.Cell><Avatar.Image size={45} source={{ uri: l.avatar }} /></DataTable.Cell>
                  <DataTable.Cell>{l.first_name}</DataTable.Cell>
                  <DataTable.Cell>{l.last_name}</DataTable.Cell>
                </DataTable.Row>
             ))
           }

        </DataTable>
     </Card>
      </View>
    </Provider>
  );
};


const styles = StyleSheet.create({
  title:{
    margin: 10,
    fontSize: 15,
    fontSize: 35
  },
  mainbox:{
    textAlign:'center',
    margin: 15,
    flex: 1,
    justifyContent: 'space-between',
  },
  databeBox:{
    margin: 10,
    textAlign: 'center',
  },
  databeHeader:{
    margin: 10,
    textAlign: 'left',
  }
});
export default MyWebtutsComponent;
Step 4 - Run project
In the last step run your project using bellow command.
npm startOutput
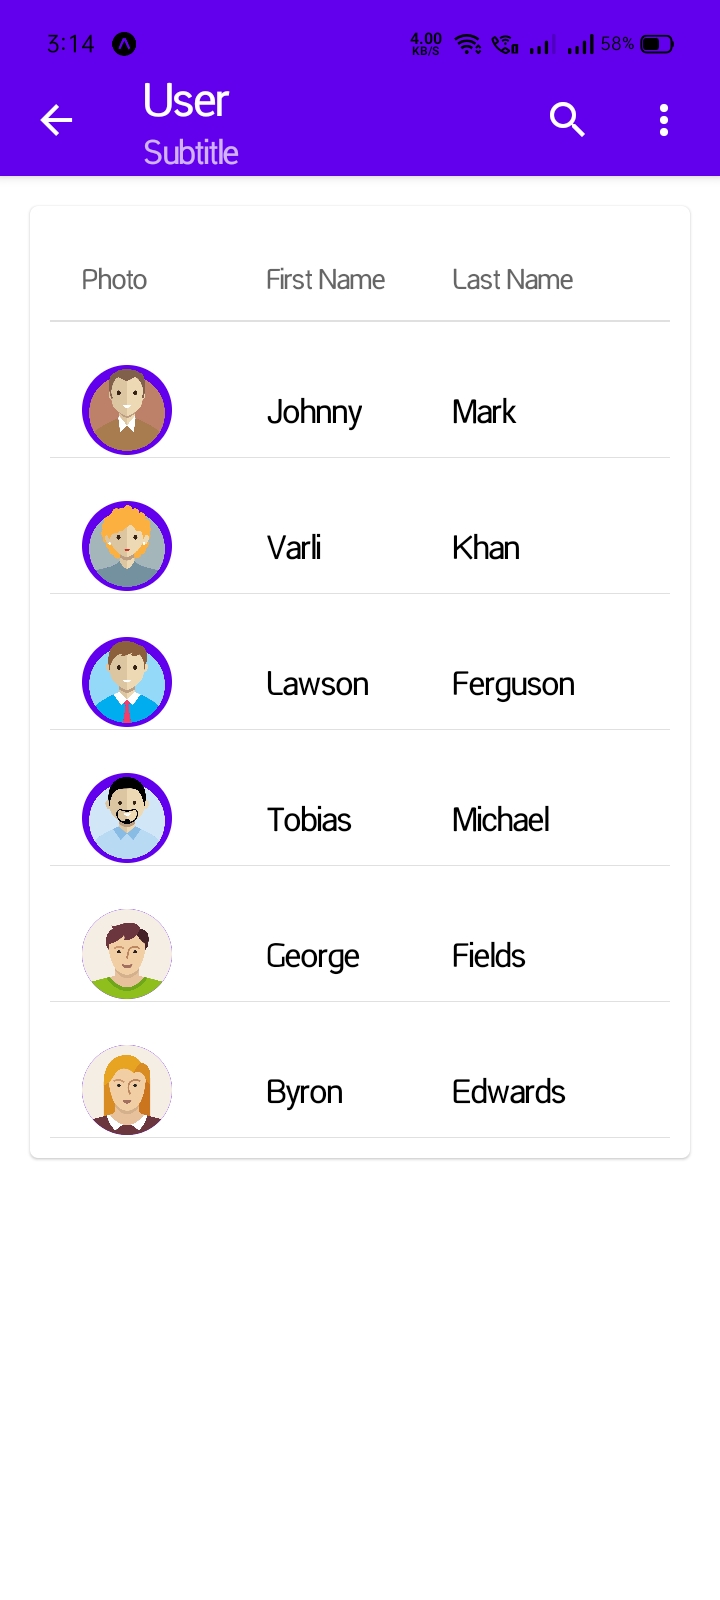
It will help you...