How to use Stack Navigation in React Native?
May 25, 2022 . Admin

Hi Guys,
Hello all! In this article, we will talk about stack navigation example in react native. it's simple example of how to use stack navigation in react native. I’m going to show you about how to implement stack navigation in react native. if you have question about react native stack navigation example then I will give simple example with solution.
In this example, there are 2 screens (Home and Setting) defined using the Stack.Screen component. Similarly, you can define as many screens as you like.
Each screen takes a component prop that is a React component. Those components receive a prop called navigation which has various methods to link to other screens. For example, you can use navigation.navigate to go to the Setting screen:
This native-stack navigator uses the native APIs: UINavigationController on iOS and Fragment on Android so that navigation built with createNativeStackNavigator will behave the same and have the same performance characteristics as apps built natively on top of those APIs.
Step 1: Download ProjectIn the first step run the following command to create a project.
expo init StackNavigationStep 2: Installation and Setup
First, you need to install them in your project:
npm install @react-navigation/native @react-navigation/native-stack
Next, install the required peer dependencies. You need to run different commands depending on whether your project is an Expo managed project or a bare React Native project.
If you have an Expo managed project, install the dependencies with expo:
expo install react-native-screens react-native-safe-area-context
If you have a bare React Native project, install the dependencies with npm:
npm install react-native-screens react-native-safe-area-contextStep 3: App.js
Now, you need to wrap the whole app in NavigationContainer. Usually you'd do this in your entry file, such as App.js:
In this step, You will open the App.js file and put the code.
import React from 'react';
import { StyleSheet, Text, View, Button } from 'react-native';
import { NavigationContainer } from '@react-navigation/native';
import { createStackNavigator } from '@react-navigation/stack';

const HomeScreen = ({ navigation }) => {
    return (
        <View style={styles.homeView}>
            <Text style={styles.homeText}>HomeScreen</Text>
            <Button
                title='go to setting screen'
                onPress={() => navigation.navigate('Setting')}
            />
        </View>
    );
}

const SettingsScreen = () => {
    return(
        <View style={styles.screenView}>
            <Text style={styles.screenText}>SettingsScreen</Text>
        </View>
    );
}

const Stack = createStackNavigator();

const App = () => {
    return (
        <NavigationContainer>
            <Stack.Navigator>
                <Stack.Screen name='Home' component={HomeScreen} />
                <Stack.Screen name='Setting' component={SettingsScreen} />
            </Stack.Navigator>
        </NavigationContainer>
    )
}

const styles = StyleSheet.create({
    homeView: {
        flex:1,
        justifyContent:'center',
        alignItems:'center',
    },
    homeText: {
        marginBottom:10,
        fontSize:20,
    },
    screenView: {
        flex:1,
        justifyContent:'center',
        alignItems:'center',
    },
    screenText: {
        fontSize:20,
    }
});

export default App;
Run Project
In the last step run your project using the below command.
expo start
You can QR code scan in Expo Go Application on mobile.
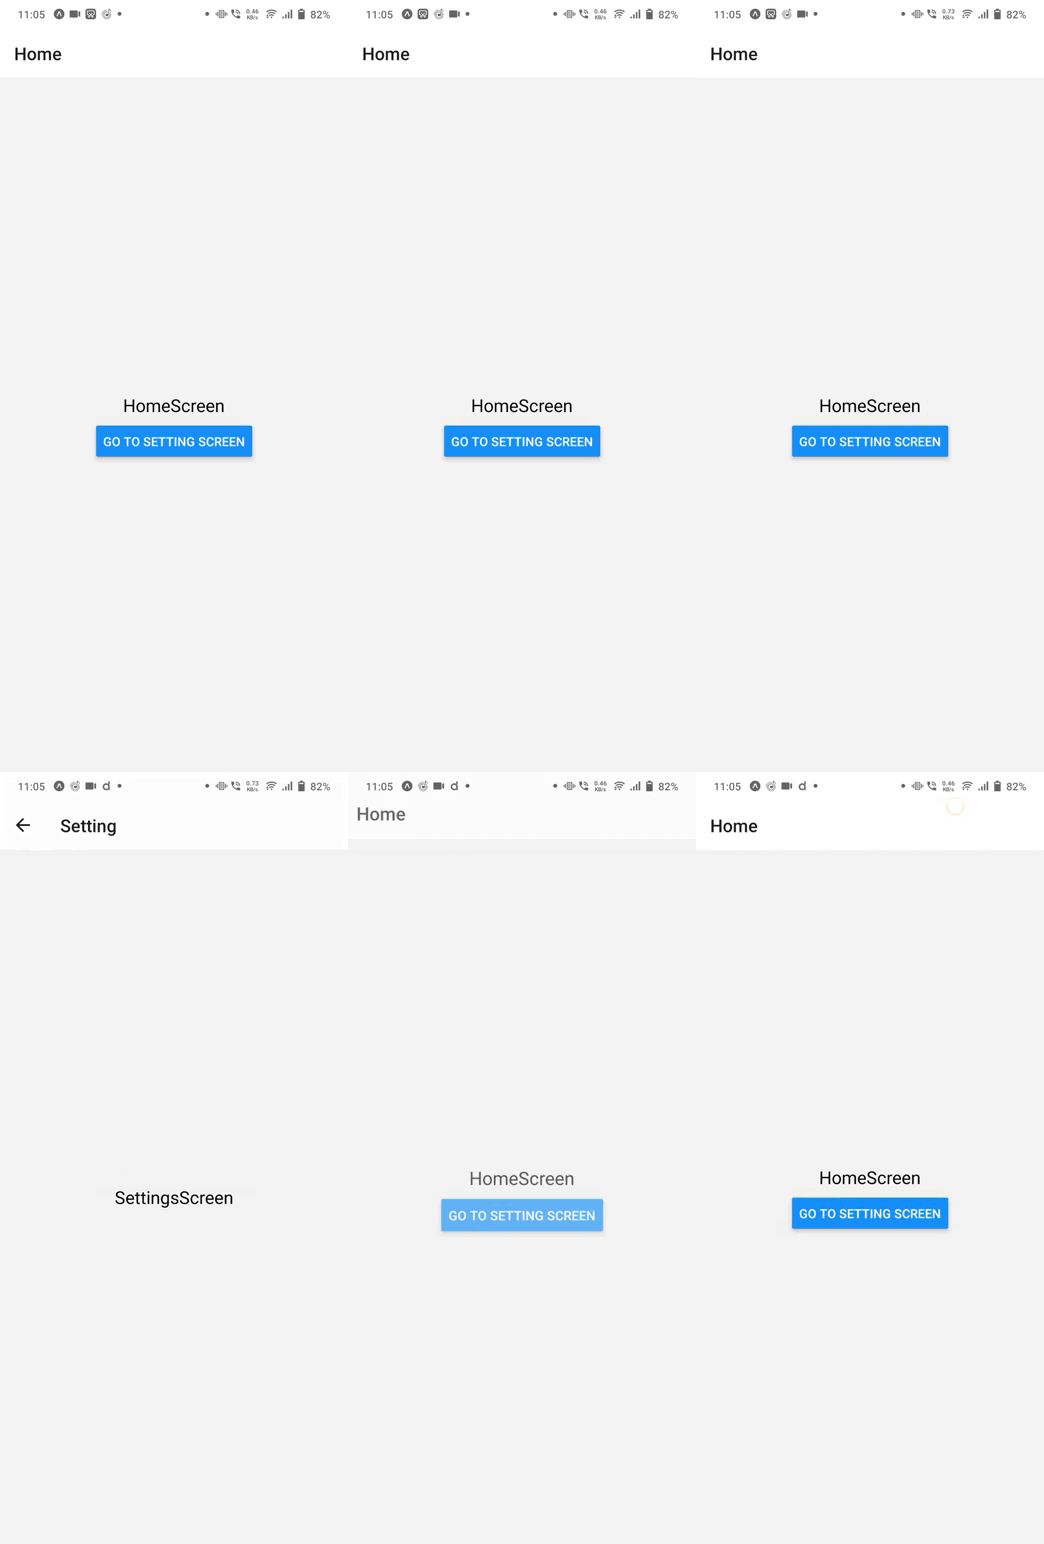
Output :
