React Native Camera Take Picture Example
Jun 24, 2021 . Admin
 Hi Guys,
Hi Guys,
In this blog,I will learn you how to use camera take photo in react native. We will show example of camera capcher picture in react native. You can easliy create react native camera take picture. First i will import Camera namespace from expo-camera, after I will make camera capcher image using in react native.
Step 1 - Create projectIn the first step Run the following command for create project.
expo init MyWebtutsStep 2 - Installation of Dependency
In the step, Run the following command for installation of dependency.
To use Camera you need to install expo-camera package.
To install this open the terminal and jump into your project
cd paper MyWebtutsRun the following command
yarn add expo-cameraafter install expo-status-bar for Status Bar.
yarn add expo-status-barStep 3 - App.js
In this step, You will open App.js file and put the code.
import {StatusBar} from 'expo-status-bar';
import React from 'react';
import {StyleSheet, Storage,Text, View, TouchableOpacity, Alert, ImageBackground, Image} from 'react-native';
import {Camera} from 'expo-camera';

let camera: Camera;

export default function App() {
  const [startCamera, setStartCamera] = React.useState(false);
  const [previewVisible, setPreviewVisible] = React.useState(false);
  const [capturedImage, setCapturedImage] = React.useState(null);
  const [cameraType, setCameraType] = React.useState(Camera.Constants.Type.back);
  const [flashMode, setFlashMode] = React.useState('off');

  const _goBack = () => console.log('Went back');
  const _handleSearch = () => console.log('Searching');
  const _handleMore = () => console.log('Shown more');

  const __startCamera = async () => {
    const {status} = await Camera.requestPermissionsAsync();
    console.log(status)
    if (status === 'granted') {
      setStartCamera(true)
    } else {
      Alert.alert('Access denied')
    }
  }

  const __takePicture = async () => {
    const photo: any = await camera.takePictureAsync()
    console.log(photo)
    setPreviewVisible(true)
    //setStartCamera(false)
    setCapturedImage(photo)
  }

  const __savePhoto = () => {

  }

  const __retakePicture = () => {
    setCapturedImage(null)
    setPreviewVisible(false)
    __startCamera()
  }

  const __handleFlashMode = () => {
    if (flashMode === 'on') {
      setFlashMode('off');
    } else if (flashMode === 'off') {
      setFlashMode('on');
    } else {
      setFlashMode('auto');
    }
  }
  const __switchCamera = () => {
    if (cameraType === 'back') {
      setCameraType('front')
    } else {
      setCameraType('back')
    }
  }

  return (
    <View style={styles.container}>
      {startCamera ? (
        <View
          style={{
            flex: 1,
            width: '100%'
          }}
        >
          {previewVisible && capturedImage ? (
            <CameraPreview photo={capturedImage} savePhoto={__savePhoto} retakePicture={__retakePicture} />
          ) : (
            <Camera
              type={cameraType}
              flashMode={flashMode}
              style={{flex: 1}}
              ref={(r) => {
                camera = r
              }}
            >
              <View
                style={{
                  flex: 1,
                  width: '100%',
                  backgroundColor: 'transparent',
                  flexDirection: 'row'
                }}
              >
                <View
                  style={{
                    position: 'absolute',
                    left: '5%',
                    top: '10%',
                    flexDirection: 'column',
                    justifyContent: 'space-between'
                  }}
                >
                  <TouchableOpacity
                    onPress={__handleFlashMode}
                    style={{
                      backgroundColor: flashMode === 'off' ? '#000' : '#fff',
                      height: 25,
                      width: 25,
                      padding: 3,
                      borderRadius:10,
                    }}
                  >
                    <Text
                      style={{
                        fontSize: 13
                      }}
                    >
                      ⚡
                    </Text>
                  </TouchableOpacity>
                  <TouchableOpacity
                    onPress={__switchCamera}
                    style={{
                      backgroundColor: '#fff',
                      marginTop: 20,
                      height: 25,
                      width: 25,
                      padding: 4,
                      borderRadius:10,
                    }}
                  >
                    <Text
                      style={{
                        fontSize: 11
                      }}
                    >
                      {cameraType === 'front' ? '🤳' : '📷'}
                    </Text>
                  </TouchableOpacity>
                </View>
                <View
                  style={{
                    position: 'absolute',
                    bottom: 0,
                    flexDirection: 'row',
                    flex: 1,
                    width: '100%',
                    padding: 20,
                    justifyContent: 'space-between'
                  }}
                >
                  <View
                    style={{
                      alignSelf: 'center',
                      flex: 1,
                      alignItems: 'center'
                    }}
                  >
                    <TouchableOpacity
                      onPress={__takePicture}
                      style={{
                        width: 70,
                        height: 70,
                        bottom: 0,
                        backgroundColor: '#fff',
                        borderRadius:100,
                      }}
                    />
                  </View>
                </View>
              </View>
            </Camera>
          )}
        </View>
      ) : (
        <View
          style={{
            flex: 1,
            backgroundColor: '#fff',
            justifyContent: 'center',
            alignItems: 'center'
          }}
        >
          <TouchableOpacity
            onPress={__startCamera}
            style={{
              width: 130,
              backgroundColor: '#38738A',
              borderRadius:10,
              flexDirection: 'row',
              justifyContent: 'center',
              alignItems: 'center',
              height: 40
            }}
          >
            <Text
              style={{
                color: '#fff',
                fontWeight: 'bold',
                textAlign: 'center'
              }}
            >
              Take picture
            </Text>
          </TouchableOpacity>
        </View>
      )}

      <StatusBar style="auto" />
    </View>
  )
}

const styles = StyleSheet.create({
  container: {
    flex: 1,
    backgroundColor: '#fff',
    alignItems: 'center',
    justifyContent: 'center'
  }
})

const CameraPreview = ({photo, retakePicture, savePhoto}: any) => {
  console.log('sdsfds', photo)
  return (
    <View
      style={{
        backgroundColor: 'transparent',
        flex: 1,
        width: '100%',
        height: '100%'
      }}
    >
      <ImageBackground
        source={{uri: photo && photo.uri}}
        style={{
          flex: 1
        }}
      >
        <View
          style={{
            flex: 1,
            flexDirection: 'column',
            padding: 15,
            justifyContent: 'flex-end'
          }}
        >
          <View
            style={{
              flexDirection: 'row',
              justifyContent: 'space-between'
            }}
          >
            <TouchableOpacity
              onPress={retakePicture}
              style={{
                width: 130,
                height: 40,

                alignItems: 'center',
              }}
            >
              <Text
                style={{
                  color: '#fff',
                  fontSize: 20
                }}
              >
                Re-take
              </Text>
            </TouchableOpacity>
            <TouchableOpacity
              onPress={savePhoto}
              style={{
                width: 130,
                height: 40,

                alignItems: 'center',
              }}
            >
              <Text
                style={{
                  color: '#fff',
                  fontSize: 20
                }}
              >
                save photo
              </Text>
            </TouchableOpacity>
          </View>
        </View>
      </ImageBackground>
    </View>
  )
}
Step 3 - Run project
In the last step run your project using bellow command.
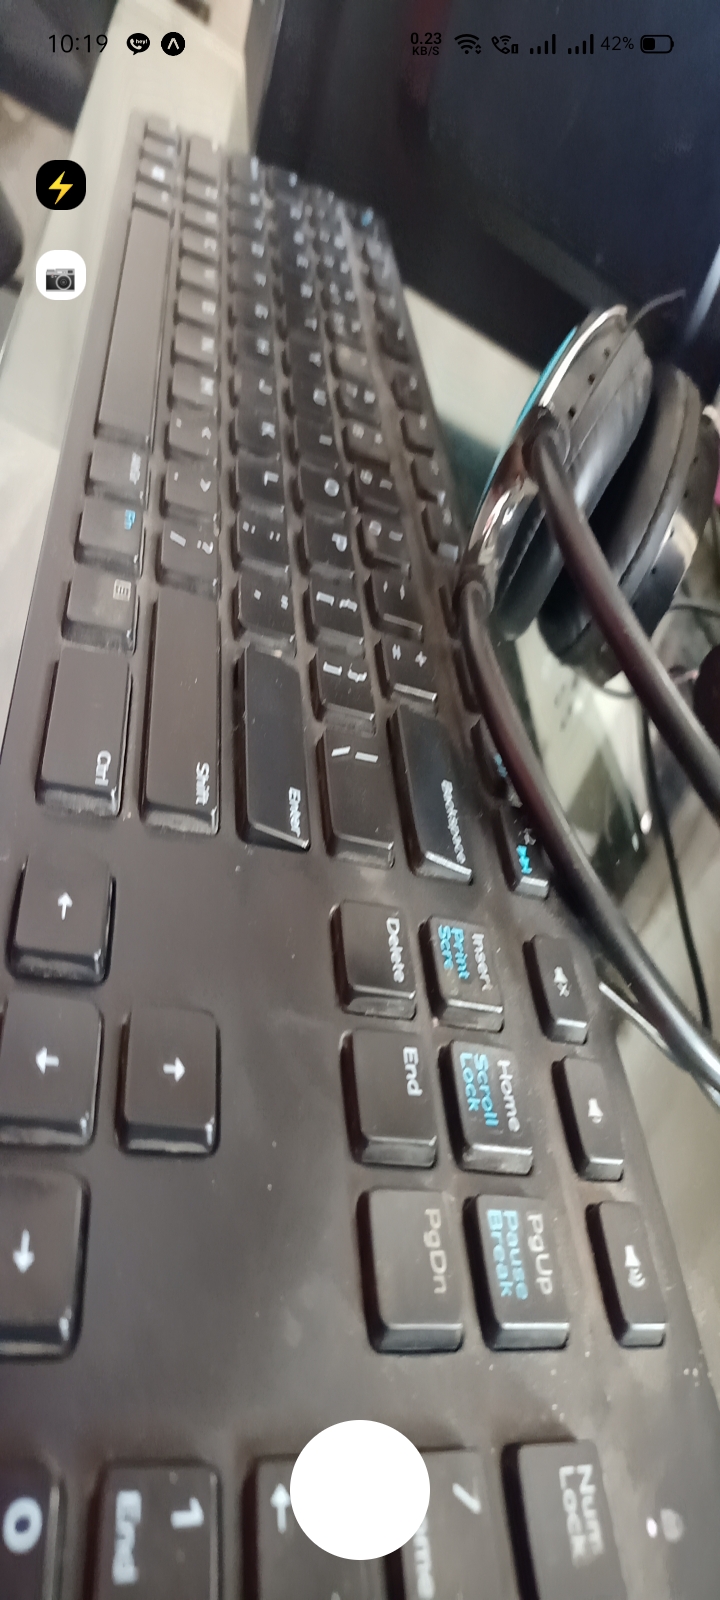
expo startOutput

It will help you...
